Part 1: Sample Slices
Now that you have loaded Flow and a drum loop sample onto a MIDI track, you can start creating your drum break. In this section, you will use the first sequencer part, P1, to generate variations of a sliced drum loop sample.
Part Overview
For the P1 sequencer part, we are going to configure a state machine according to the following diagram:
- Diagram
- Matrix
| S1 | S2 | S3 | S4 | S5 | S6 | S7 | S8 | |
|---|---|---|---|---|---|---|---|---|
| S1 | 55% | 15% | 15% | 15% | ||||
| S2 | 100% | |||||||
| S3 | 100% | |||||||
| S4 | 20% | 80% | ||||||
| S5 | 20% | 80% | ||||||
| S6 | 20% | 80% | ||||||
| S7 | 10% | 20% | 70% | |||||
| S8 | 100% |
| N1 | N2 | |
|---|---|---|
| N1 | 100% | |
| N2 |
| N1 | N2 | |
|---|---|---|
| N1 | 25% | 75% |
| N2 |
This state machine is going to play the sample slice notes on every sixteenth note in mostly sequential order, sometimes jumping to a different slice, or repeating the current slice instead of moving on.
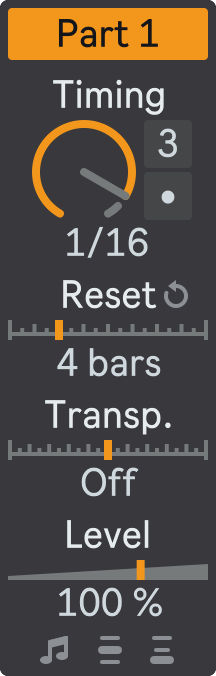
Mixer
For P1, keep the Timing at the default value of 1/16. This will make the state machine transition on every sixteenth note.
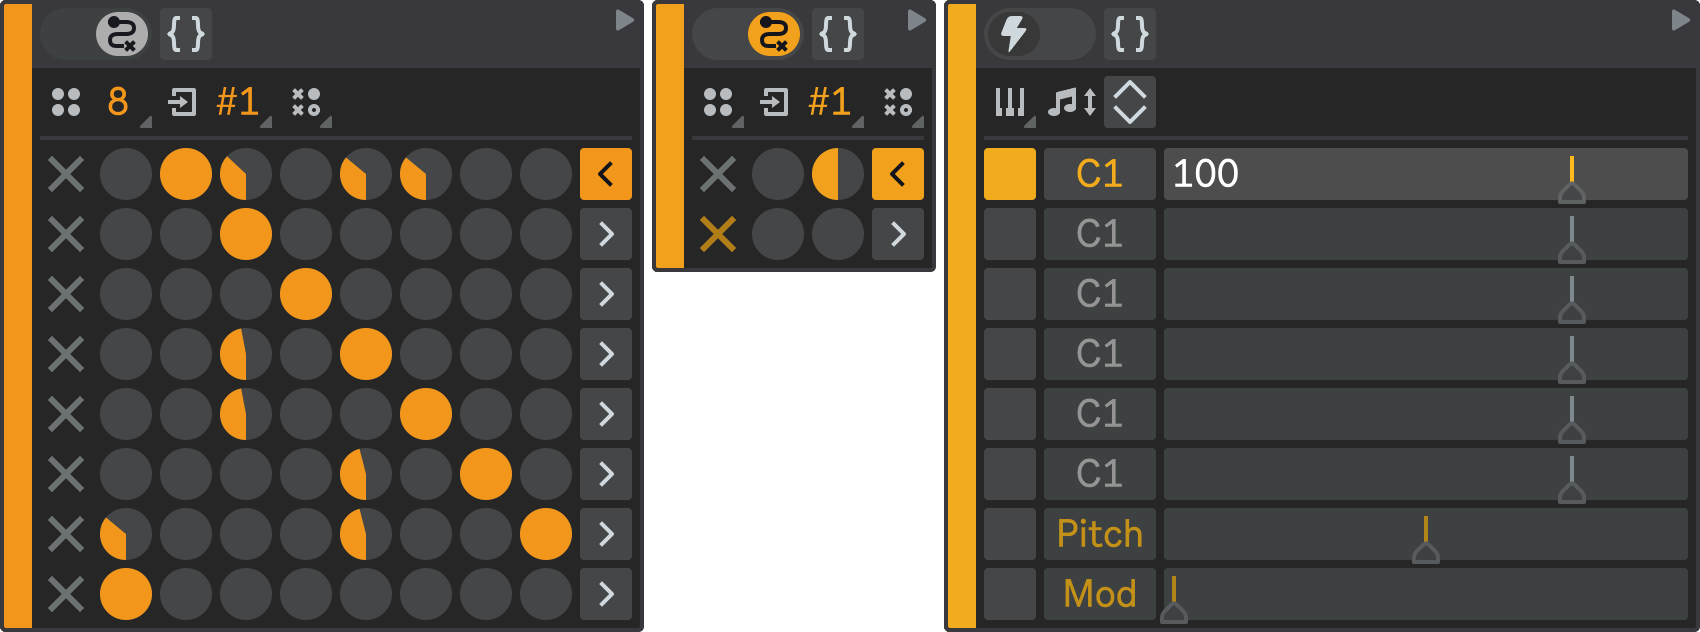
Sequencer
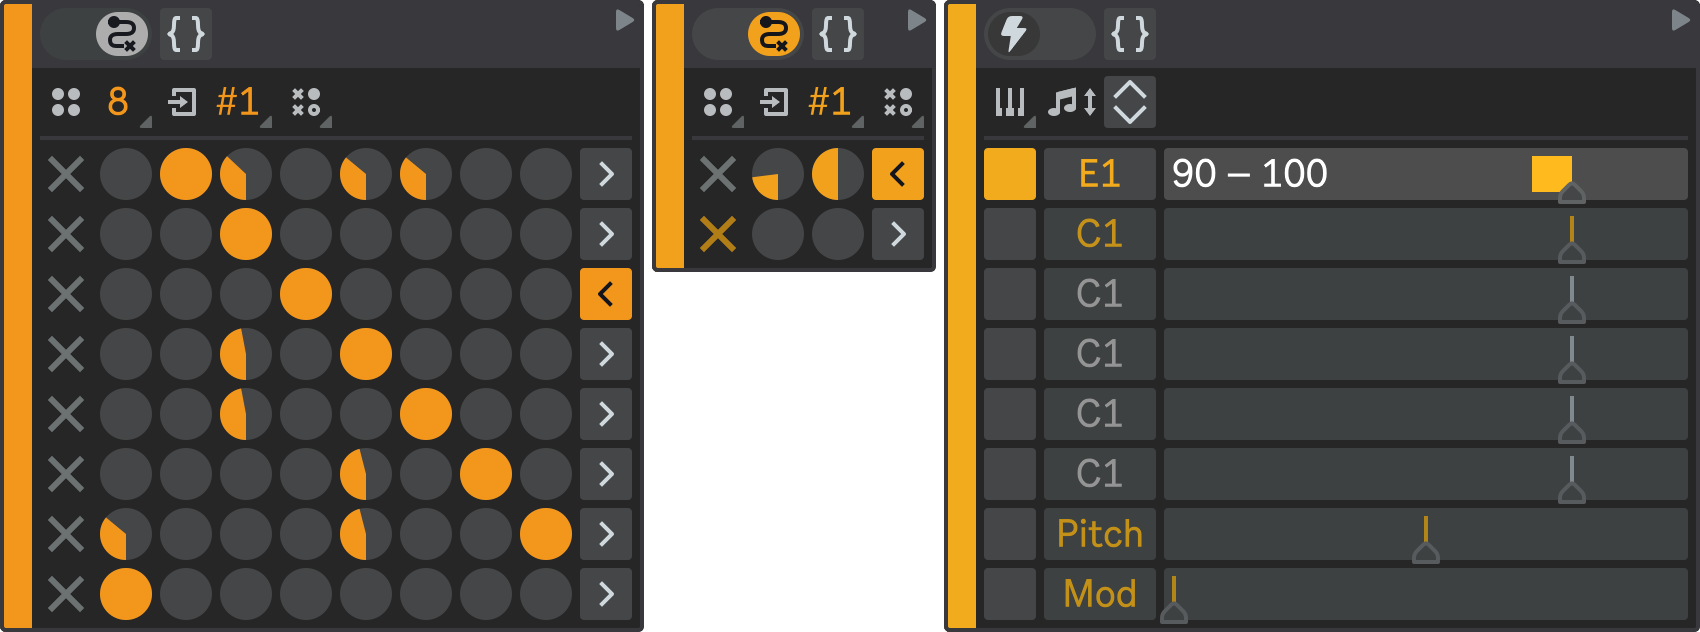
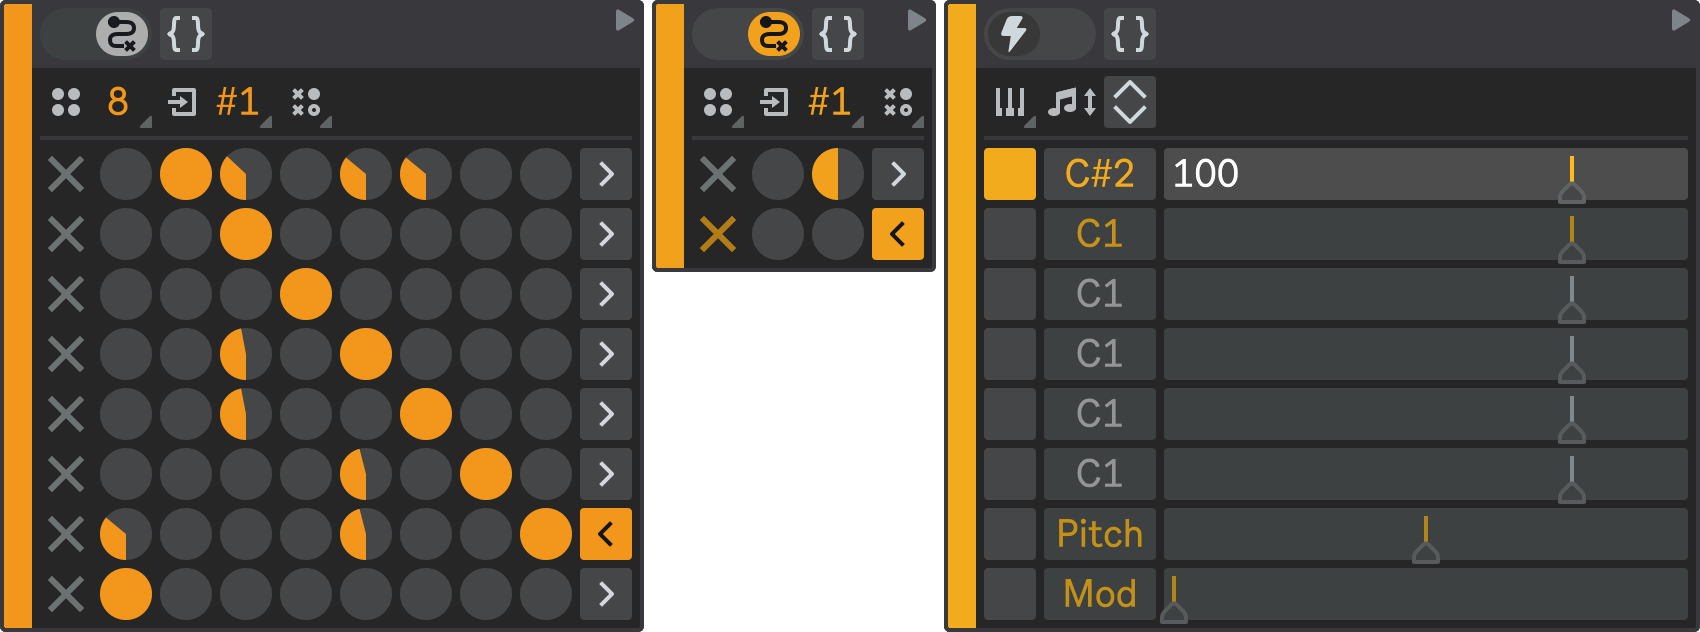
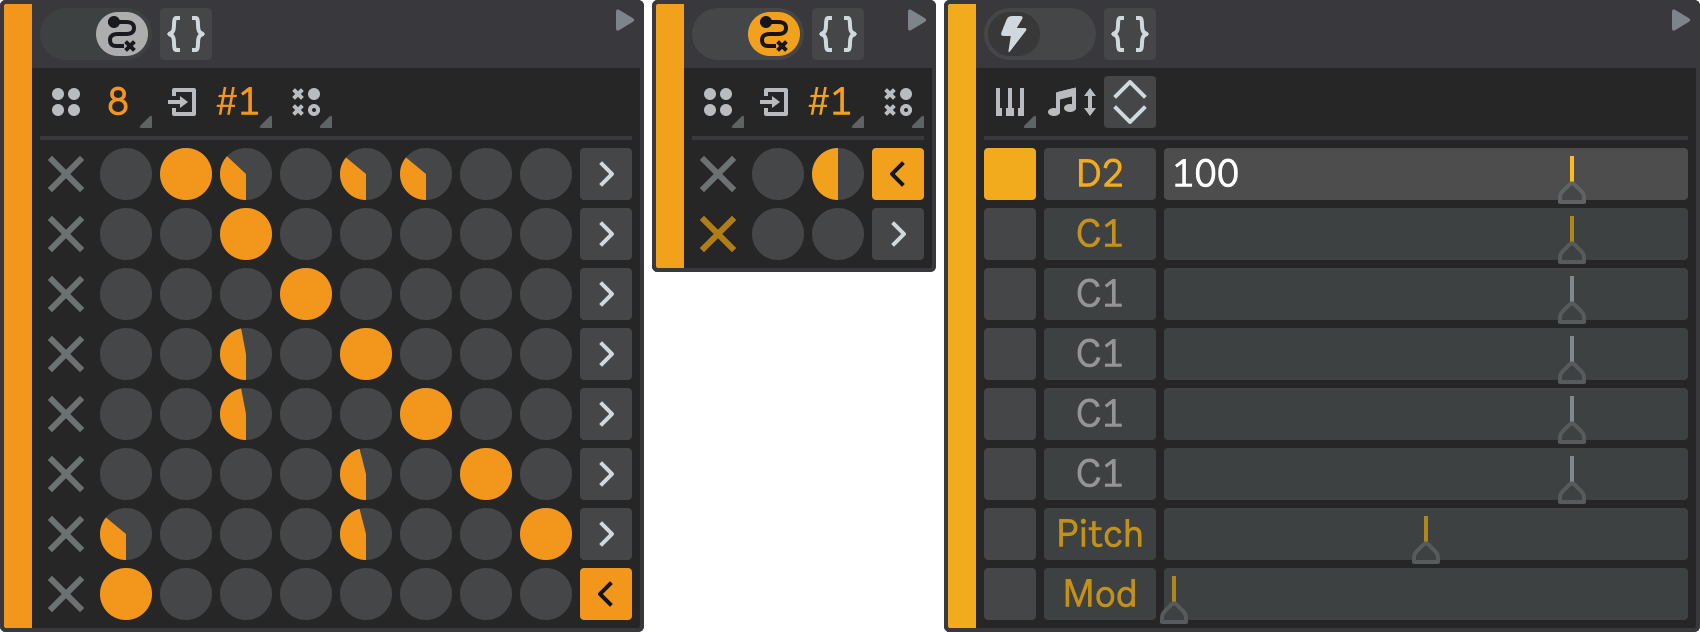
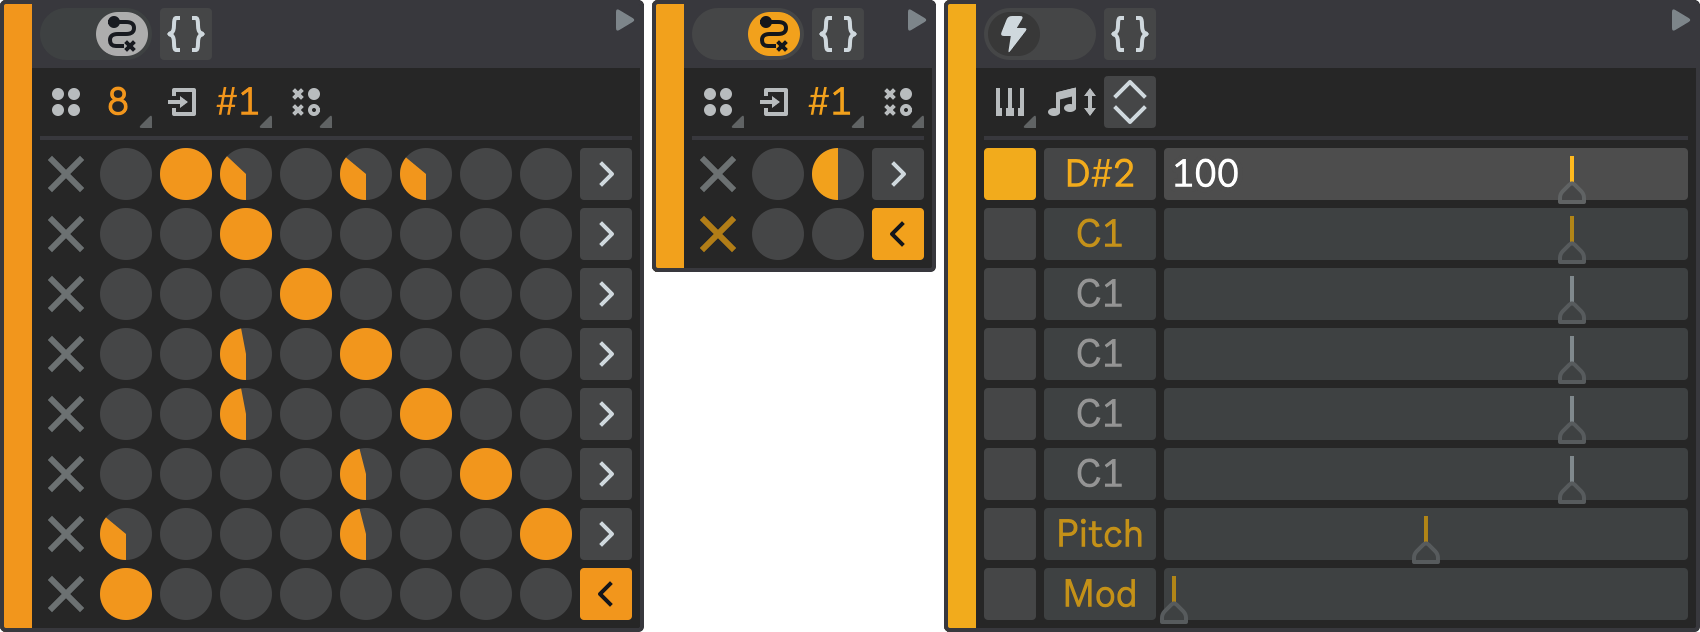
Next, go to the sequencer configuration section. Open the floating plug-in window and make sure that P1 is selected in the Part Selector.
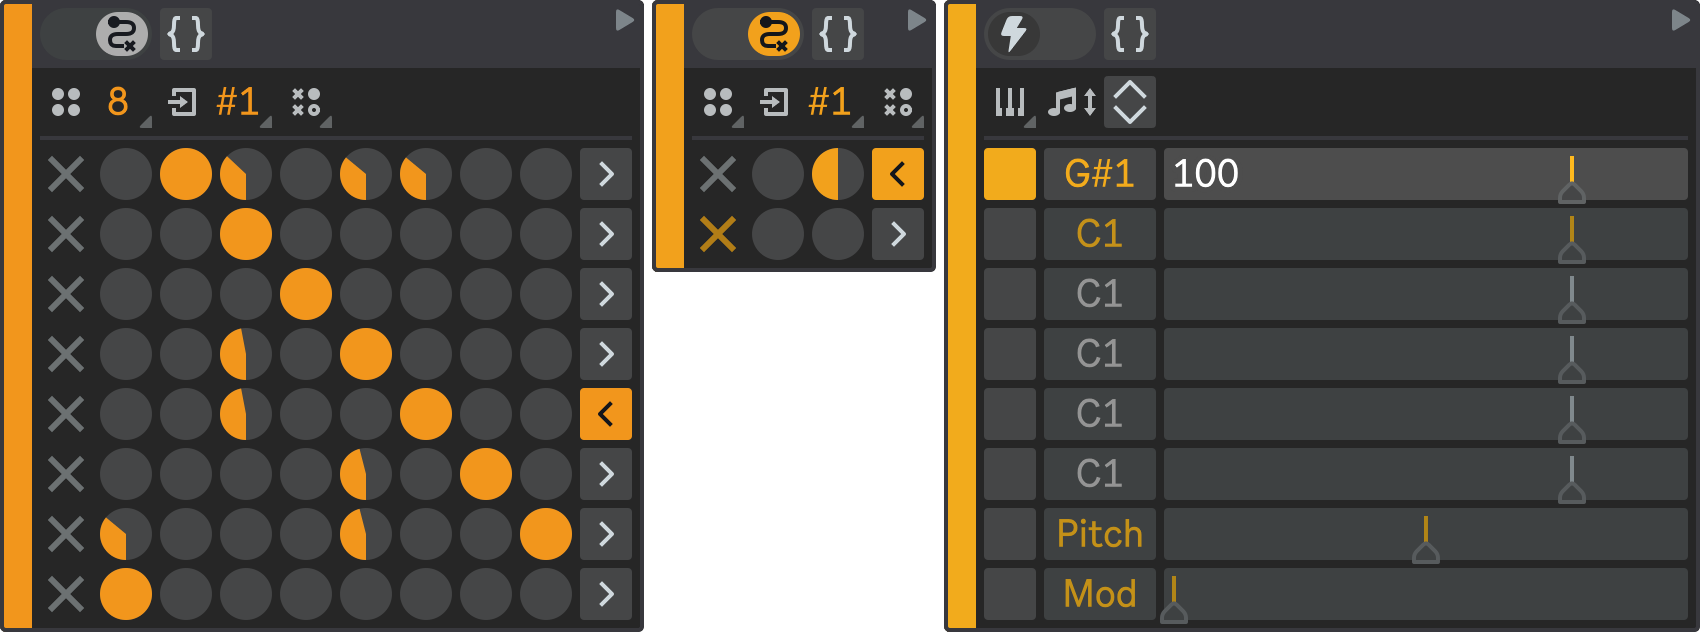
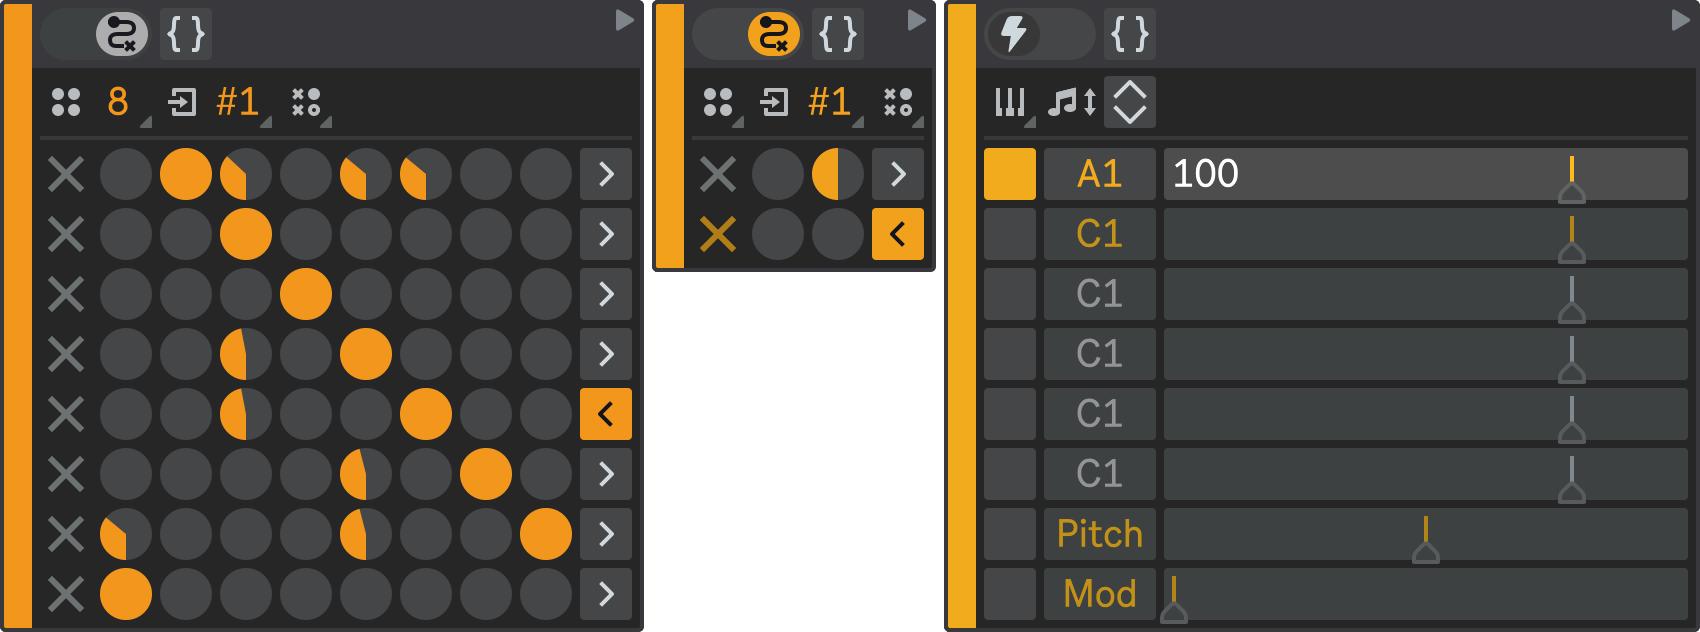
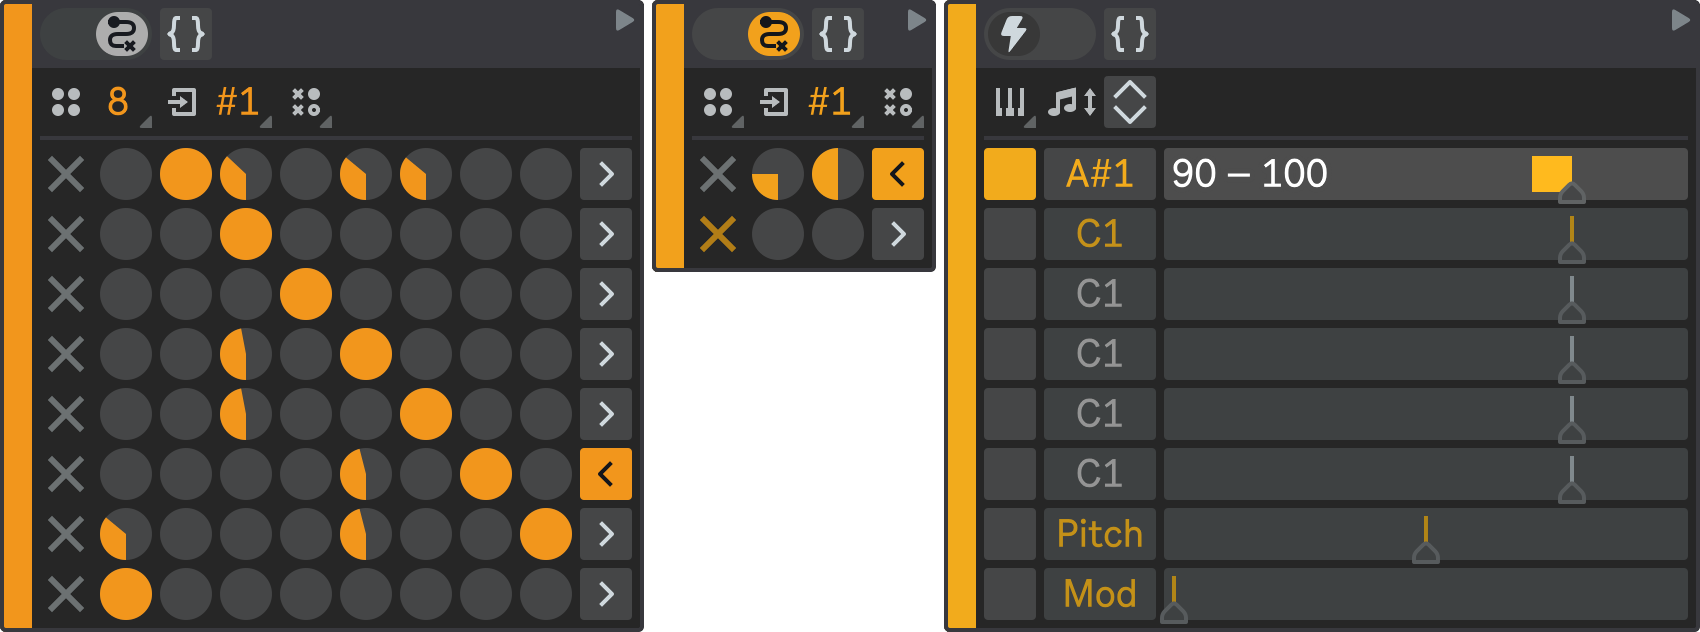
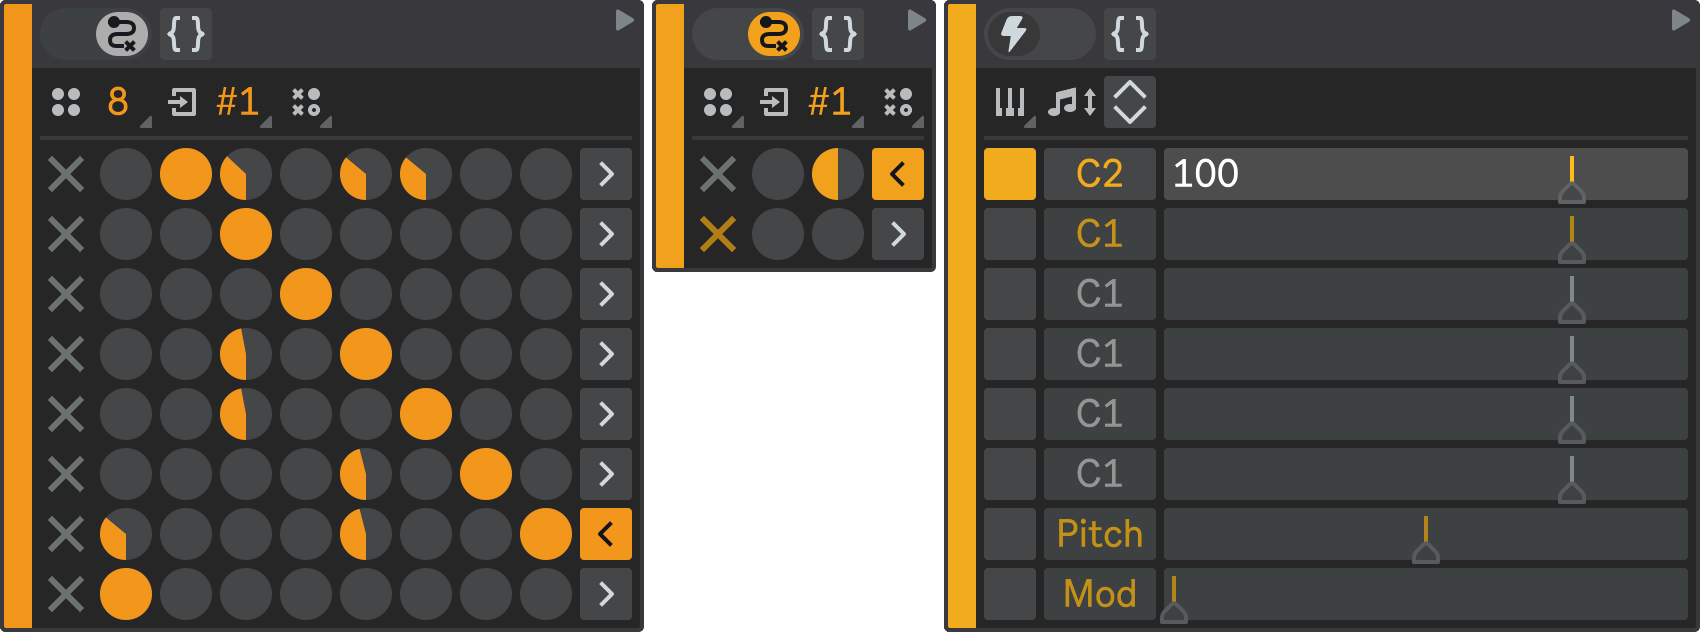
For this sequencer part, we need eight high-level states, each with two sub-states, so that we have a pattern with sixteen notes in total. Configure P1 root state machine as follows:
- States Number: 8;
- States 1-8:
- State Type: State Machine;
- States Number: 2.
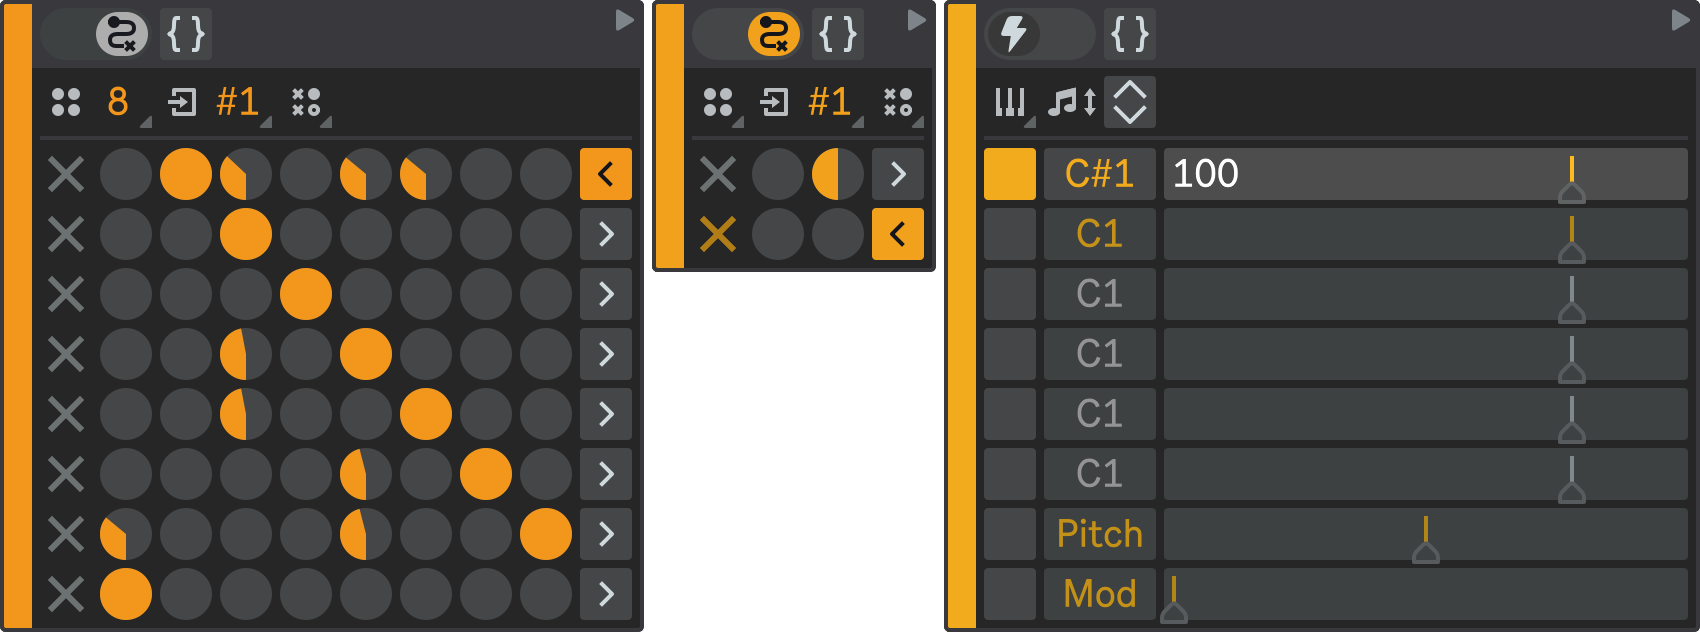
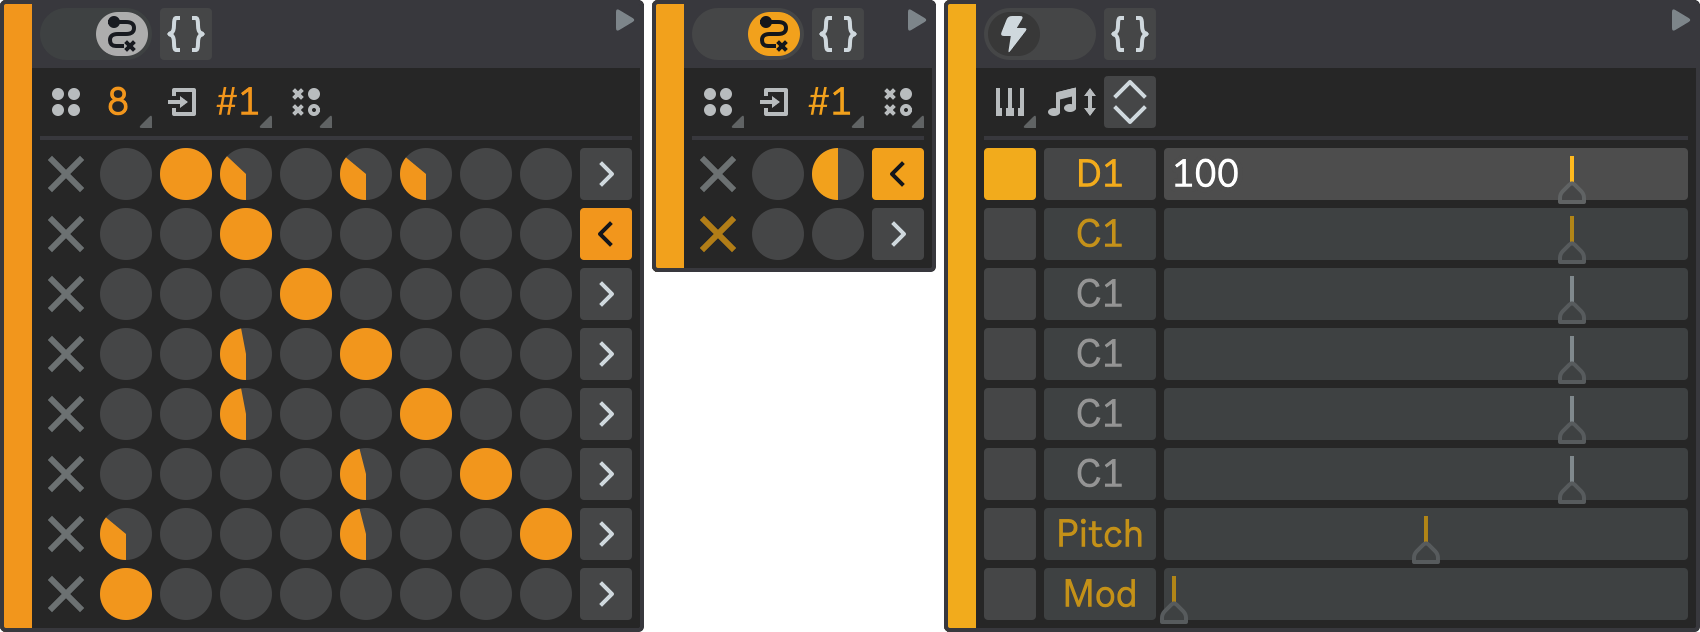
Then, configure 16 trigger sub-states to represent 16 notes in chromatic order:
- State 1
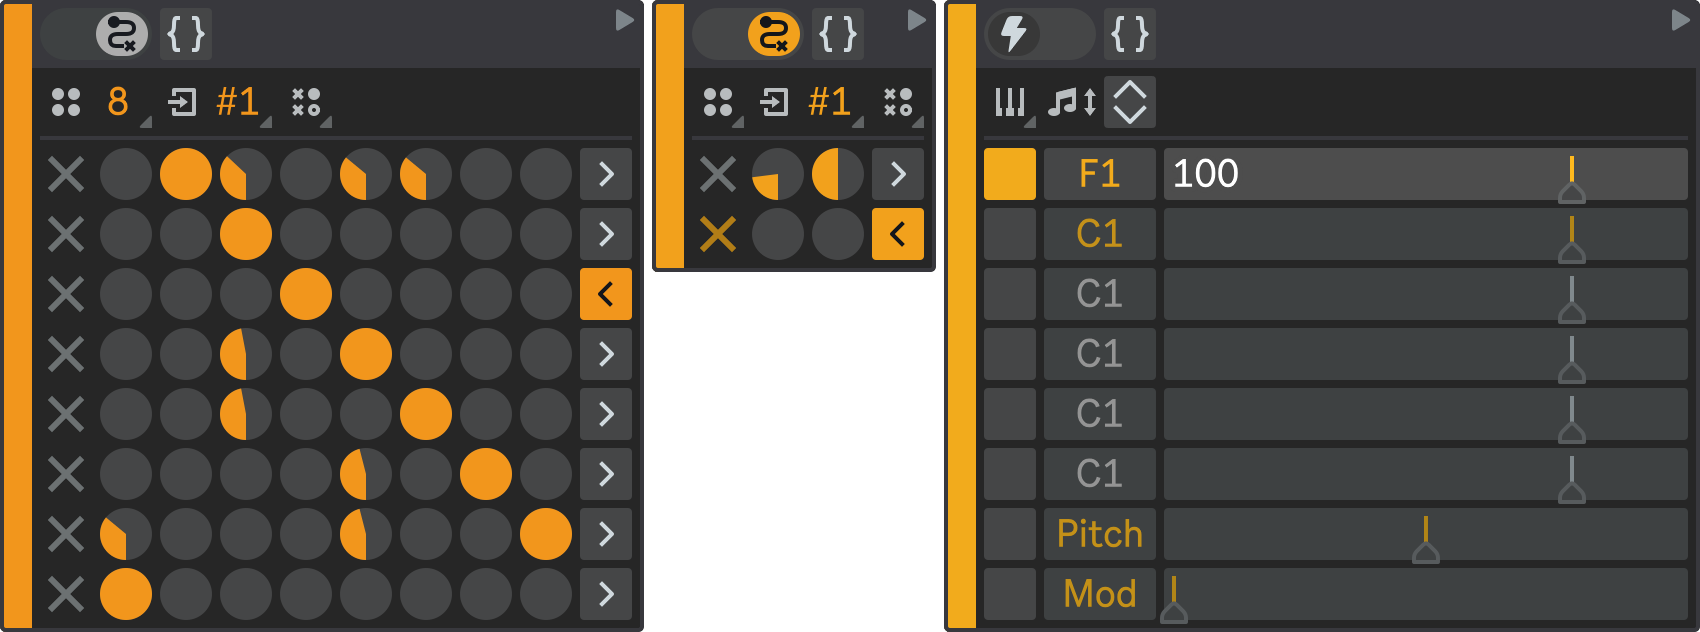
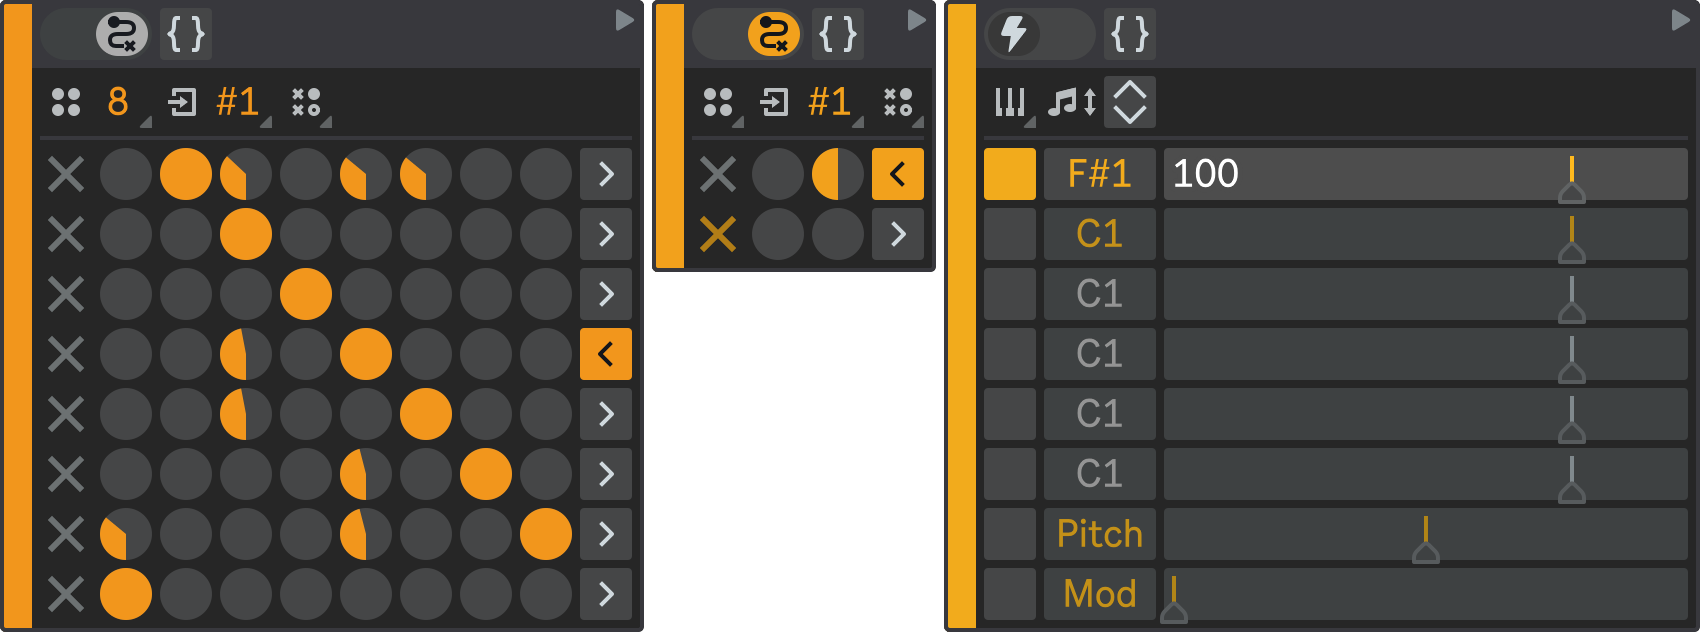
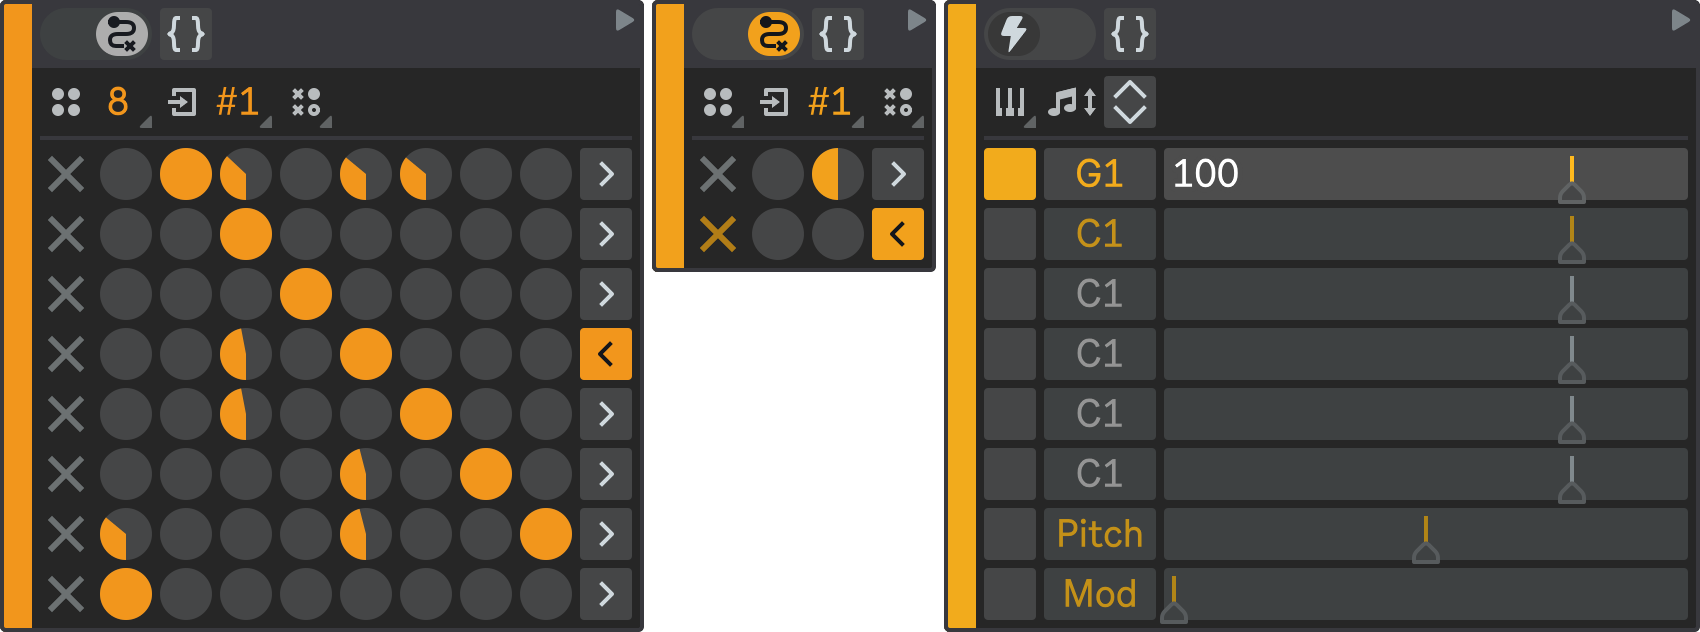
- Sub-state 1: C1;
- Sub-state 2: C#1;
- State 2
- Sub-state 1: D1;
- Sub-state 2: D#1;
- ...
- State 8
- Sub-state 1: D2;
- Sub-state 2: D#2.
The next step is to set up the state transition rules for the root state machine and its nested state machines. You can follow the diagram above as a guide or experiment with your own settings.
The basic principle is that the root state machine should play its sub-states in a mostly sequential order with some variations. The eight sub-states should also play their states in a sequential order, but Sub-State 3 and Sub-State 6 have the option to repeat the first snare note sometimes.
Your P1 state machine configuration should look like this:
- State 1.1
- State 1.2
- State 2.1
- State 2.2
- State 3.1
- State 3.2
- State 4.1
- State 4.2
- State 5.1
- State 5.2
- State 6.1
- State 6.2
- State 7.1
- State 7.2
- State 8.1
- State 8.2


Result
Now, press Play in Ableton Live to hear the sample slices rearranged in a non-linear order, creating a unique and dynamic pattern that never repeats.
If you want to make this pattern less chaotic and more predictable, you can increase probabilities of the linear state transitions over non-linear ones. You can also adjust the Reset Interval in the mixer to make this pattern restart more frequently, such as every one or two bars. This will emphasize the starting note of the drum loop more often and limit the variation of the pattern, preventing it from becoming too complex and intricate over time.
This is how you can create an irregular pattern with sample slicing. In the next part, we will add some pitch bend modulations to make this beat sound even more wild and breakcore-inspired.