Part 1: Kick and Snare
Now that you have loaded Flow and a drum rack plug-in onto a MIDI track, you can start creating your drum pattern. In this section, you will use the first sequencer part, P1, to generate a simple kick and snare pattern.
Part Overview
For the P1 sequencer part, we are going to configure a state machine according to the following diagram:
- Diagram
- Matrix
| Kick | Snare | |
|---|---|---|
| Kick | 100% | |
| Snare | 100% |
This state machine will generate kick and snare on every quarter note, and alternate between them with a 100% chance, meaning that kick is always followed by snare, and snare is always followed by kick.
Let's start from configuring the P1's Mixer.
Mixer
Each sequencer part has its own mixer section, where you can adjust various parameters of that part. You can adjust mixer parameters either from the Rack View, or from the floating Plug-In Window.
Timing
The Timing parameter sets the speed of the state machine transitions. Each time the state machine enters a new state, it plays all the notes and modulation values defined in that state.
Set P1's Timing to 1/4. This will make the state machine transition on every quarter note.
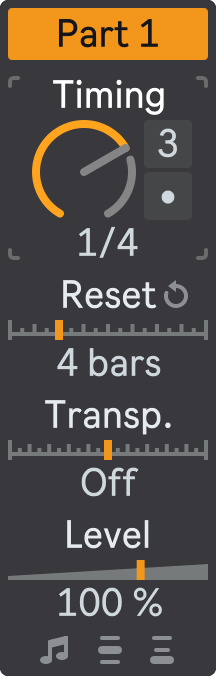
You can leave the other mixer parameters at their default values for now — we will explain them later.
Sequencer
To access the sequencer configuration, click the Plug-In Window button (  ) at the bottom left corner of the rack view.
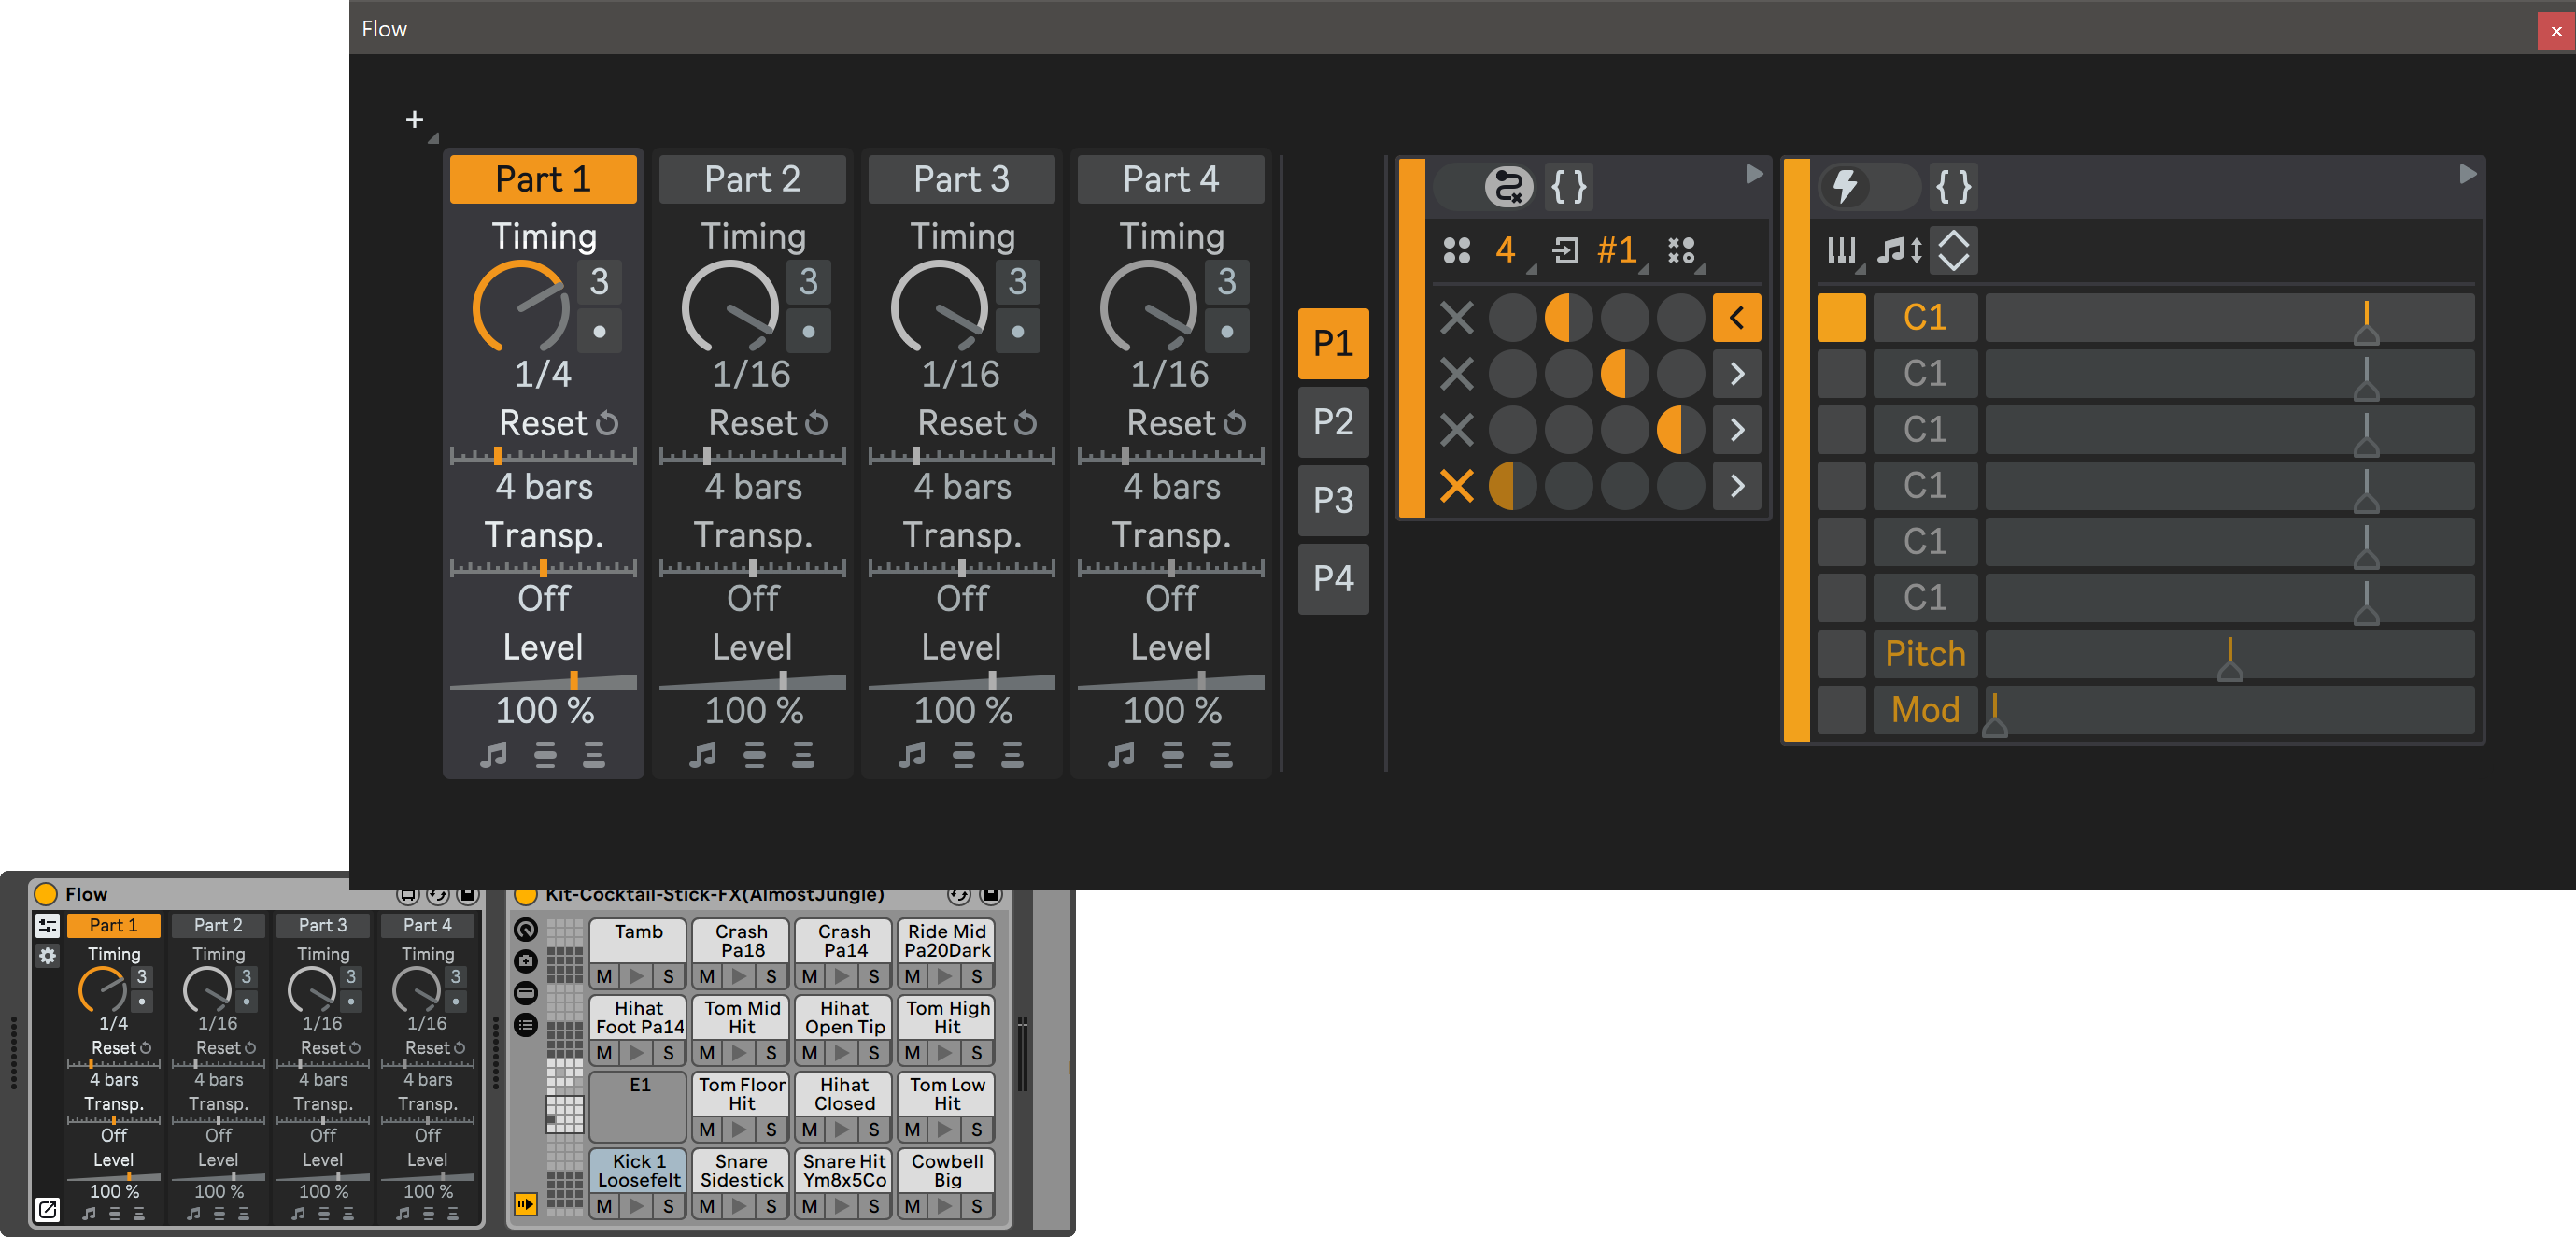
The sequencer lets you edit the rules and parameters of the state machine, such as the number of states, notes and modulation values produced by each state, and probabilities of transitions between various states.
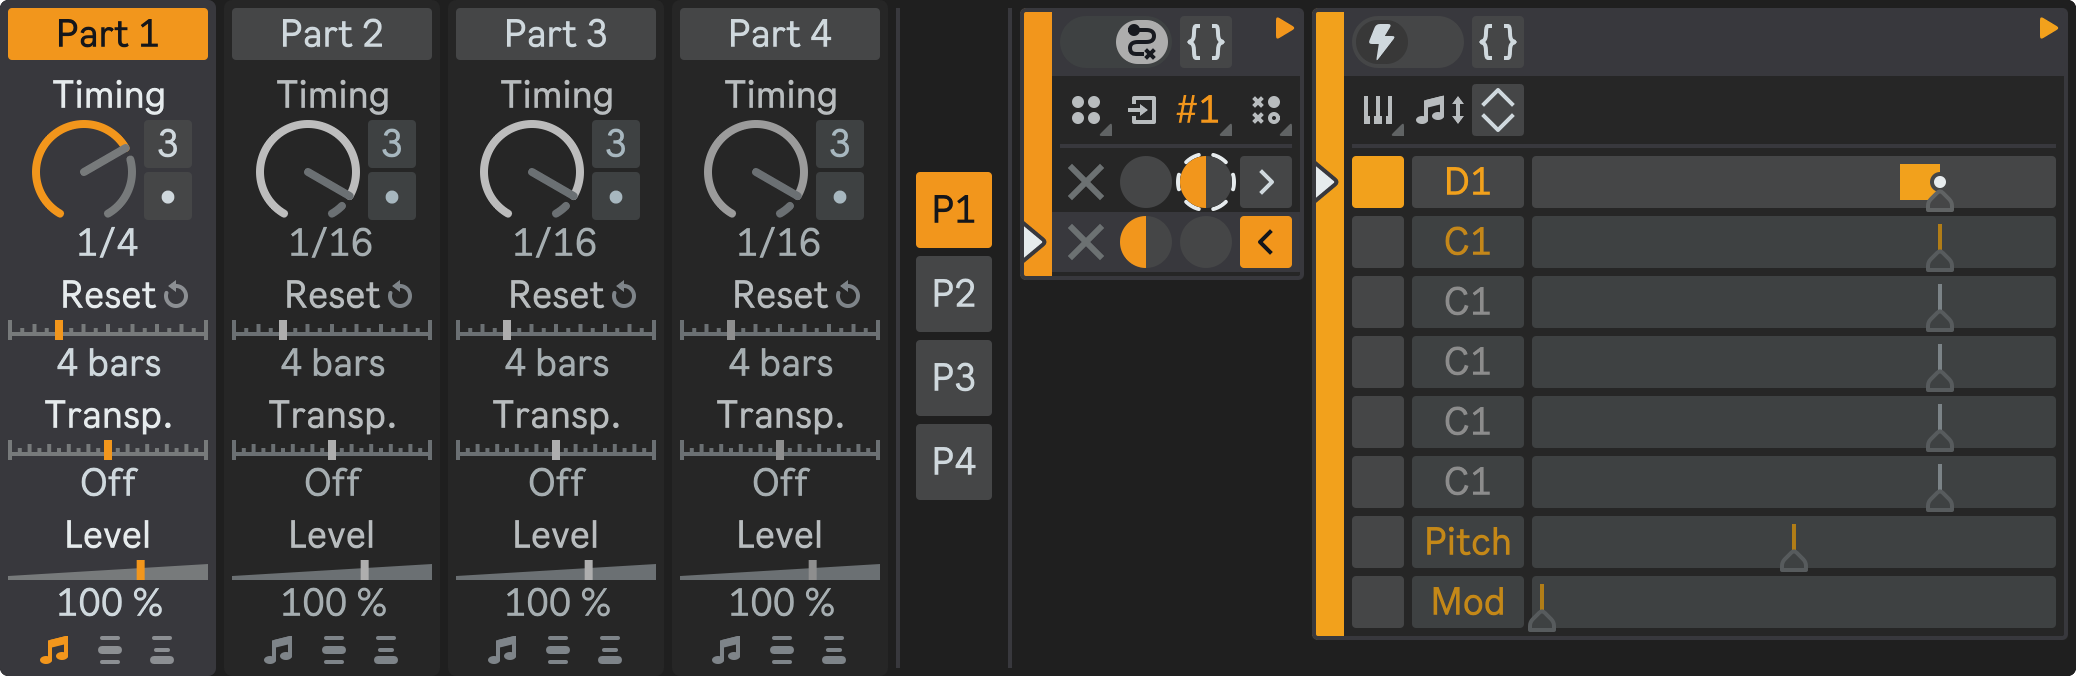
Part Selector
The Part Selector allows to switch between the four parallel sequencer parts by clicking the P1 - P4 buttons. Each part has a separate state machine with its own settings and parameters that you can customize.

Make sure that P1 is selected in the Part Selector.
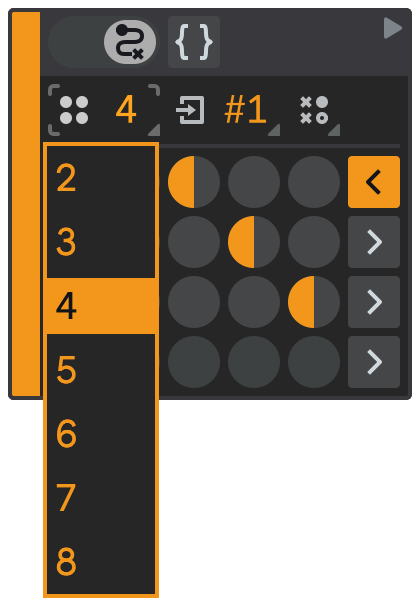
States Number
As you can see from the state machine diagram above, we only need two states for this sequencer part: one for the kick and one for the snare. To change the number of states of P1's state machine, click on the States Number dropdown and select 2.
Now let's see how to configure these two states.
States Configuration
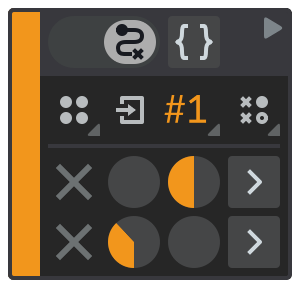
The State Selector lets you switch between the states of the state machine and configure them. You can expand or collapse each state by clicking on the corresponding button.

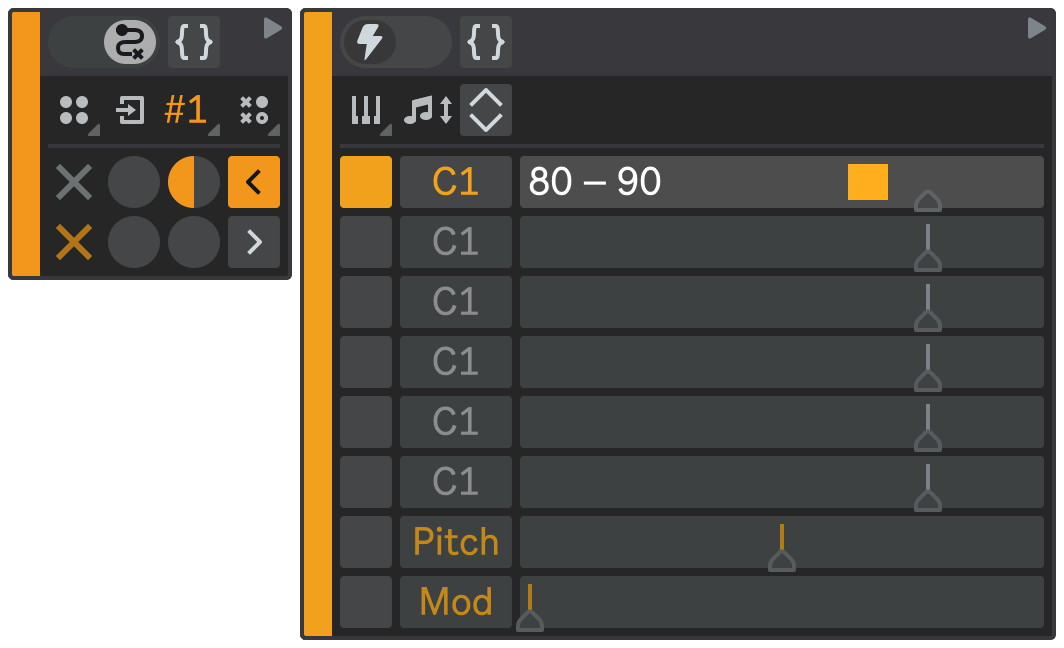
Make sure that State 1 is expanded. It defines musical notes and modulation values that will be produced when the state machine enters that state.
To make State 1 play a kick note, make sure that the first note checkbox is enabled and its pitch is set to C1, the kick note in the drum kit we are using. The exact note may vary depending on your drum kit.
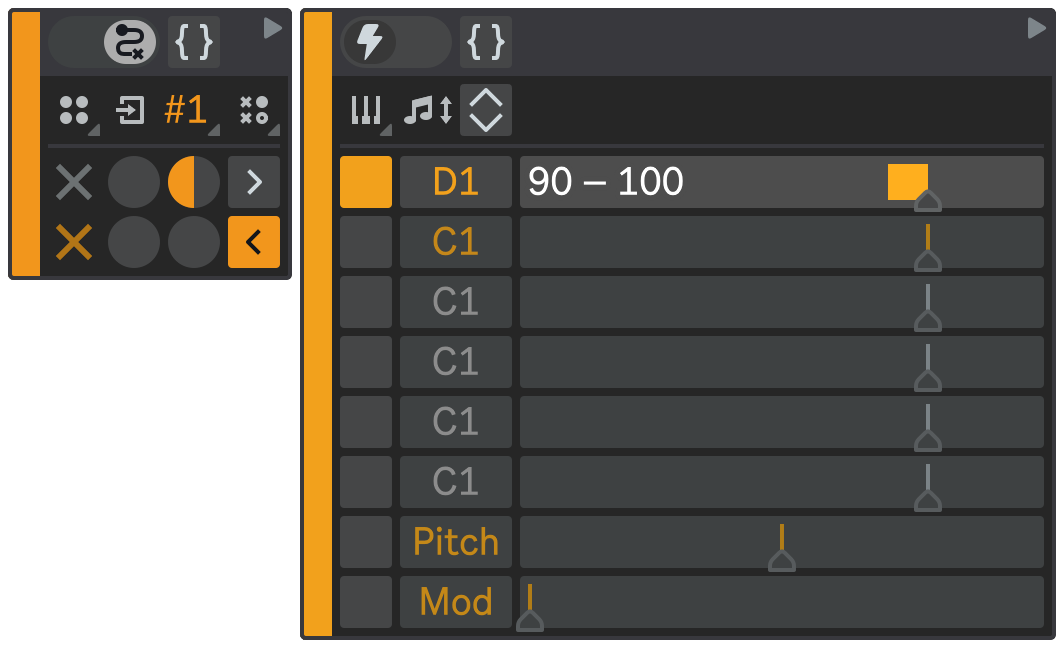
Then, go to State 2 and set it to play a D1 note, which is the snare note in the drum kit.
When you change the pitch of the note, Flow automatically outputs the note so you can immediately hear how it sounds. This is especially useful when you are working with sliced samples or drum kits. This behavior can be changed in the System section.
For both states, you can also adjust their Velocity Ranges for each note to your liking — for example, you can make the kick's velocity softer. Flow will randomly generate a velocity for each note within the range you set every time the state is played. The velocity determines how loud or soft each note will be played.
At this point, you should have State 1 and State 2 configured like this:
- State 1
- State 2
Now, we've configured the states, but we also need to tell the state machine how to transition between them.
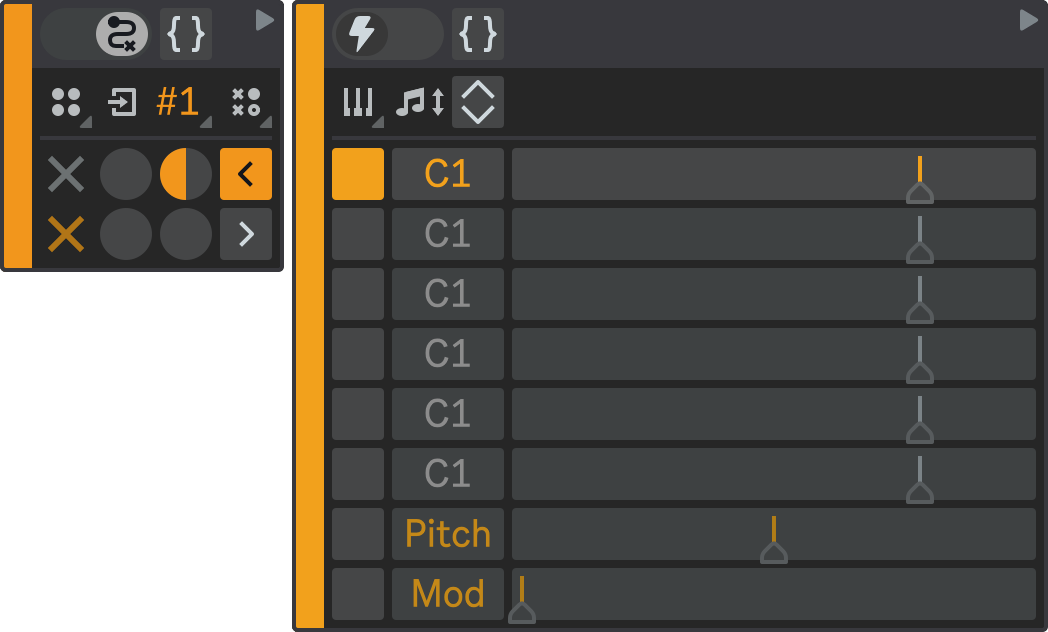
State Transition Matrix
The State Transition Matrix is a table that shows how the state machine moves, or transitions, from one state to another. Each row and column represent a state, and each cell represents a transition from the row state to the column state.

For this sequencer part, we want to make a simple sequential pattern: kick followed by snare, snare followed by kick, and so on. To do this, we need to set two transitions: one from State 1 to State 2, and one from State 2 to State 1.
The first row of the state transition matrix determines which states will play after State 1 is done playing. The second cell in the first row is already populated with a default value, meaning that State 1 should always be followed by State 2. Leave it as it is.
The second row of the state transition matrix determines which states will play after State 2 is done playing. To make State 2 always followed by State 1, move your mouse cursor over the first cell in the second row and dial in some value — it doesn't matter what value at this point.
Your P1 state transition matrix should look like this:
Result
Now, hit Play in Ableton Live. Flow will start generating MIDI notes based on P1 state machine configuration. You will hear a basic kick and snare pattern on every quarter note.
Playback Indicators
Notice that Flow displays some playback indicators in the user interface to help you see what is happening.
- The mixer indicators light up when its corresponding part outputs a note or modulation value;
- The state machine indicators light up when state machine is currently playing and show which state is playing, and which transition was last used;
- The trigger indicators light up when trigger is currently playing and show which notes are being played, and which velocities or modulation values were chosen from the ranges.
The indicators are grayed out when the state has finished playing.
You can use these indicators to track the execution flow and the playback of your states and adjust your sequencer configuration as you like.
Summary
For this part, we created a very simple linear pattern. In the next part, we will use probabilistic transitions to create more dynamic and expressive hi-hats pattern on top of this basic beat.