Part 2: Arpeggios
In this section, you will use the second sequencer part, P2, to generate some arpeggios on top of the chords pattern from P1.
Part Overview
For the P2 sequencer part, we are going to configure a state machine according to the following diagram:
- Diagram
- Matrix
| Arp 1 | Arp 2 | |
|---|---|---|
| Arp 1 | 100% | |
| Arp 2 | 100% |
| B | C | D | E | C | B | A | C | |
|---|---|---|---|---|---|---|---|---|
| B | 80% | 20% | ||||||
| C | 80% | 20% | ||||||
| D | 30% | 50% | 20% | |||||
| E | 30% | 50% | 20% | |||||
| C | 30% | 70% | ||||||
| B | 30% | 70% | ||||||
| A | 30% | 70% | ||||||
| C |
| A | C | E | G | C | E | G | B | |
|---|---|---|---|---|---|---|---|---|
| B | 100% | |||||||
| C | 100% | |||||||
| D | 30% | 70% | ||||||
| E | 30% | 70% | ||||||
| C | 30% | 70% | ||||||
| B | 30% | 70% | ||||||
| A | 30% | 70% | ||||||
| C |
This state machine will play two different arpeggios on every sixteenth note. One arpeggio will always follow another, but inside of each arpeggio, notes will follow each other in a less predictable way.
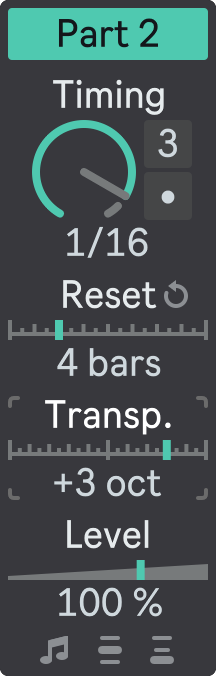
Mixer
Configure P2 mixer like following:
- Part Activator: On;
- Timing: 1/16.
Transposition
The Transposition parameter allows you to adjust the pitch of the generated notes by moving them up or down in octaves or semitones.
Set the Transposition to +3 octaves. This will make P2 play its notes in a higher key range. Don't worry about the notes sounding too high, because we already lowered the oscillator pitch of the synth that will receive them.
Your P2 mixer section should look like this:
Sequencer
Next, open the floating plug-in window and select P2 in the Part Selector.
The state machine on the diagram above has two high-level states, each representing a different arpeggio pattern, and each high-level arpeggio state has eight sub-states.
Set the States Number of the state machine to 2. Now let's see how to configure these high-level states and their sub-states.
High-Level State 1
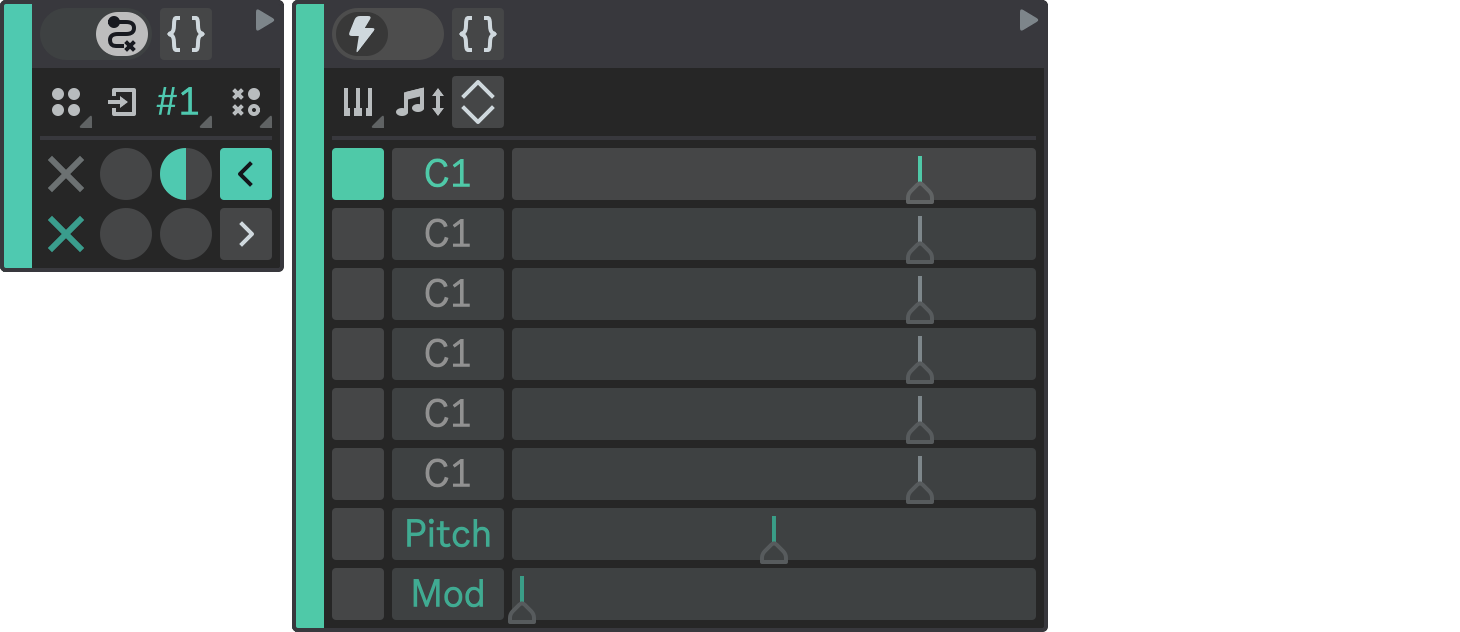
Expand the first state.
Notice the toggle in the top left corner of the expanded state configuration. It determines the State Type for that state: either a Trigger or a State Machine. A Trigger is a simple state that defines notes and modulation values, while a State Machine is a complex state that defines nested states and transitions.

By default, the state type is set to a Trigger, which is a simple state without nested states.
Click the State Type toggle to change State 1 type to a State Machine. This makes it a high-level state with its own sub-states.
- State Type: Trigger
- State Type: State Machine
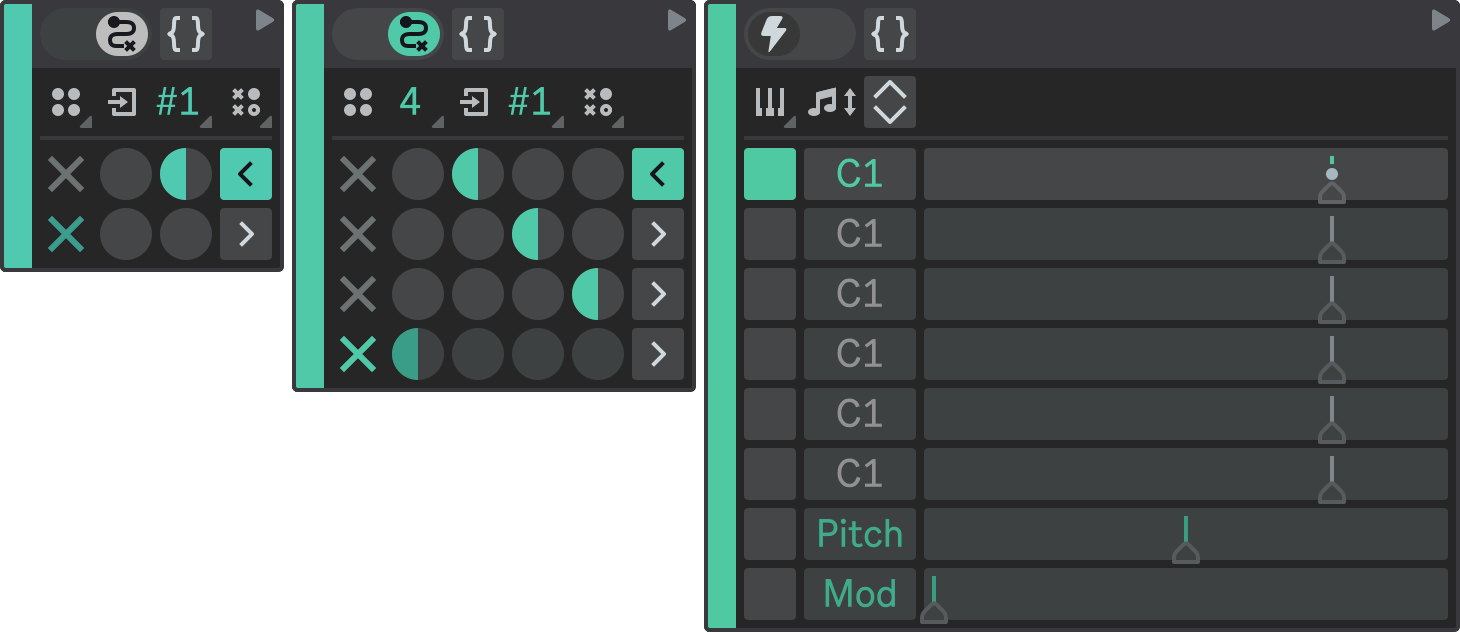
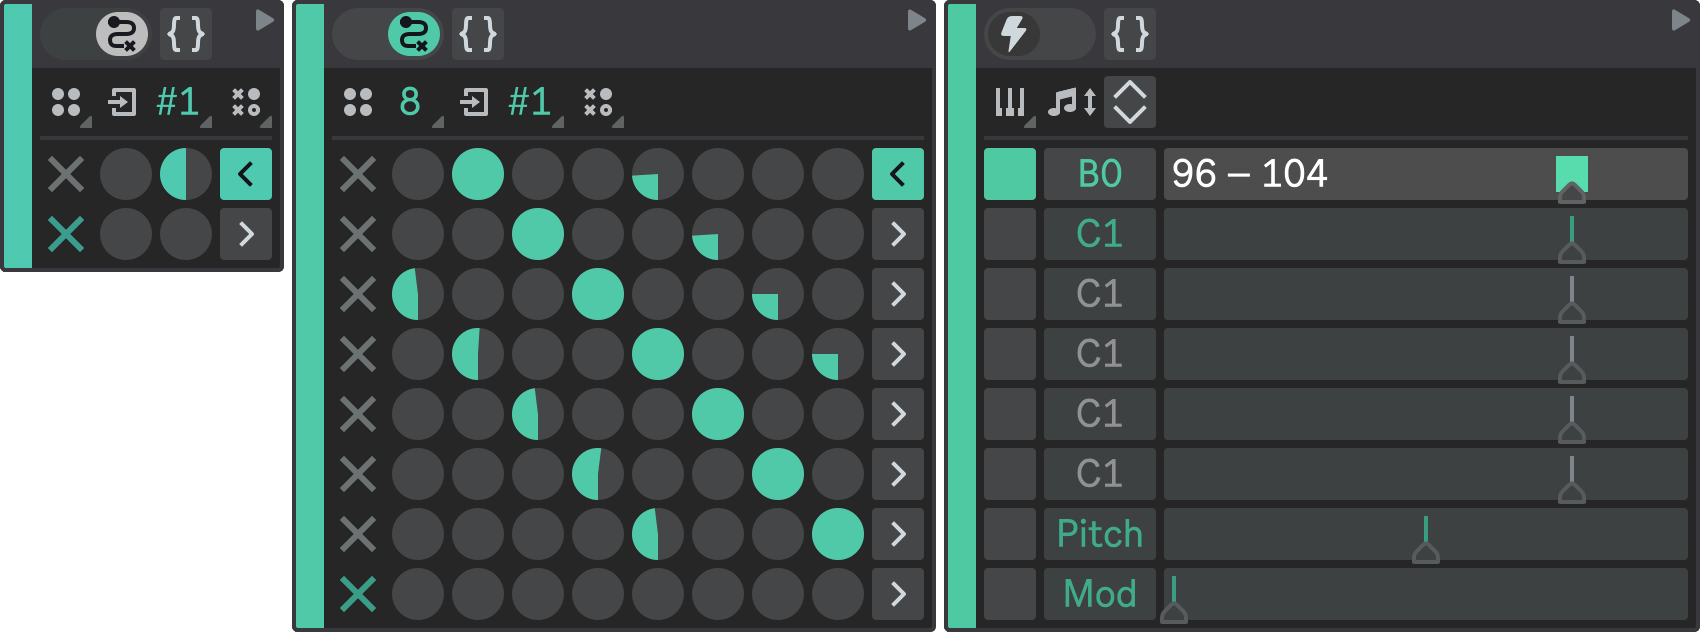
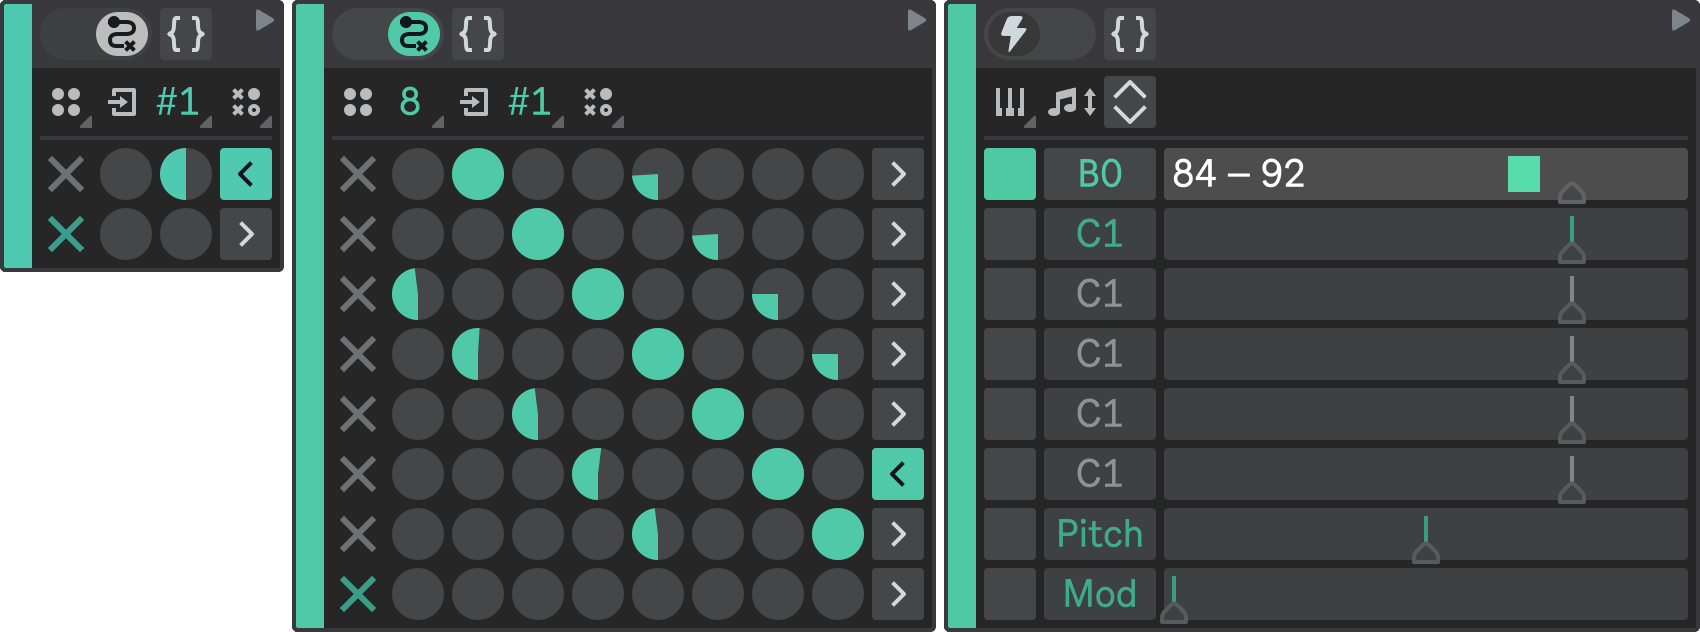
Now, configure the first high-level state as follows:
- States Number: 8;
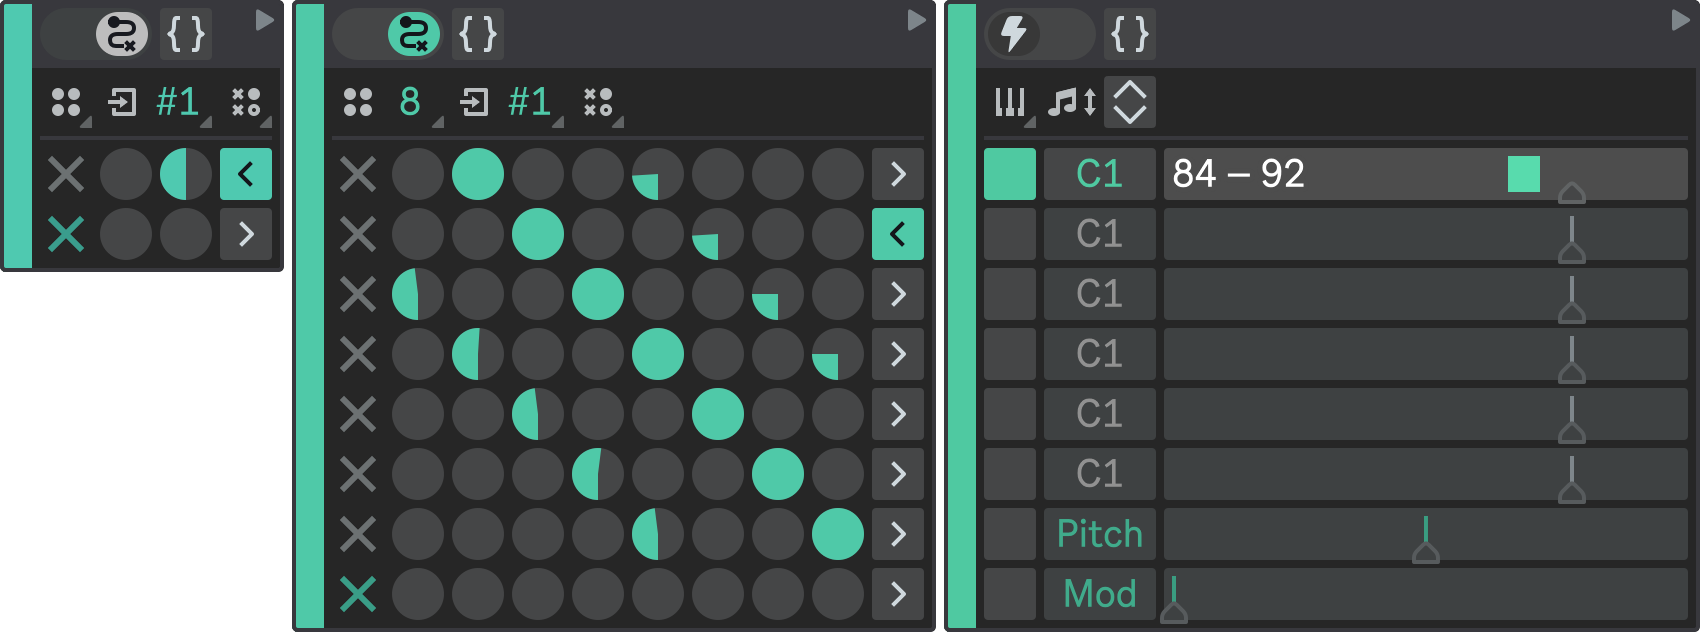
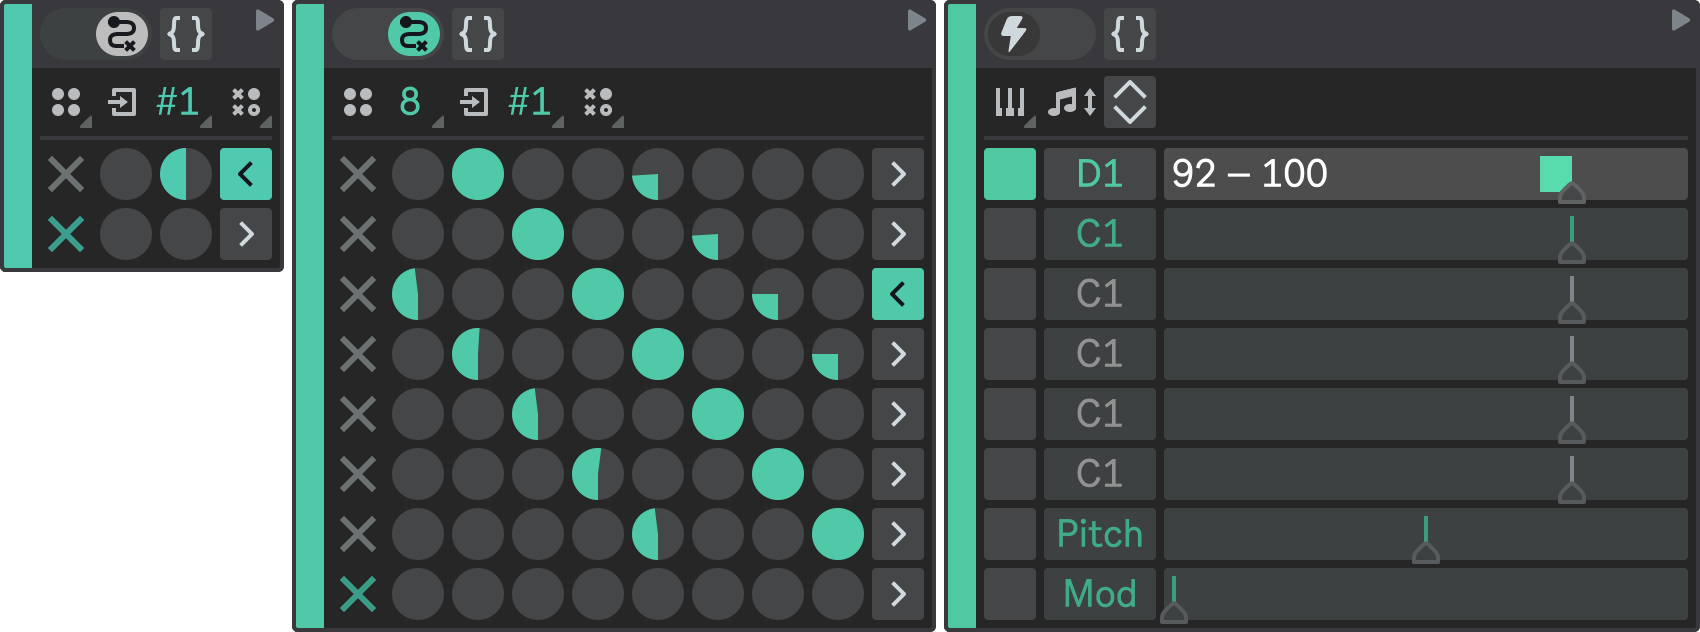
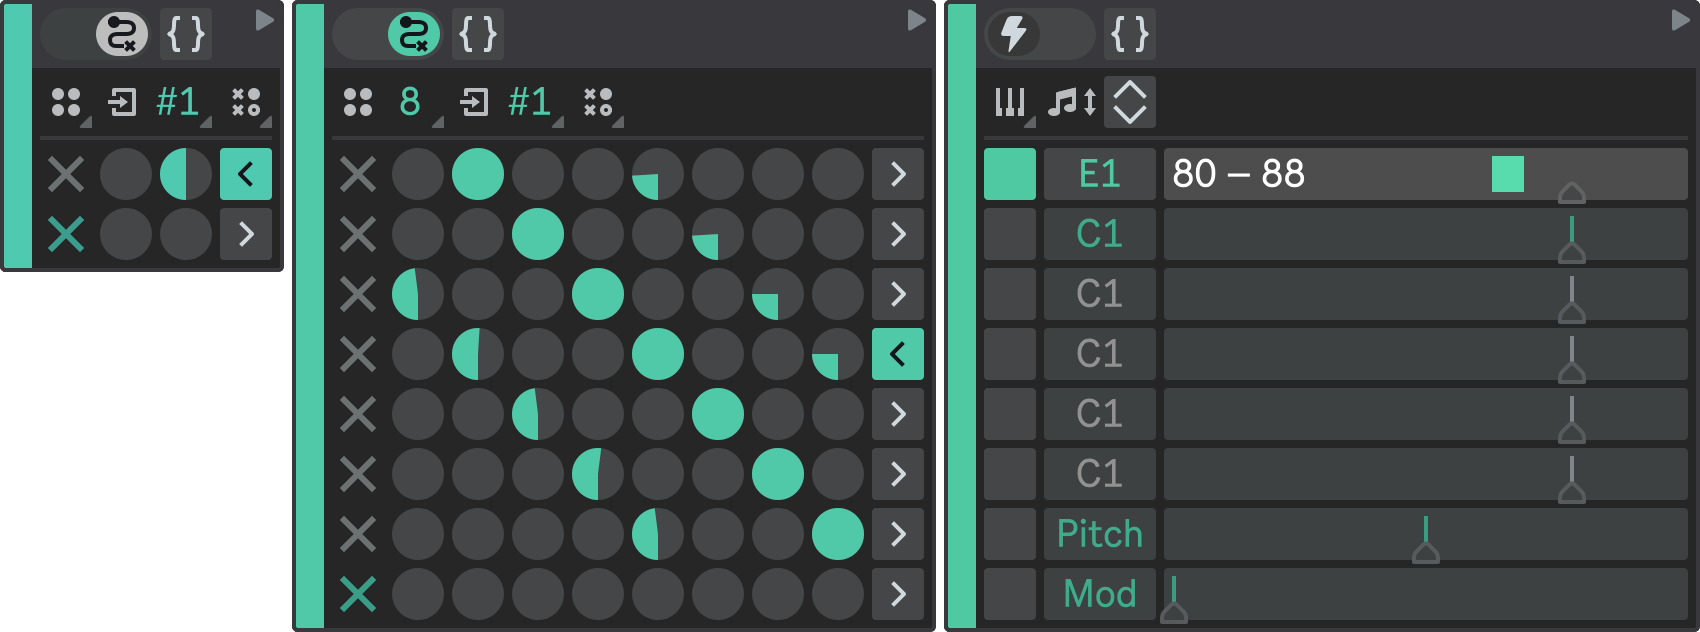
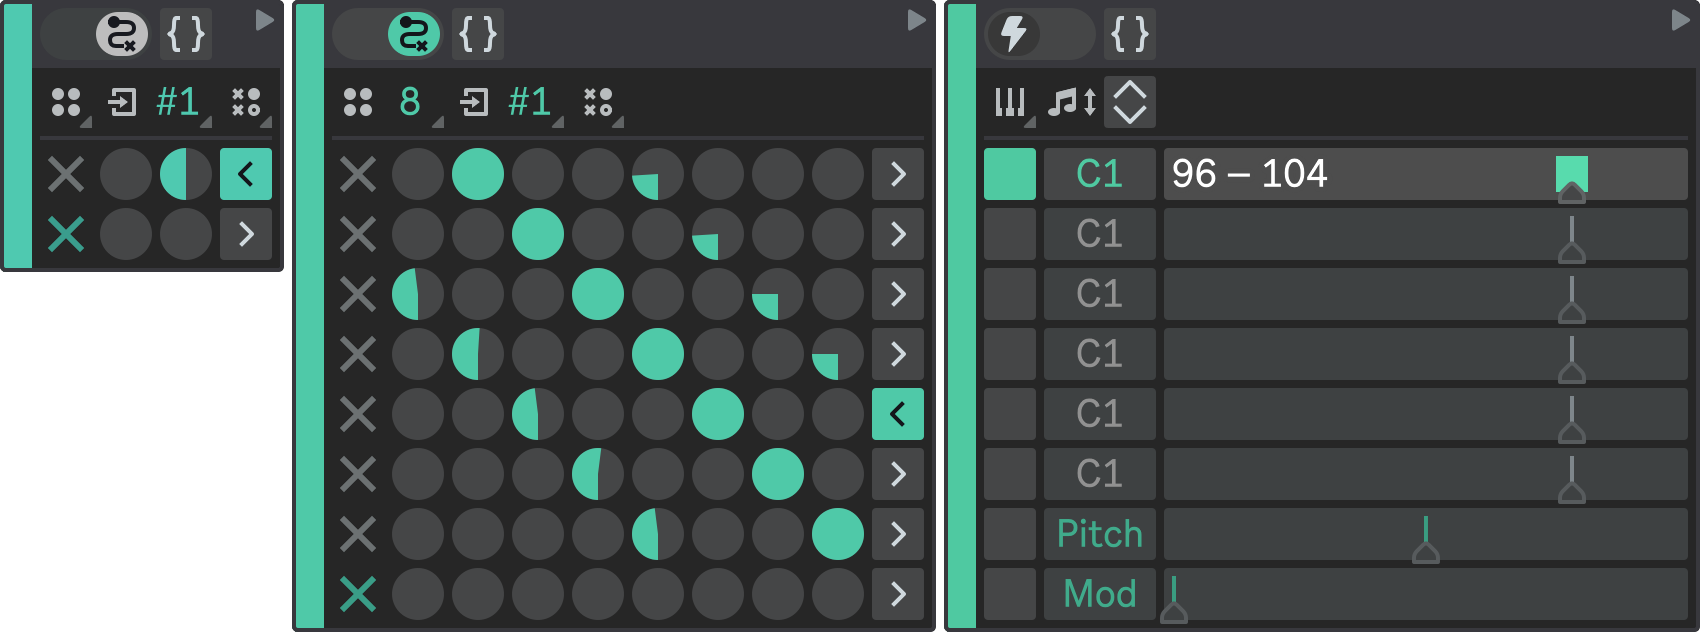
- Sub-State 1: B0;
- Sub-State 2: C1;
- Sub-State 3: D1;
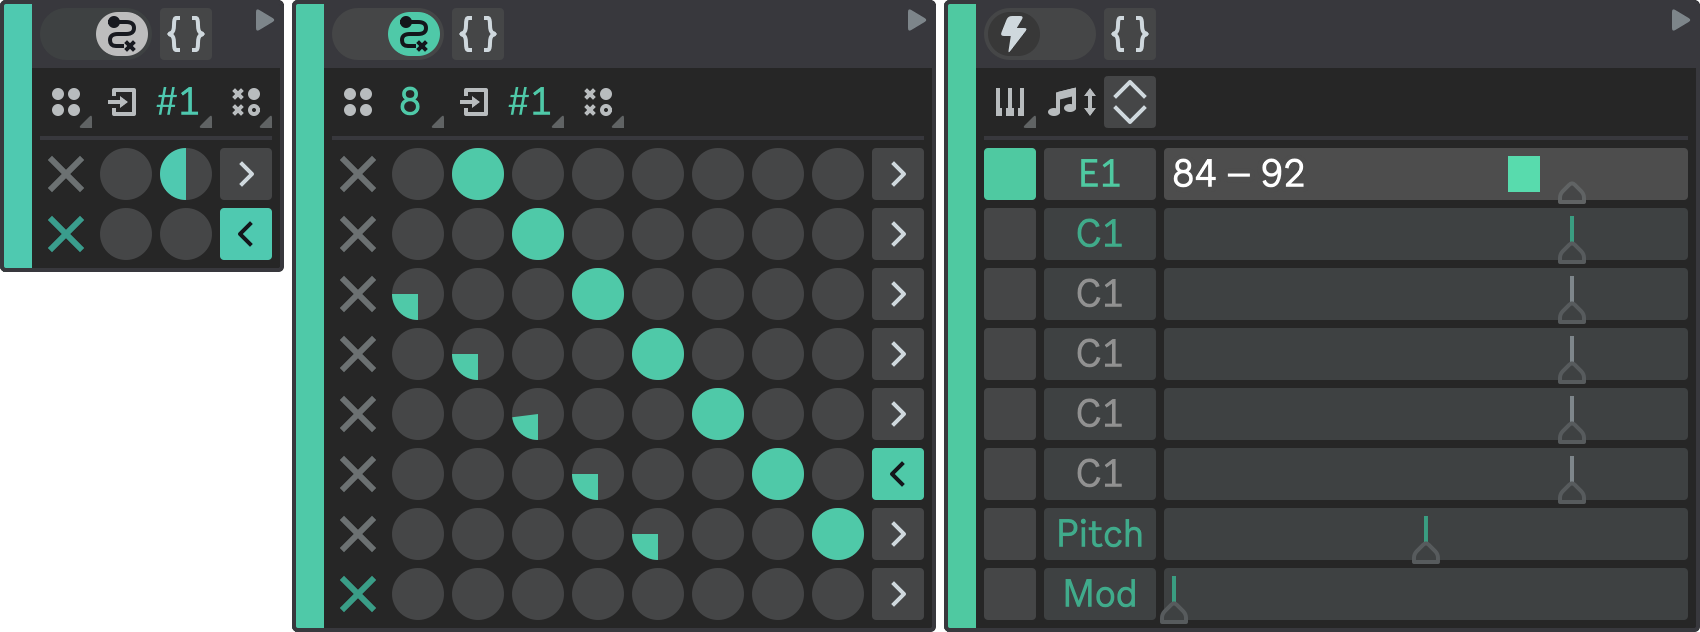
- Sub-State 4: E1;
- Sub-State 5: C1;
- Sub-State 6: B0;
- Sub-State 7: A0;
- Sub-State 8: C1.
These are the notes that will be played by each sub-state. You can adjust their velocities as you like.
To configure the State Transition Matrix, you can refer to the state machine diagram above. It defines a sequential transitions with some slight irregularities.
Final States
To the left of the State Transition Matrix, there is a column of checkboxes that indicate the Final States of the state machine. A final state is a state that causes the state machine to exit when it is reached. If a state is marked as final, any state transitions defined in the State Transition Matrix for it are ignored and the corresponding matrix row is dimmed in the user interface.

A state machine can have zero, one or more final states, depending on its purpose and design. When a state machine reaches a final state, different things can happen depending on its level in the hierarchy:
- If the state machine is nested inside another state machine, it means that it has completed its execution and gives the control back to its parent state machine. The parent state machine then resumes its execution from where it left off.
- If the state machine is the root state machine (the highest level in the hierarchy), it means that the whole state machine has finished its execution. There is no higher level to return to, so the state machine restarts from its Initial State.
If the state machine has a state that does not have any outgoing transitions, it is also considered a final state. This is shown in the UI by automatically highlighting the final state checkbox for that state.
If a state machine does not have any final states, it will keep running indefinitely, unless you manually restart the playback, or unless the Reset Interval is reached. Typically, for nested states machines, you should always define a final state if you don't want the execution flow to be locked inside that state machine, or ensure that Reset Interval is enabled for the corresponding sequencer part.
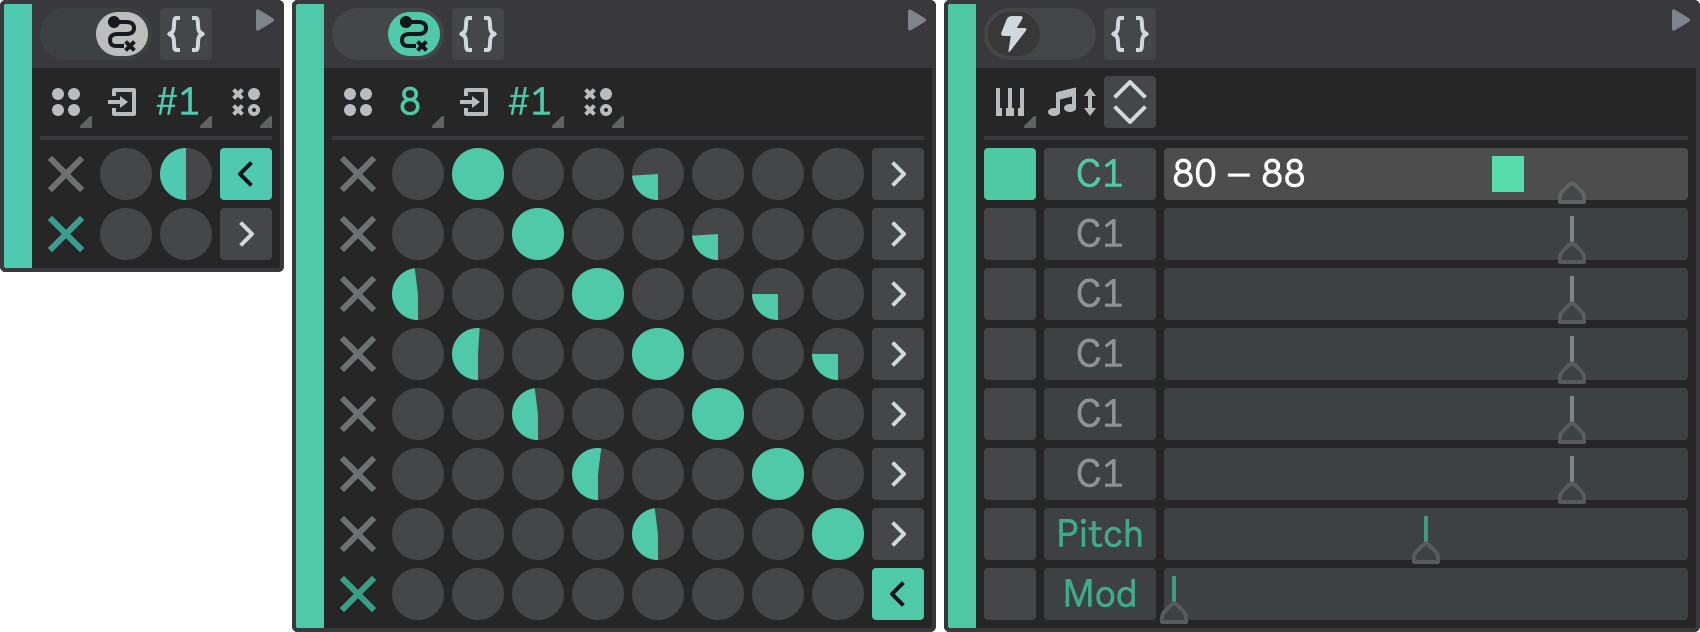
Disable any Final State checkboxes. The last row checkbox will remain slightly highlighted, because the last state does not have any transitions and is treated as a final state.
Now your State 1 configuration should look like this:
- State 1.1
- State 1.2
- State 1.3
- State 1.4
- State 1.5
- State 1.6
- State 1.7
- State 1.8
High-Level State 2
Expand the second state of the root state machine.
Again, set its type to State Machine to make it a high-level state, and configure it similarly to State 1:
- States Number: 8;
- Final States: none (all checkboxes disabled);
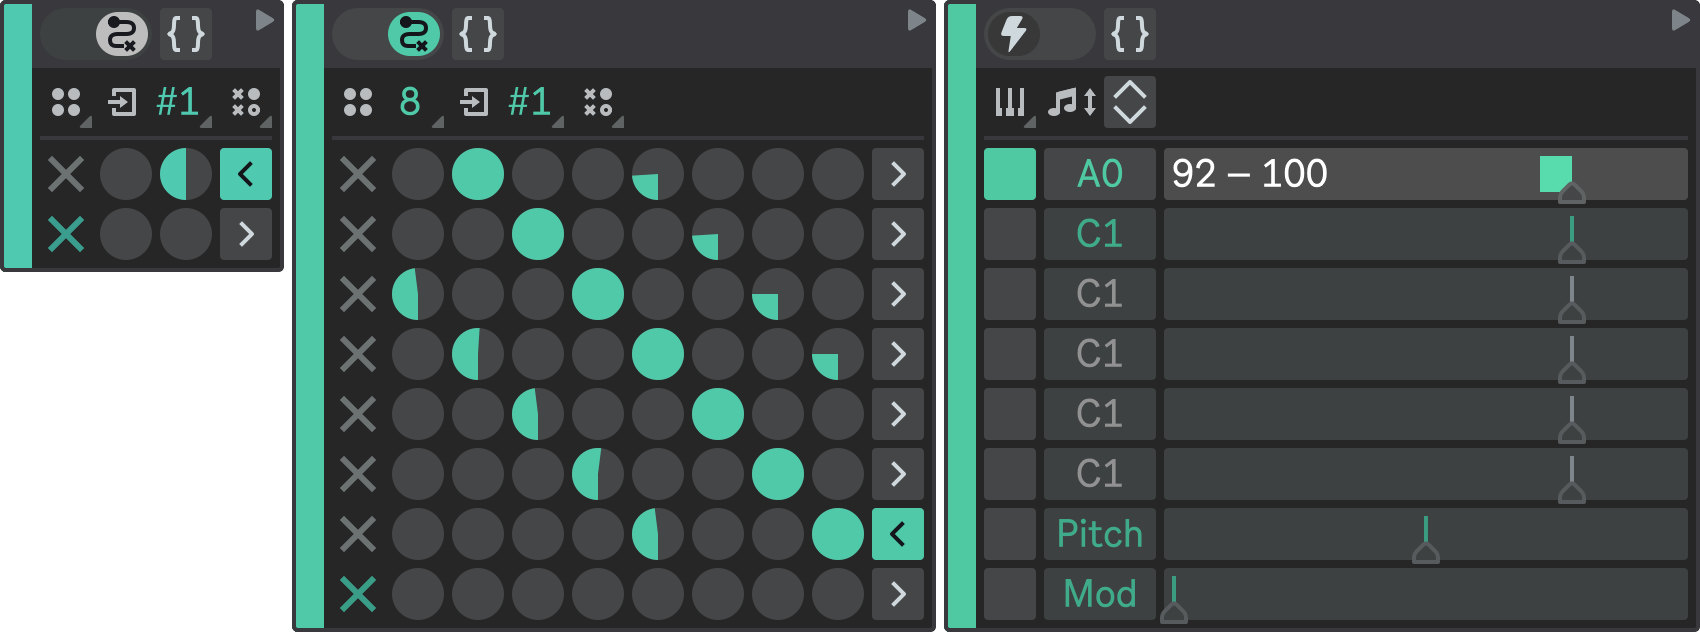
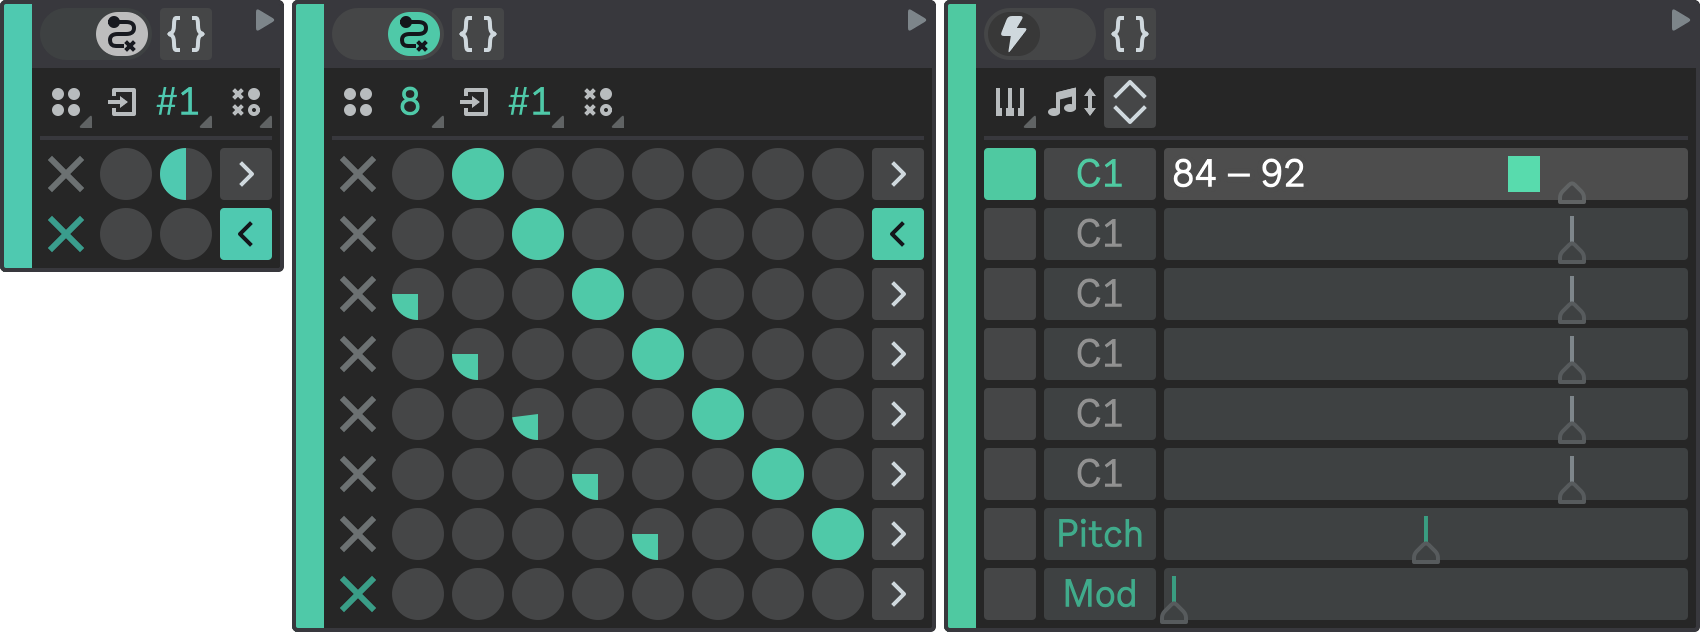
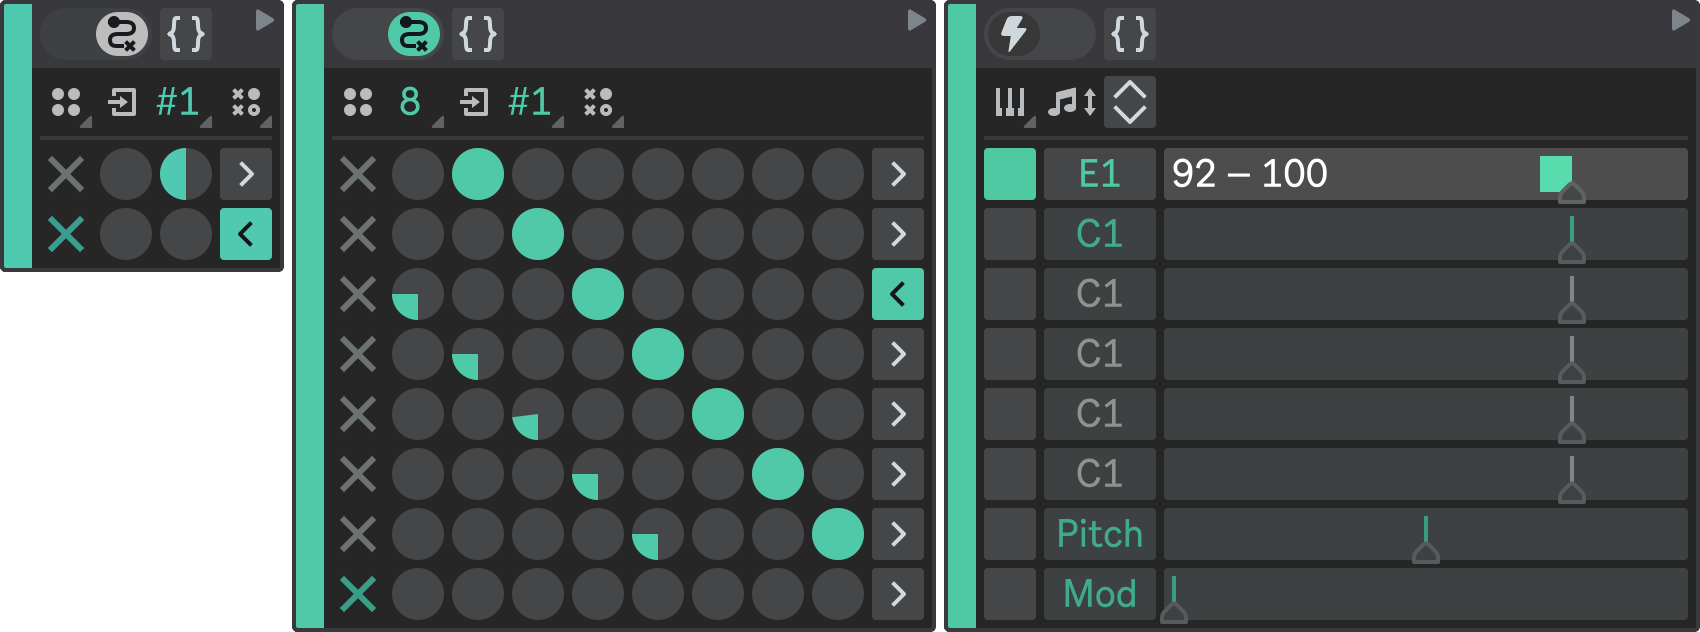
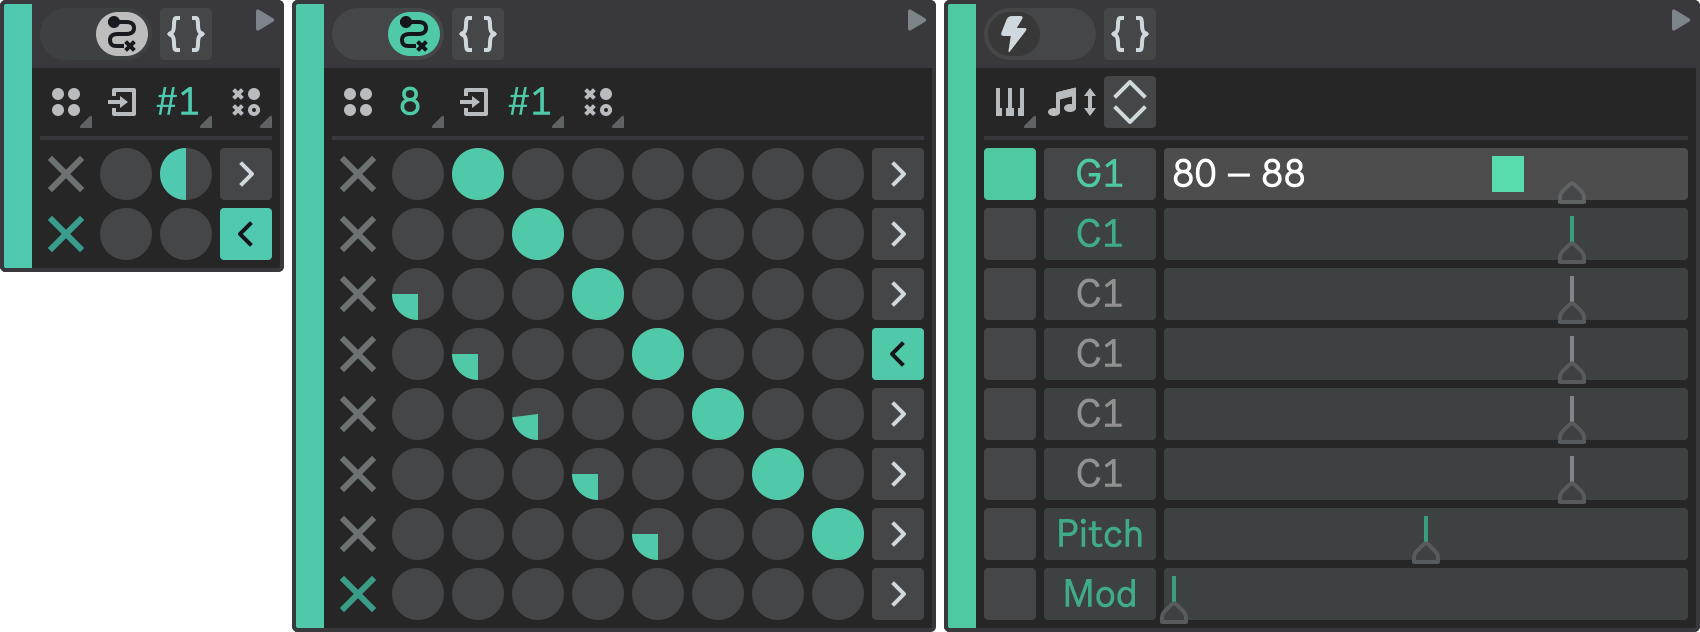
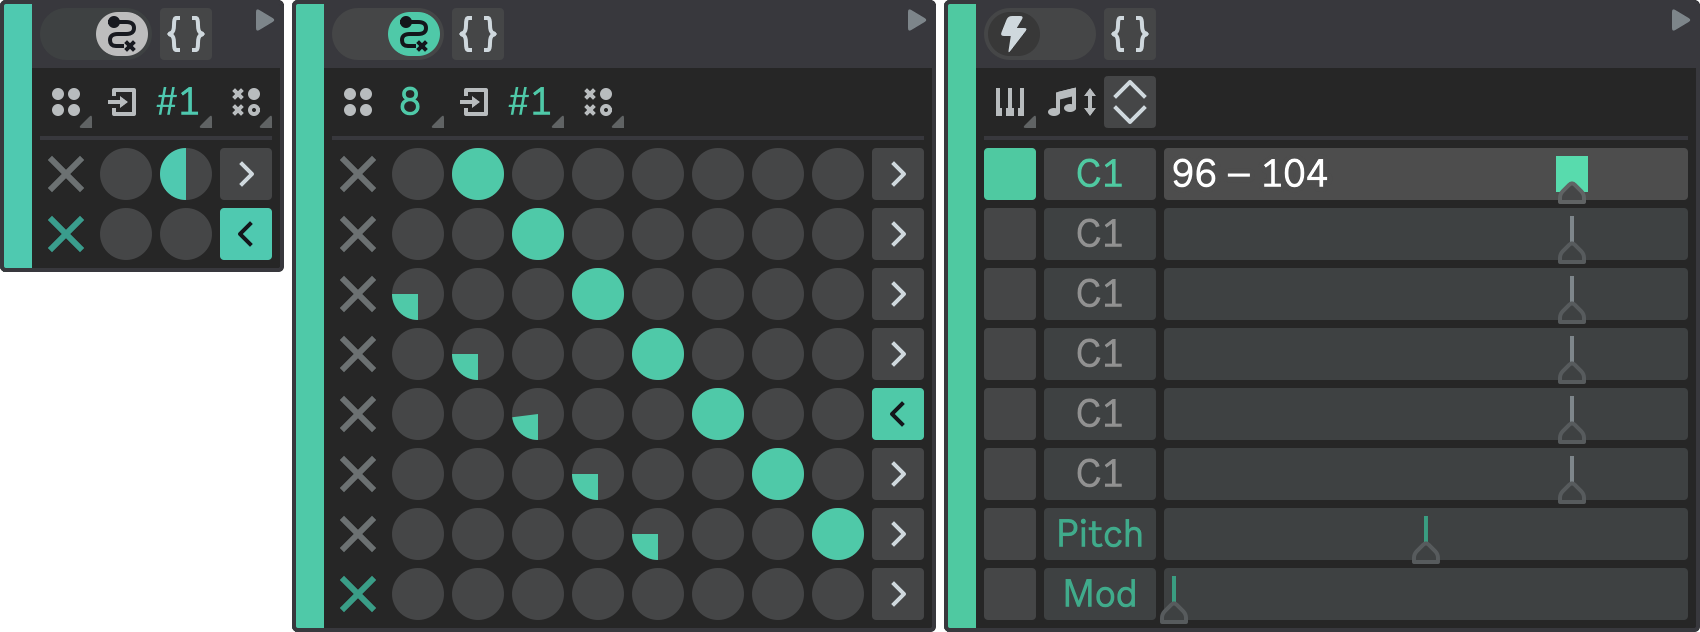
- Sub-State 1: A0;
- Sub-State 2: C1;
- Sub-State 3: E1;
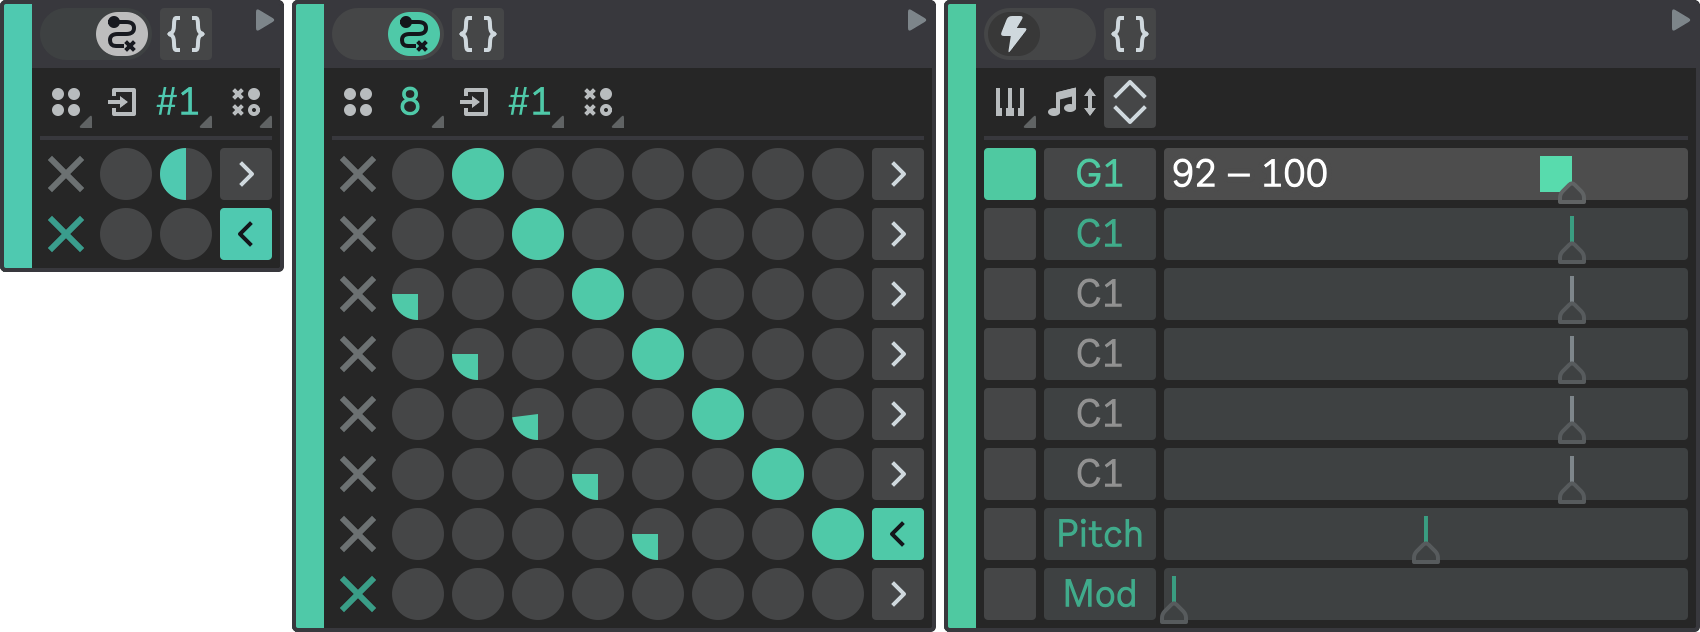
- Sub-State 4: G1;
- Sub-State 5: C1;
- Sub-State 6: E1;
- Sub-State 7: G1;
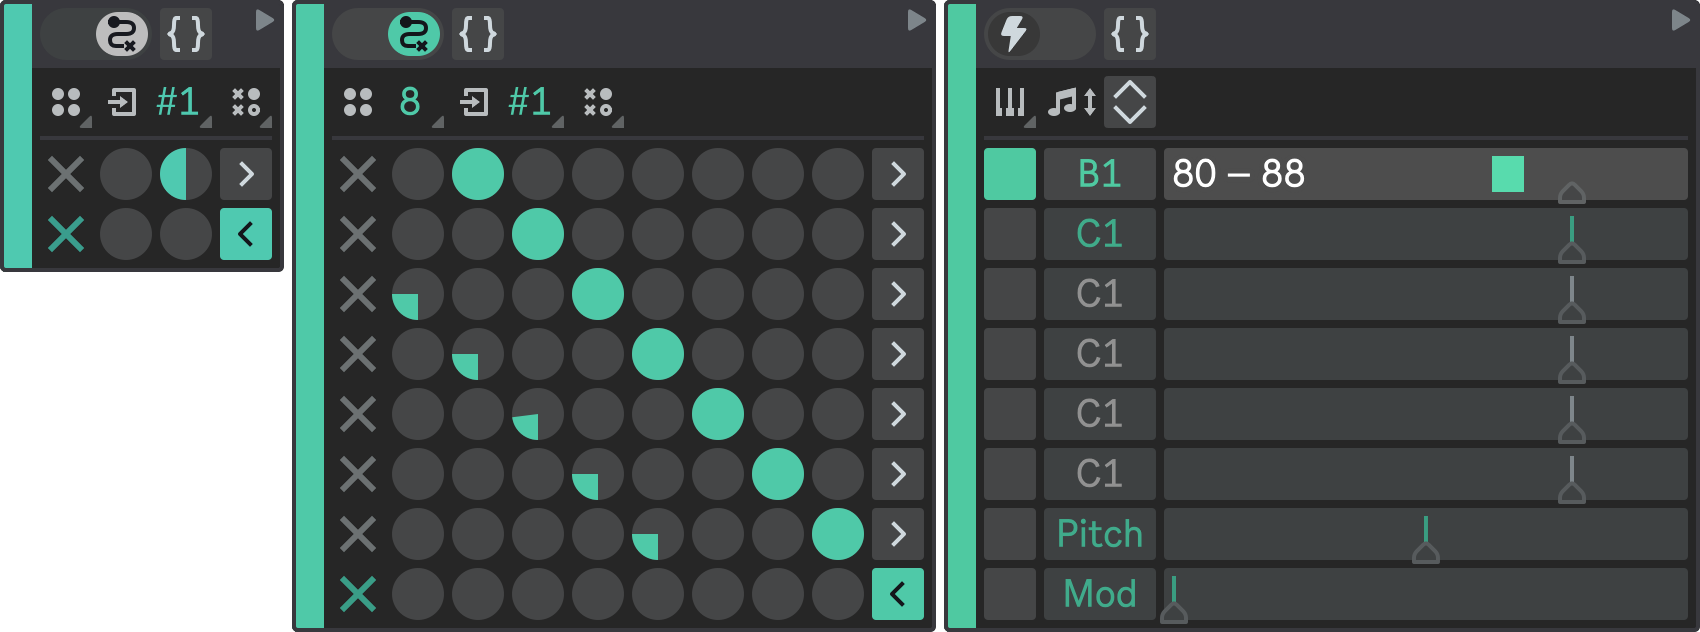
- Sub-State 8: B1.
Again, you can adjust note velocities to your liking.
Refer to the state machine diagram above to configure the State Transition Matrix. It also defines a sequential transitions with some irregularities, but is slightly different.
Your State 2 should look like this:
- State 2.1
- State 2.2
- State 2.3
- State 2.4
- State 2.5
- State 2.6
- State 2.7
- State 2.8
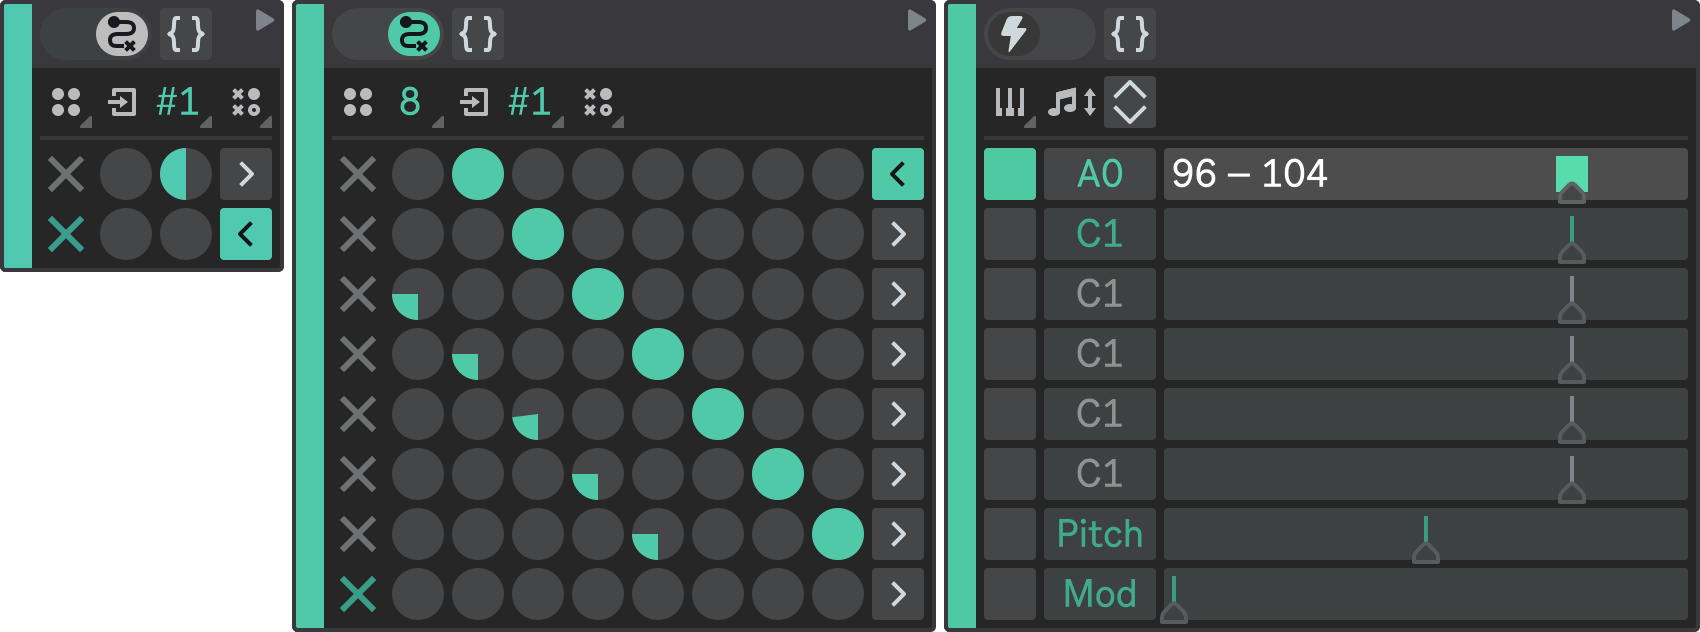
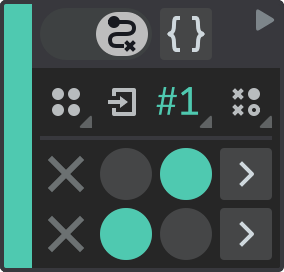
Root State Transition Matrix
Next, you just need to configure the State Transition Matrix of the root state machine.
Configure it in a way that each high-level state follows one another:
Result
Hit Play in Ableton Live to hear both sequencer parts playing together.
Notice that Flow will play each arpeggio in a non-linear way, but it will always switch to another arpeggio when it reaches the last note.
Again, you can go back and further refine state machine configuration or mixer parameters to your liking.