Part 3: Melody
In this section, you will use the third sequencer part, P3, to generate a melody.
Part Overview
For the P3 sequencer part, we are going to configure a state machine according to the following diagram:
- Diagram
- Matrix
| A | E | Rest | A | E | Rest | A | E | |
|---|---|---|---|---|---|---|---|---|
| A | 100% | |||||||
| E | 100% | |||||||
| Rest | 100% | |||||||
| A | 100% | |||||||
| E | 100% | |||||||
| Rest | 100% | |||||||
| A | 100% | |||||||
| E |
This state machine will play the melody on every dotted quarter note.
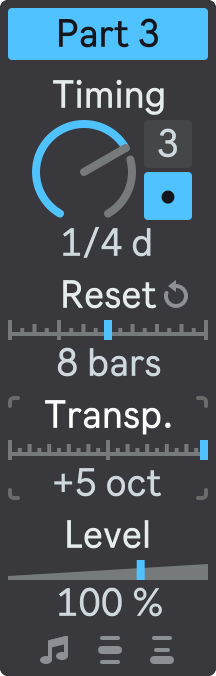
Mixer
Configure P3 mixer like following:
- Part Activator: On;
- Timing: 1/4d — this will make the state machine transition on every dotted quarter note;
- Reset: 8 bars;
- Transposition: +5 octaves.
Your P3 mixer section should look like this:
Sequencer
Next, open the floating plug-in window and select P3 in the Part Selector.
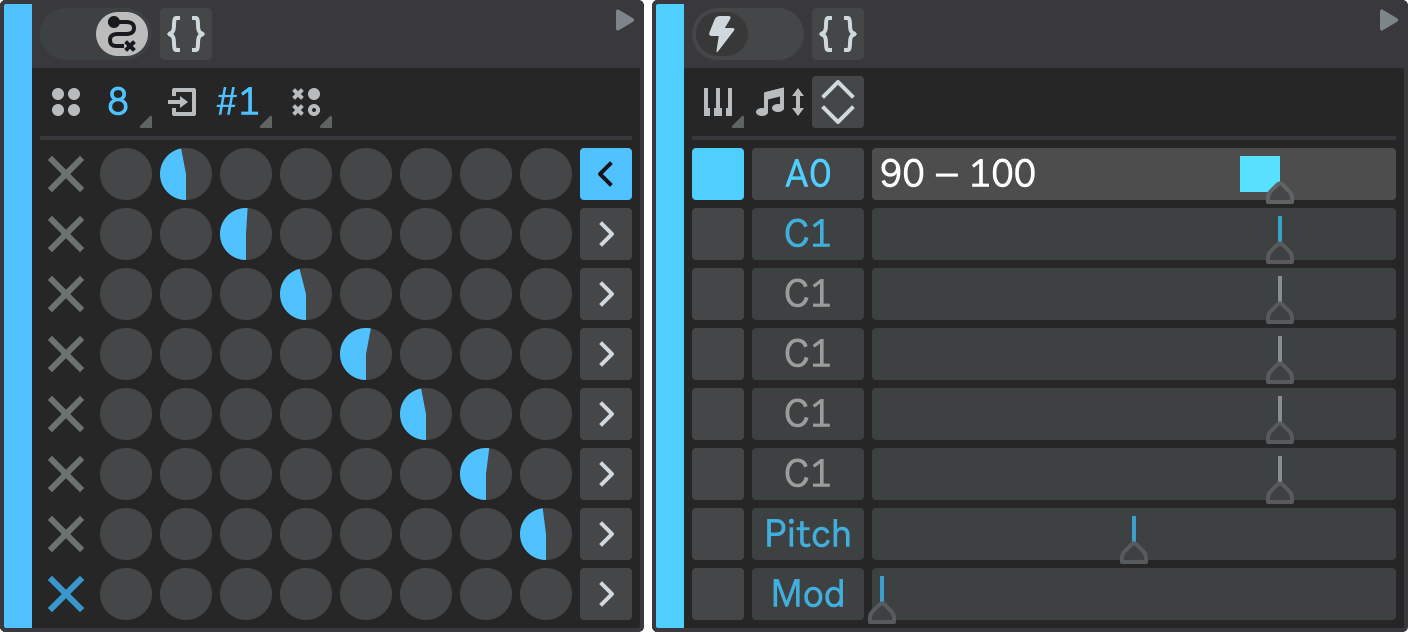
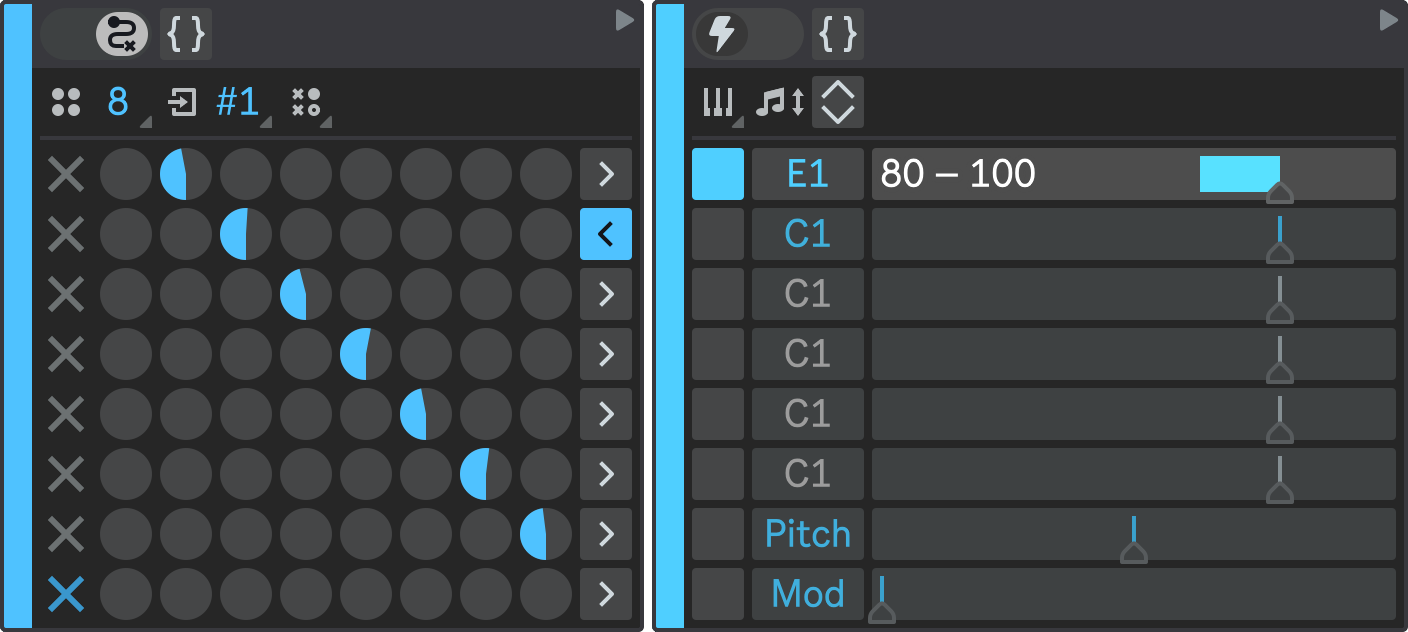
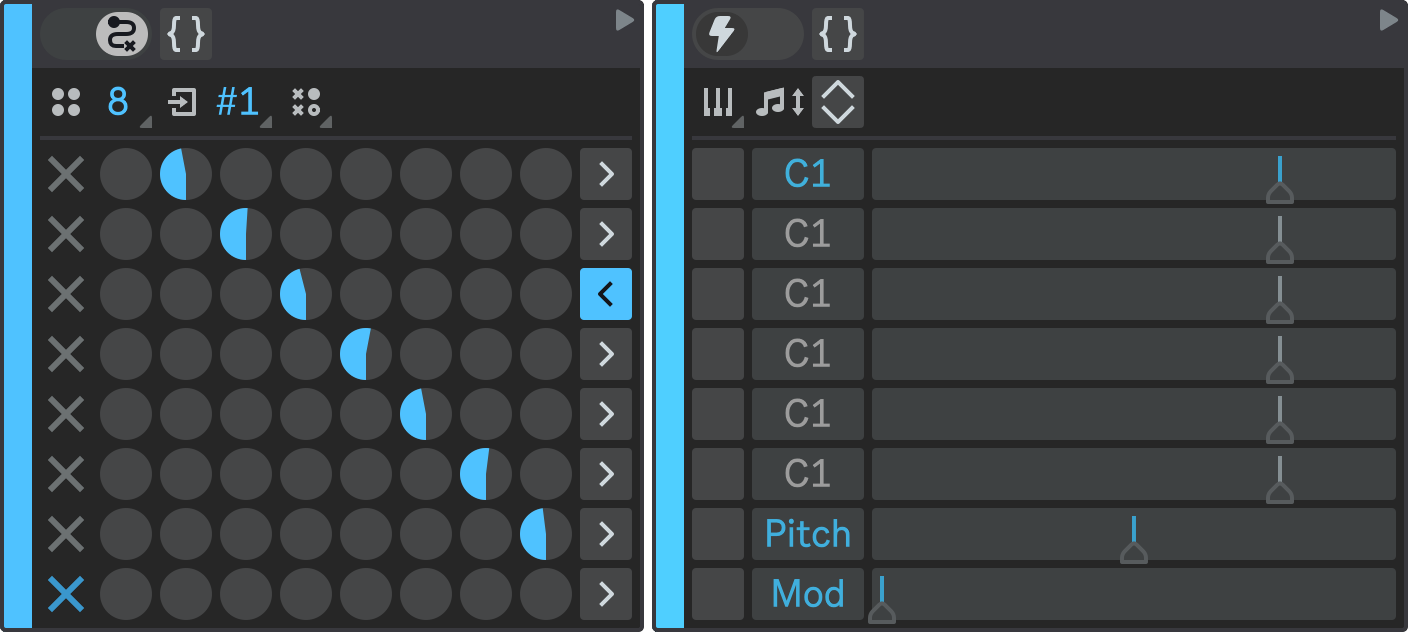
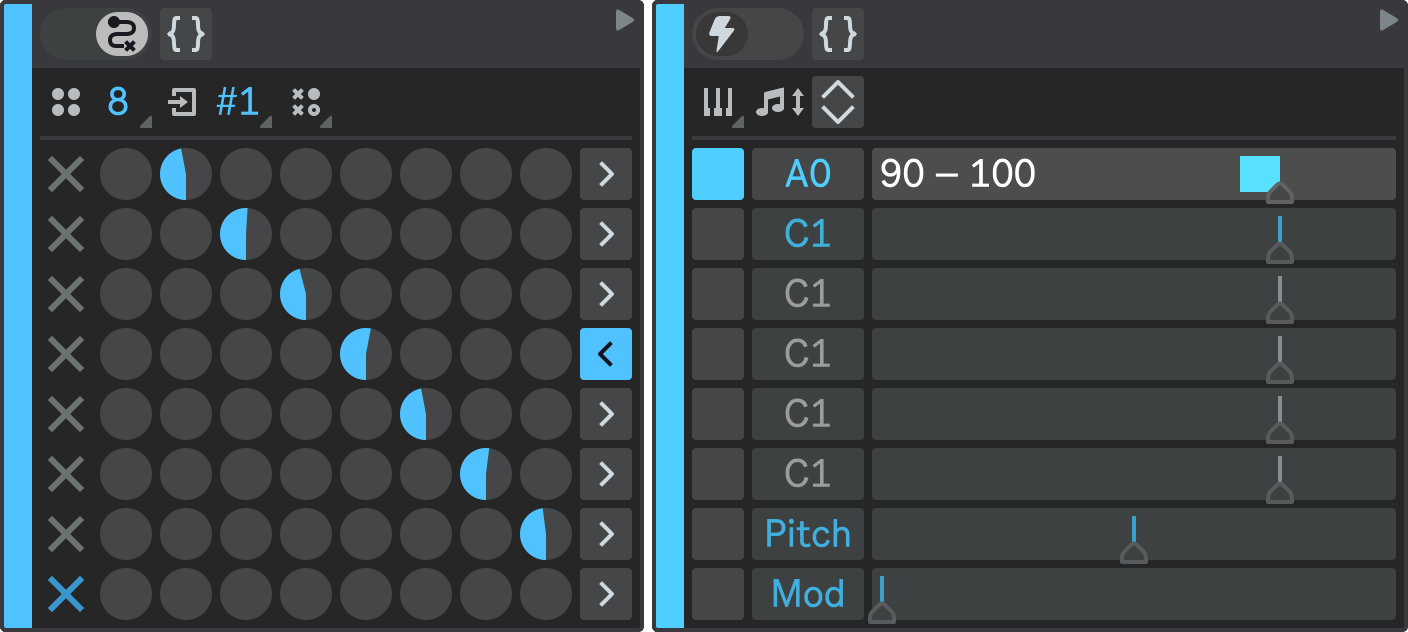
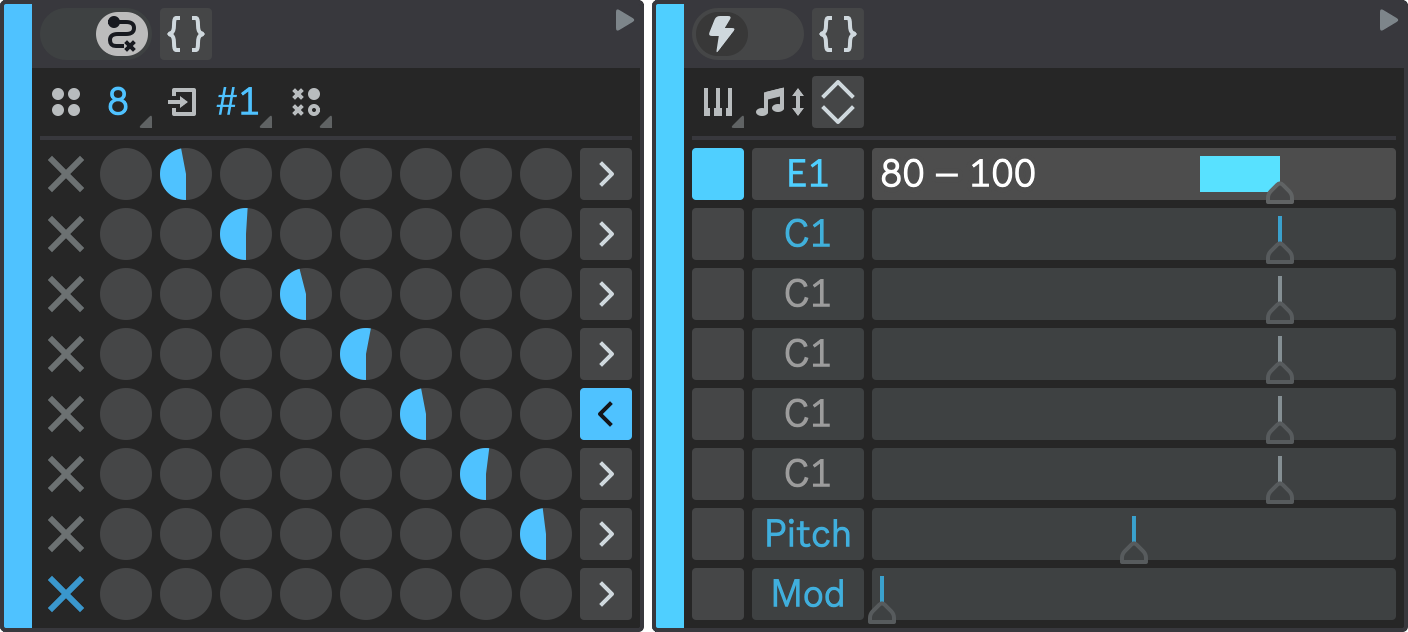
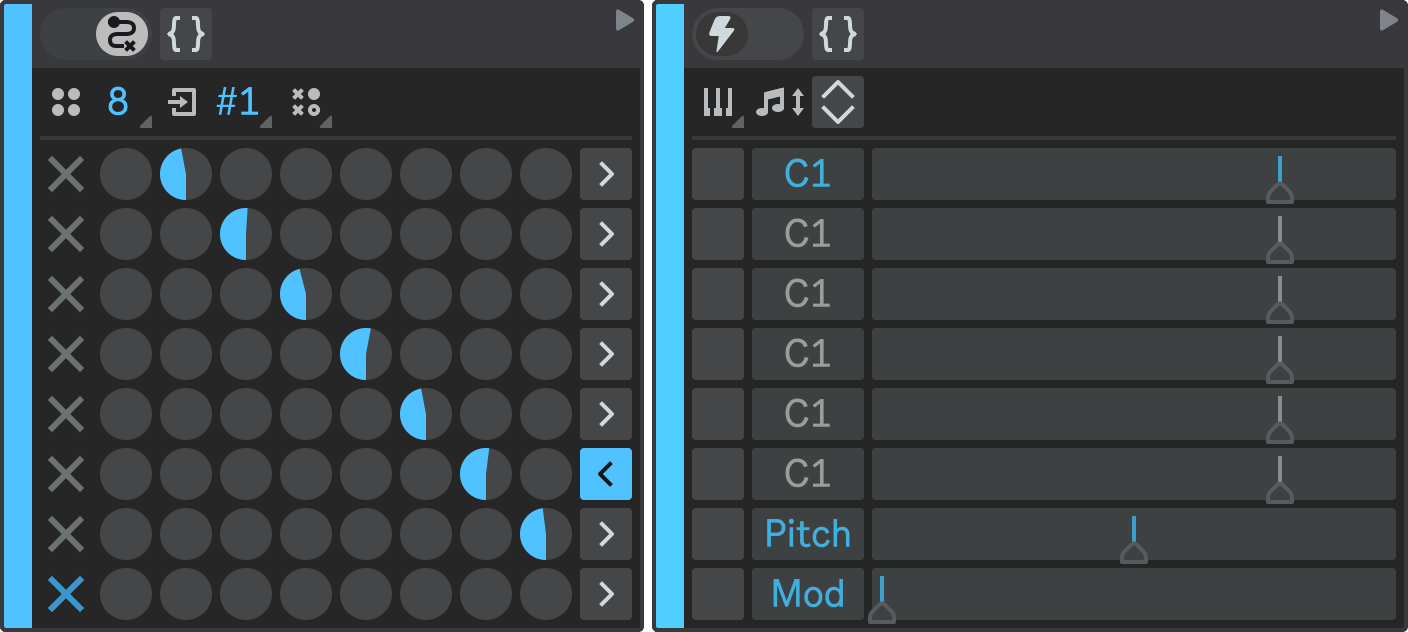
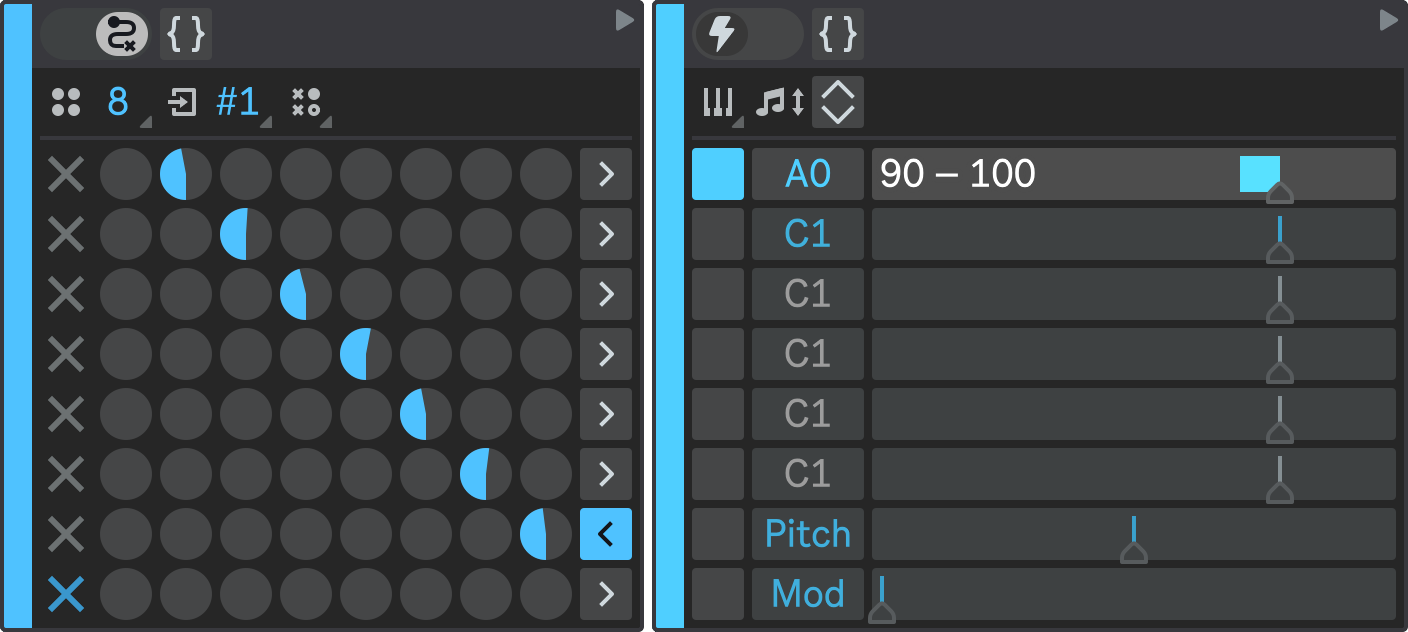
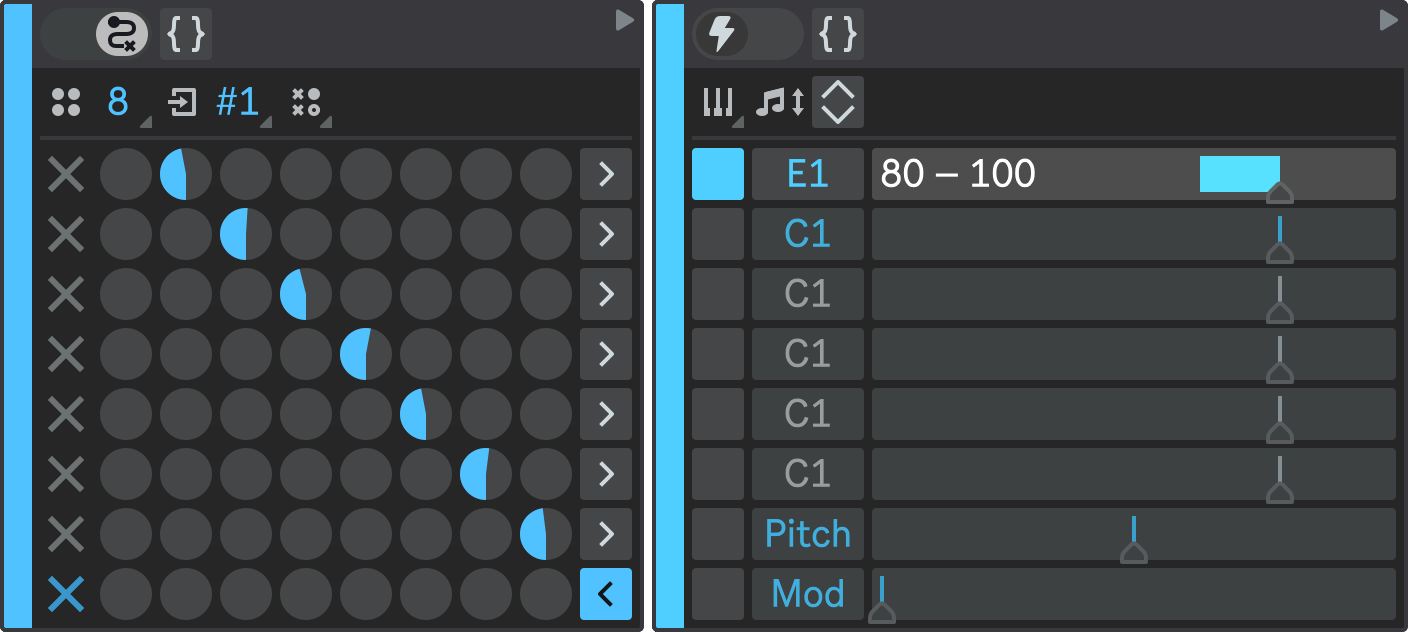
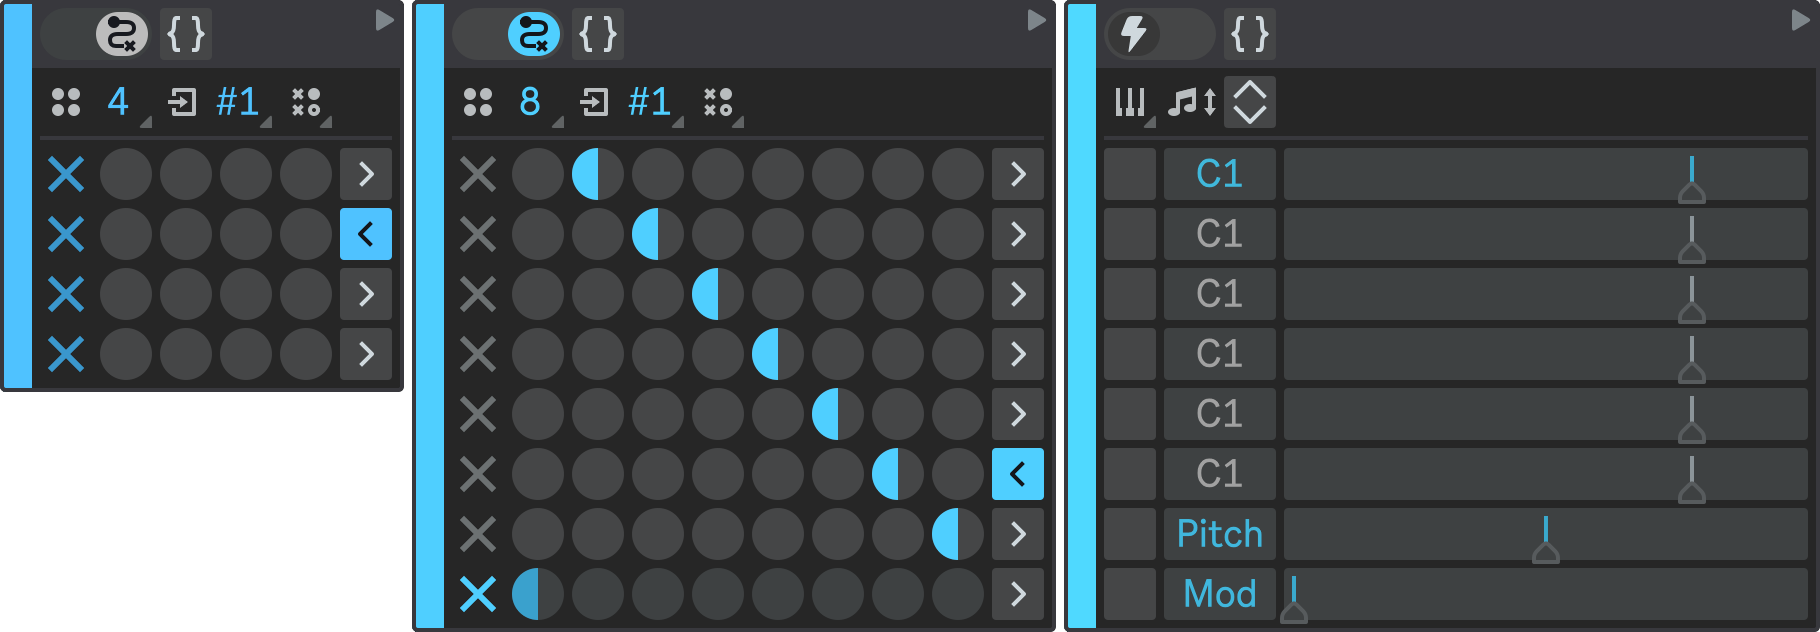
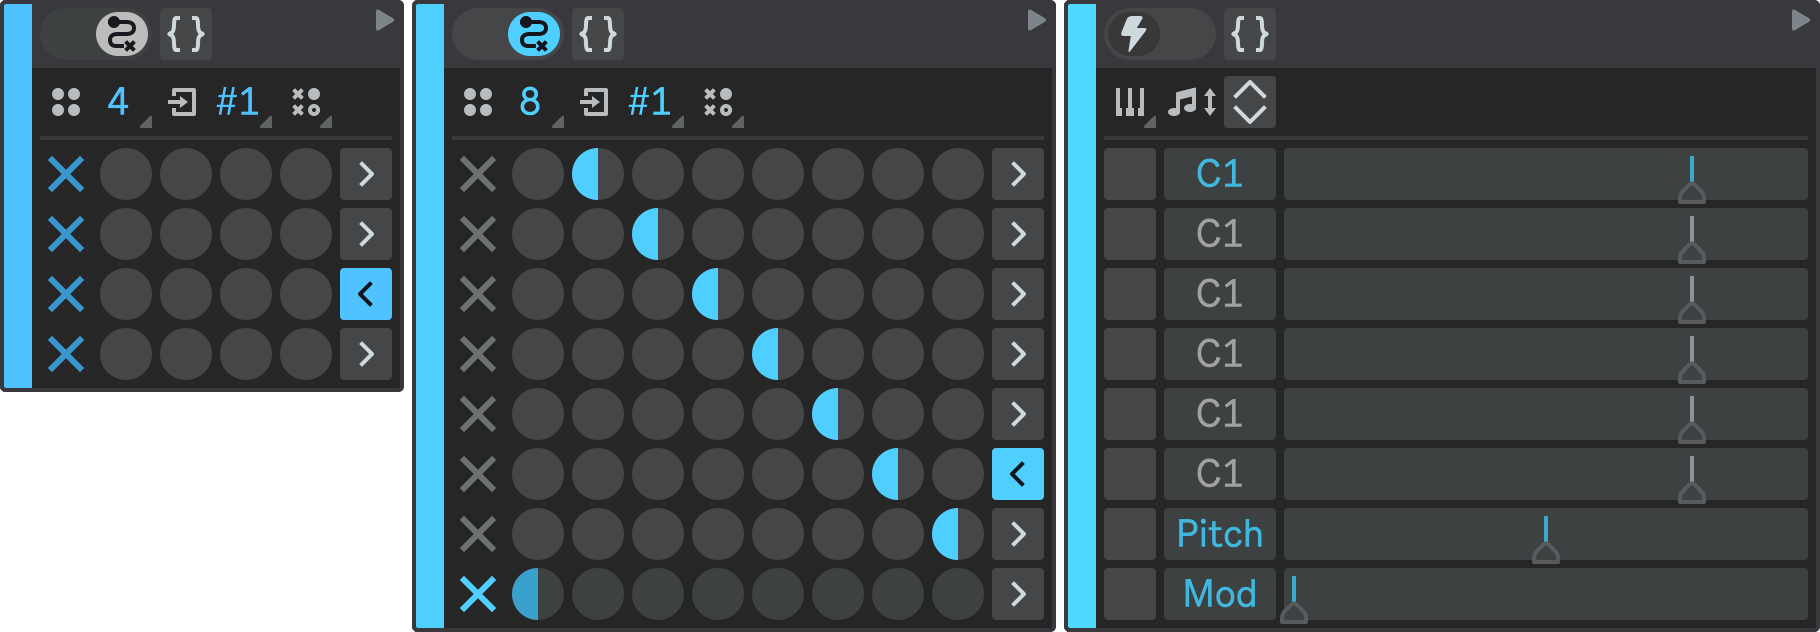
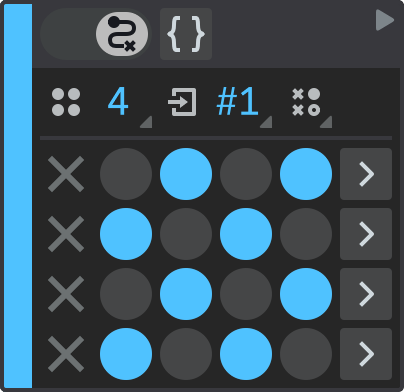
This state machine has eight trigger states without any high-level states, so its configuration is pretty easy. Configure it as follows:
- States Number: 8;
- Final States: none;
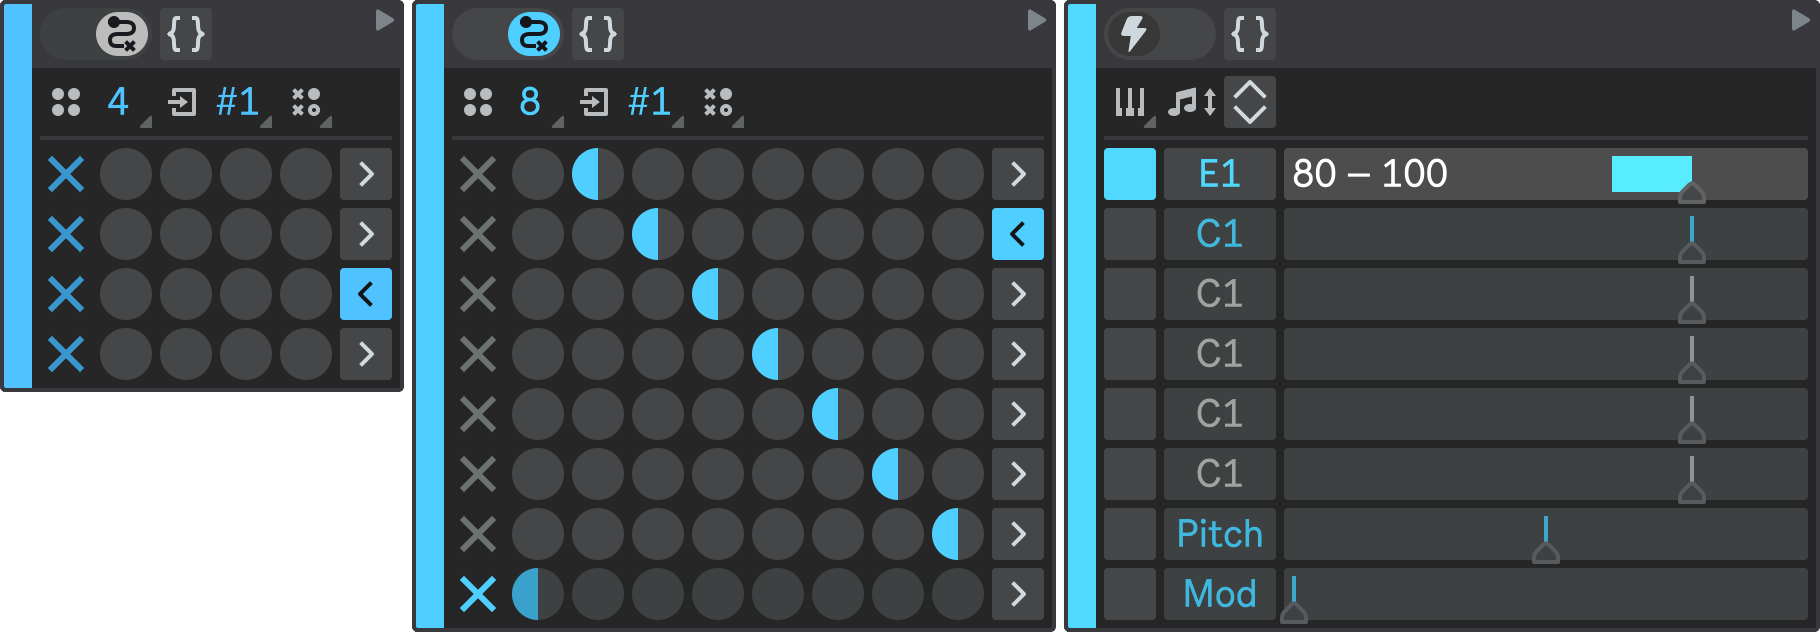
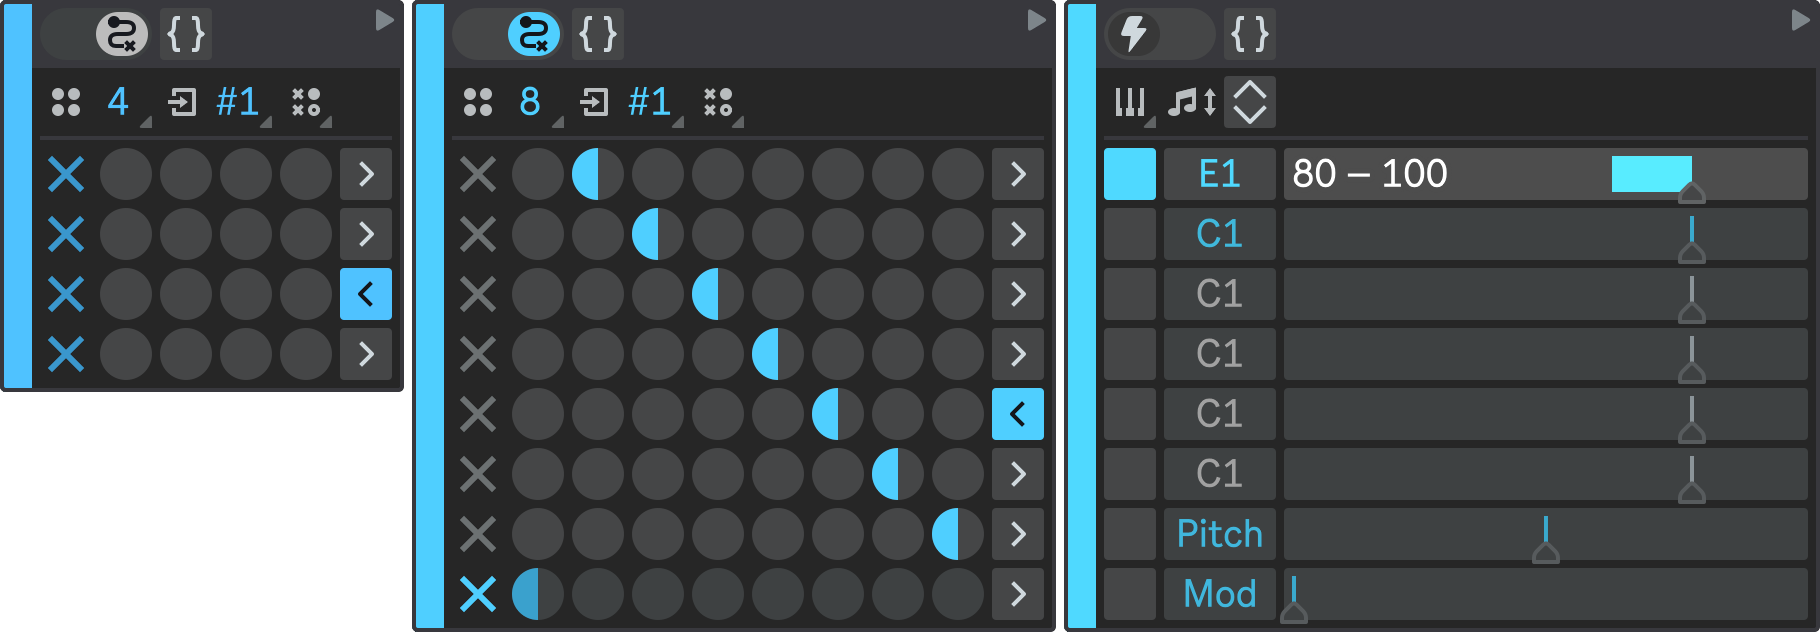
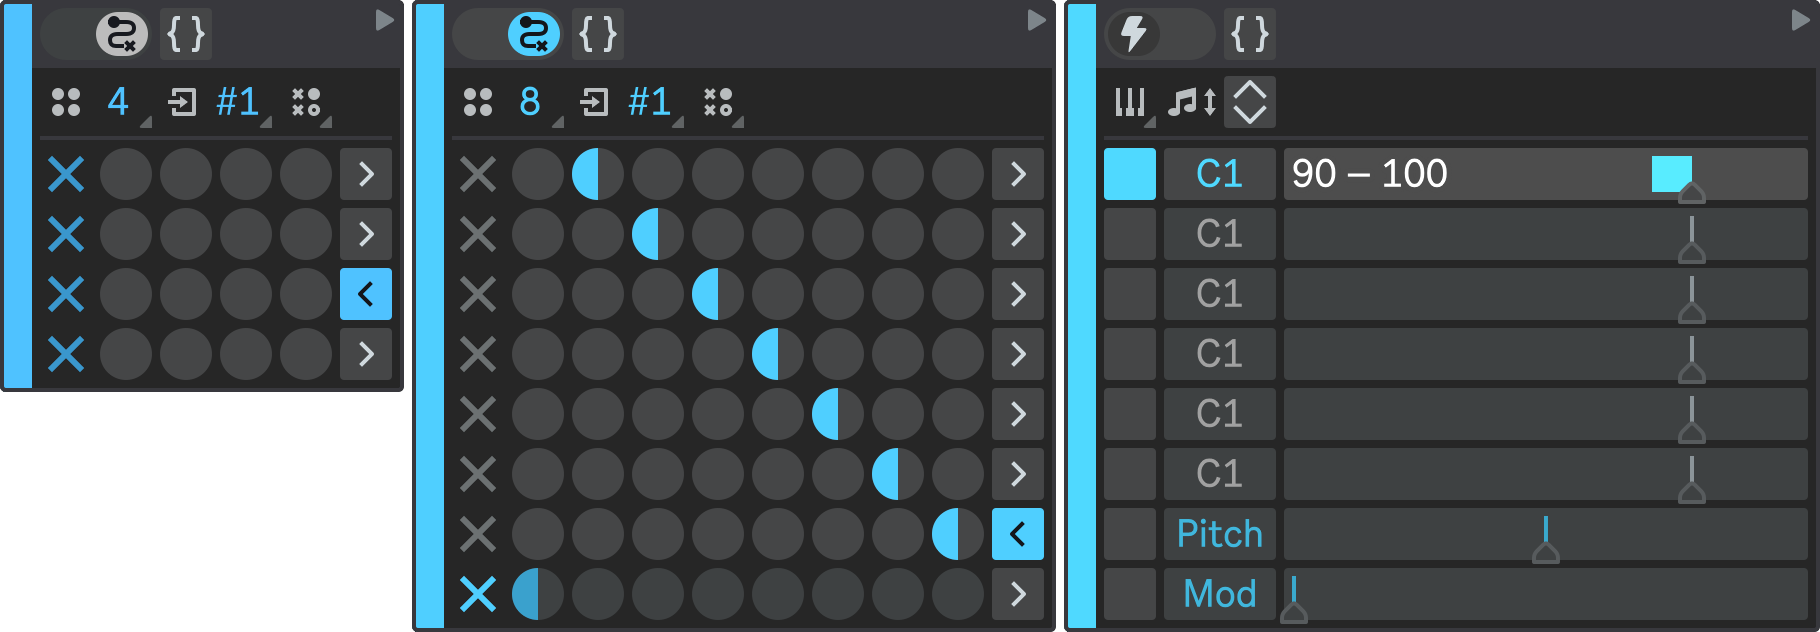
- State 1: A0;
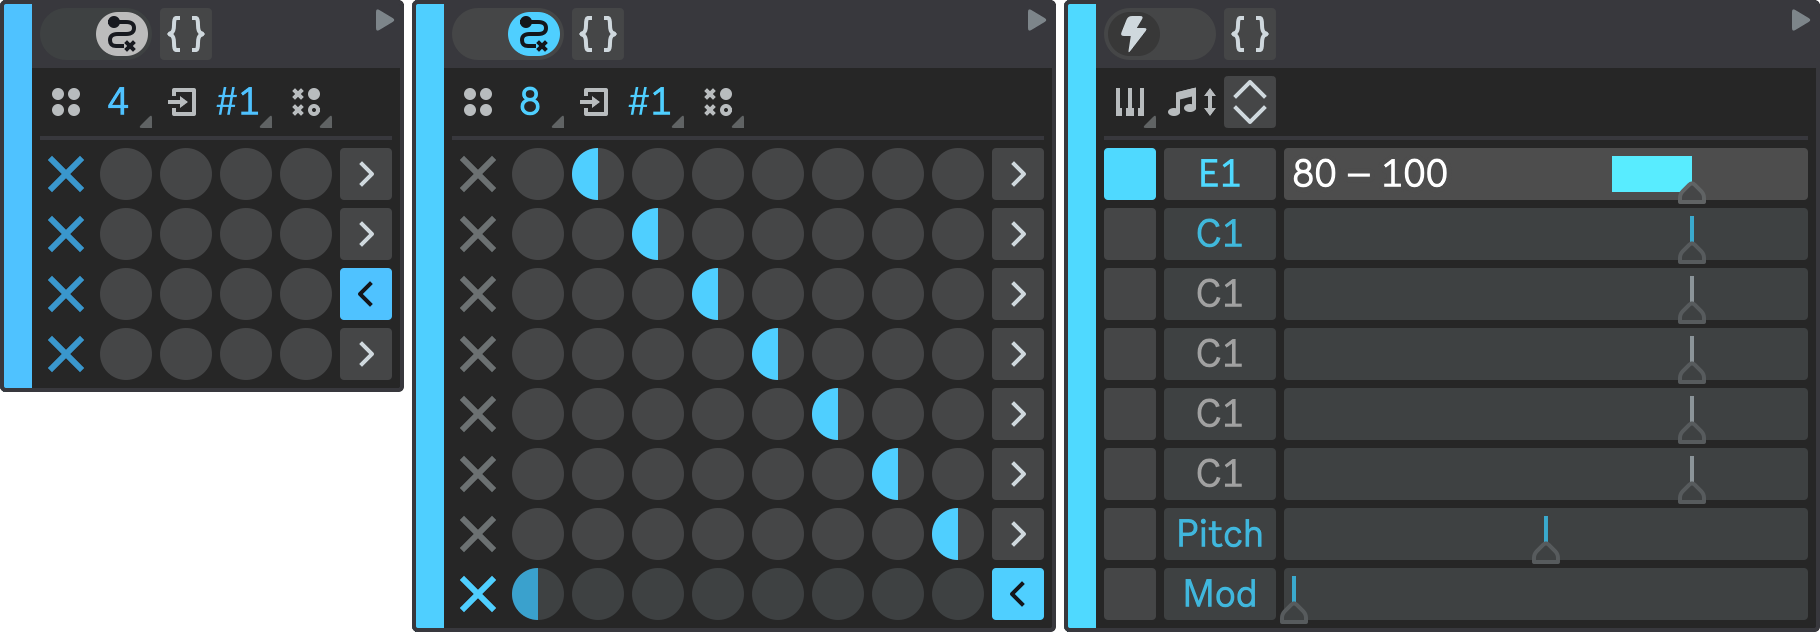
- State 2: E1;
- State 3: empty (all notes deactivated);
- State 4: A0;
- State 5: E1;
- State 6: empty;
- State 7: A0;
- State 8: E1.
You can adjust note velocities as you like.
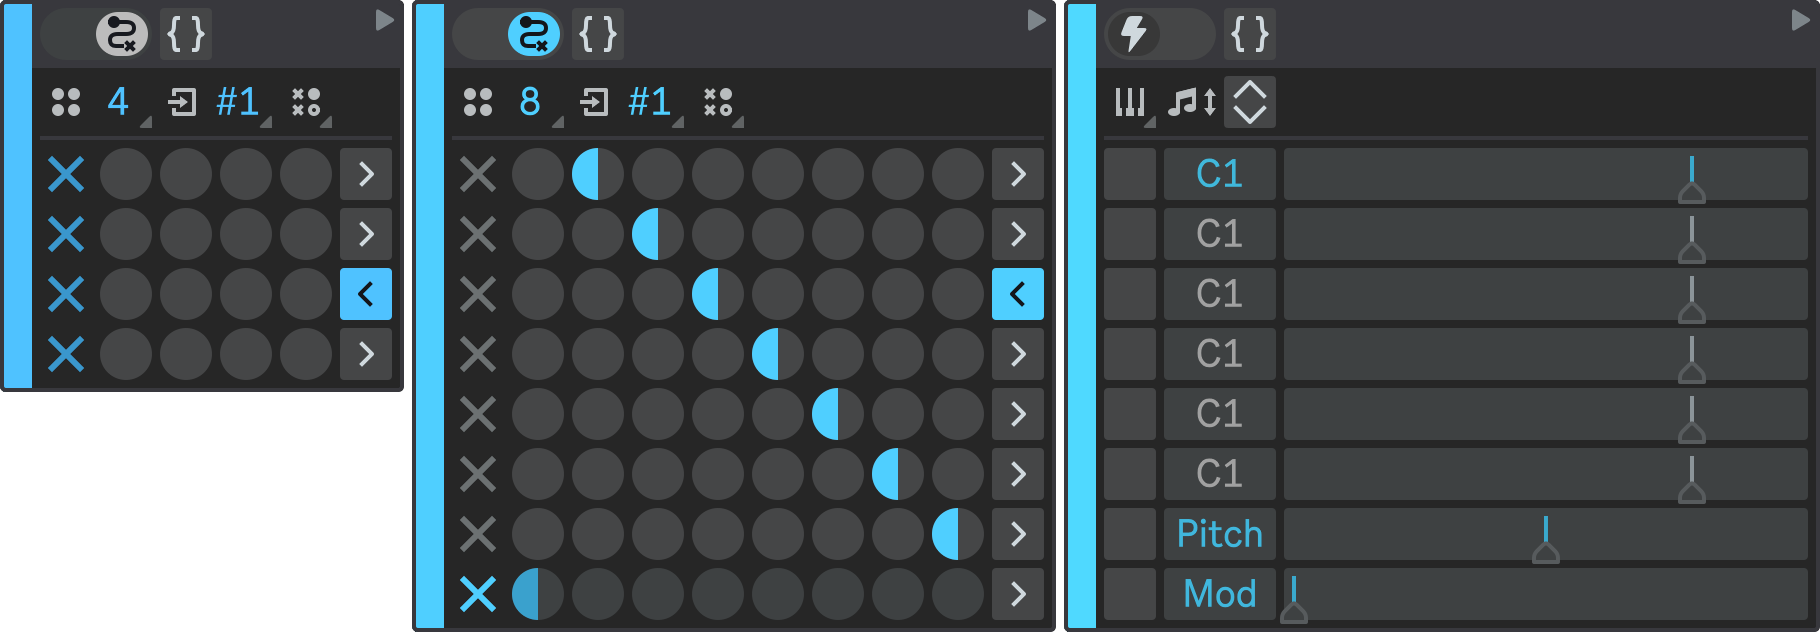
Then, configure the State Transition Matrix in a linear way: the first state is followed by the second one, the second by the third one and so on. For the last state, do not configure any state transitions to make it the final state.
- State 1
- State 2
- State 3
- State 4
- State 5
- State 6
- State 7
- State 8
State Transition Matrix Pattern Selector
Instead of manually adjusting the cell values, you can use the Pattern Selector dropdown to quickly populate the State Transition Matrix with the selected pattern.
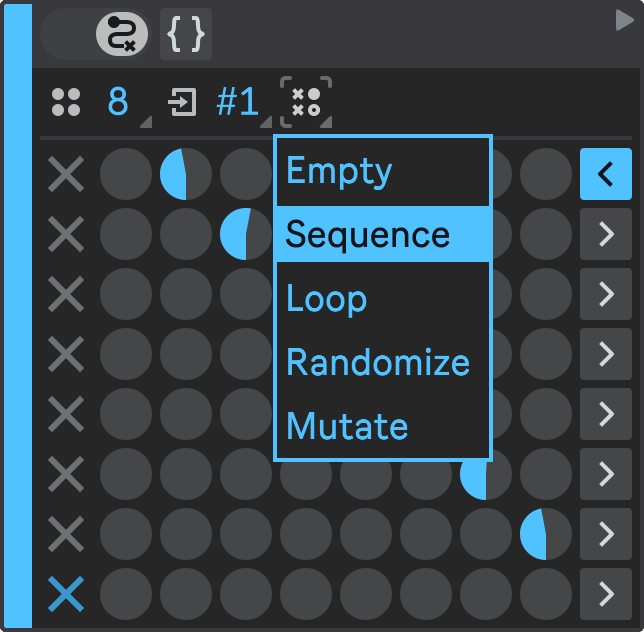
It also lets you completely randomize or slightly mutate the values.
Wrap Feature
We have created a short sequence of notes that sounds nice, but it's not enough to be a melody — it's just a brief phrase. It would work better as a building block for a longer and more interesting melodic pattern.
We could make this state machine into a sub-state of another state machine that also defines other melodic phrases and combines them together to form a complete melody. This way, the phrase we created could be integrated into a more complex musical structure.
The Wrap button (  ) allows you to do exactly that. When you click it, a new container state machine is created on top of the wrapped state, and the wrapped state is moved to be the first sub-state of the new state machine. Then, you can configure the new container state machine and expand your idea further to create a longer and more varied pattern. You can wrap both Trigger and State Machine states.
Click the Wrap button of the P3 root state machine and see what happens.
- Wrap: Before
- Wrap: After
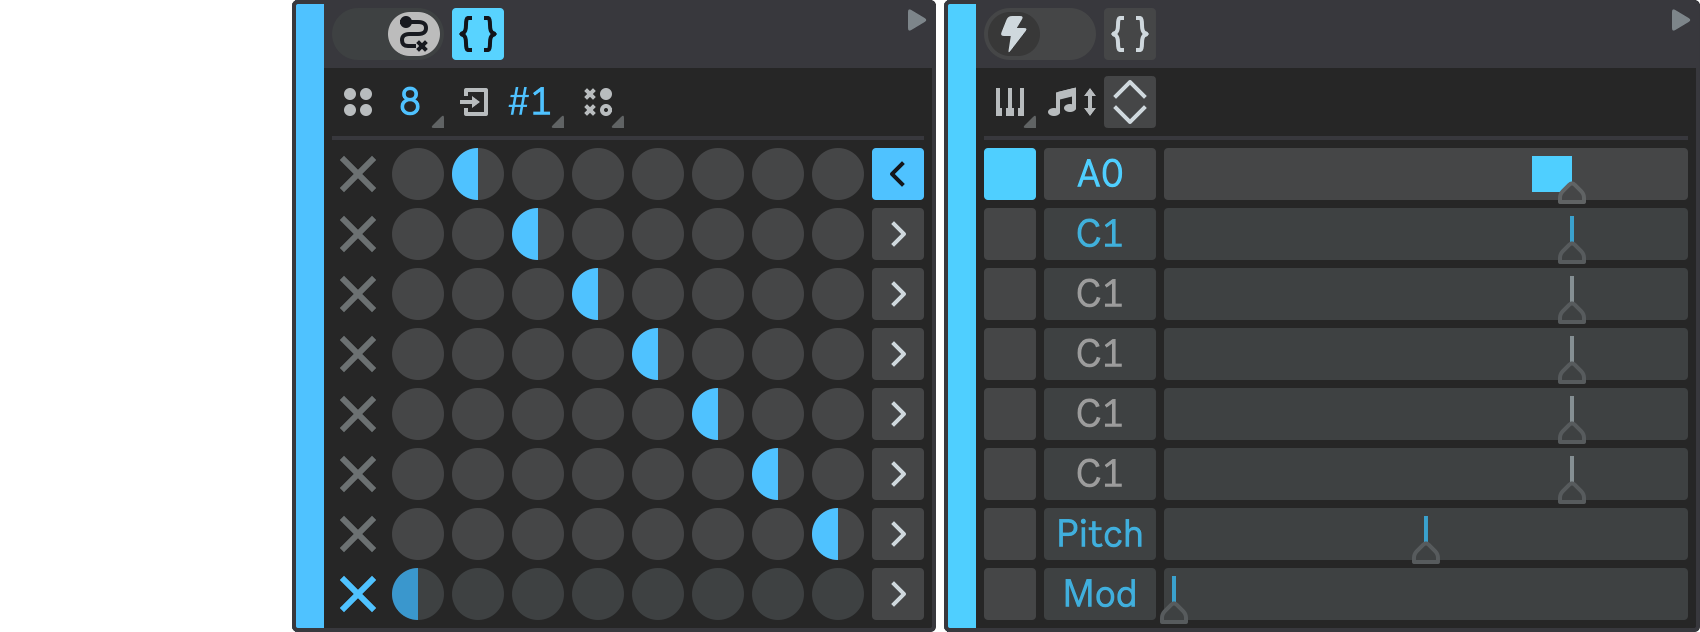
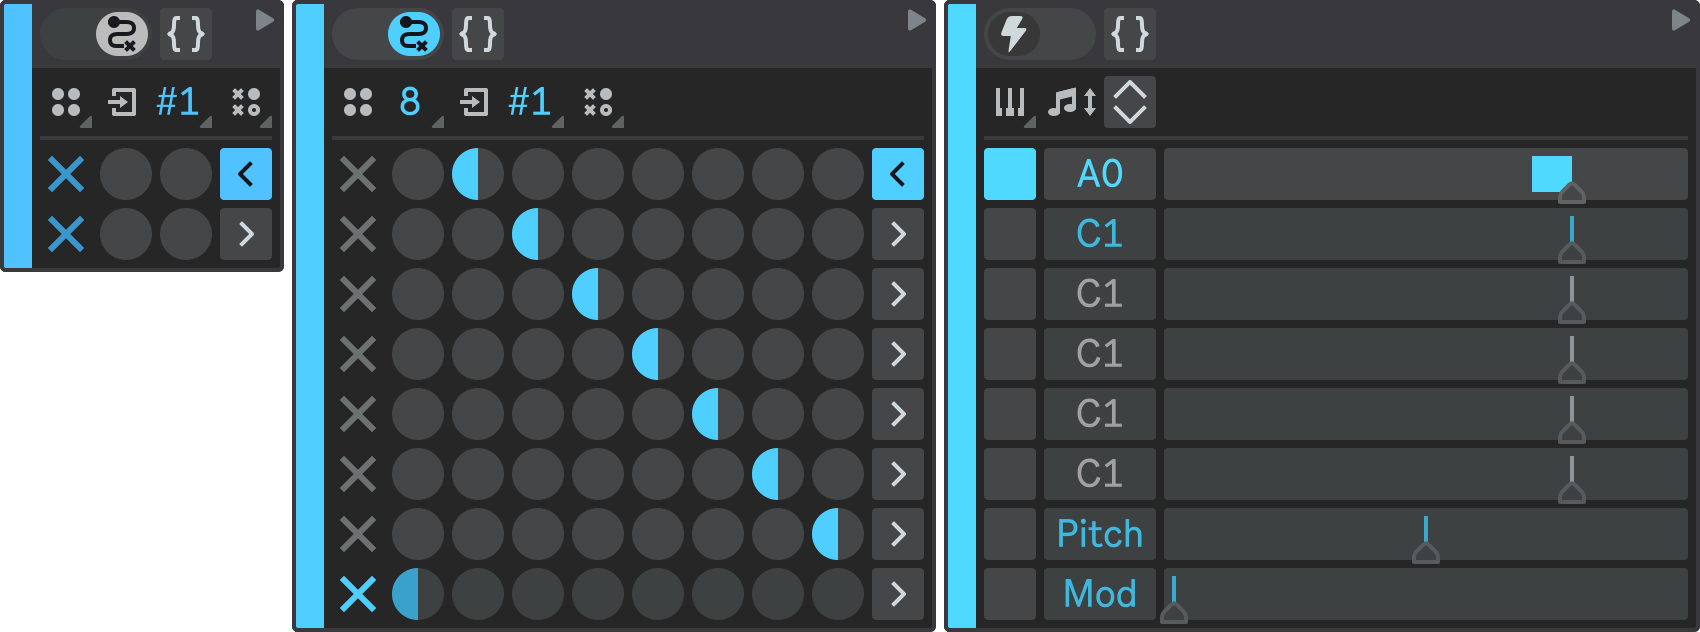
Wrapping lets you abstract the patterns you create and integrate them into bigger patterns. Using the State Type toggle and the Wrap button, you can expand your musical models in both directions: inside and outside.
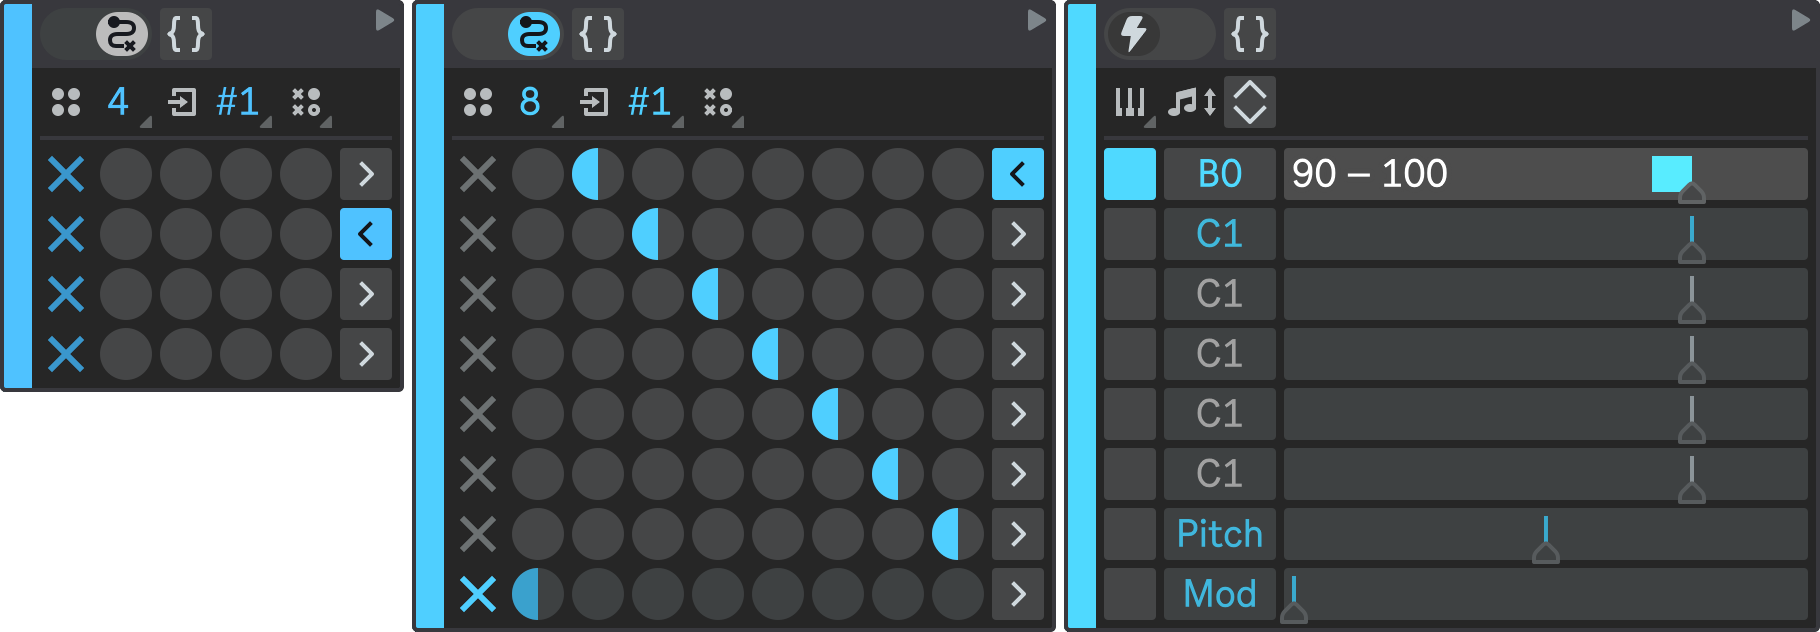
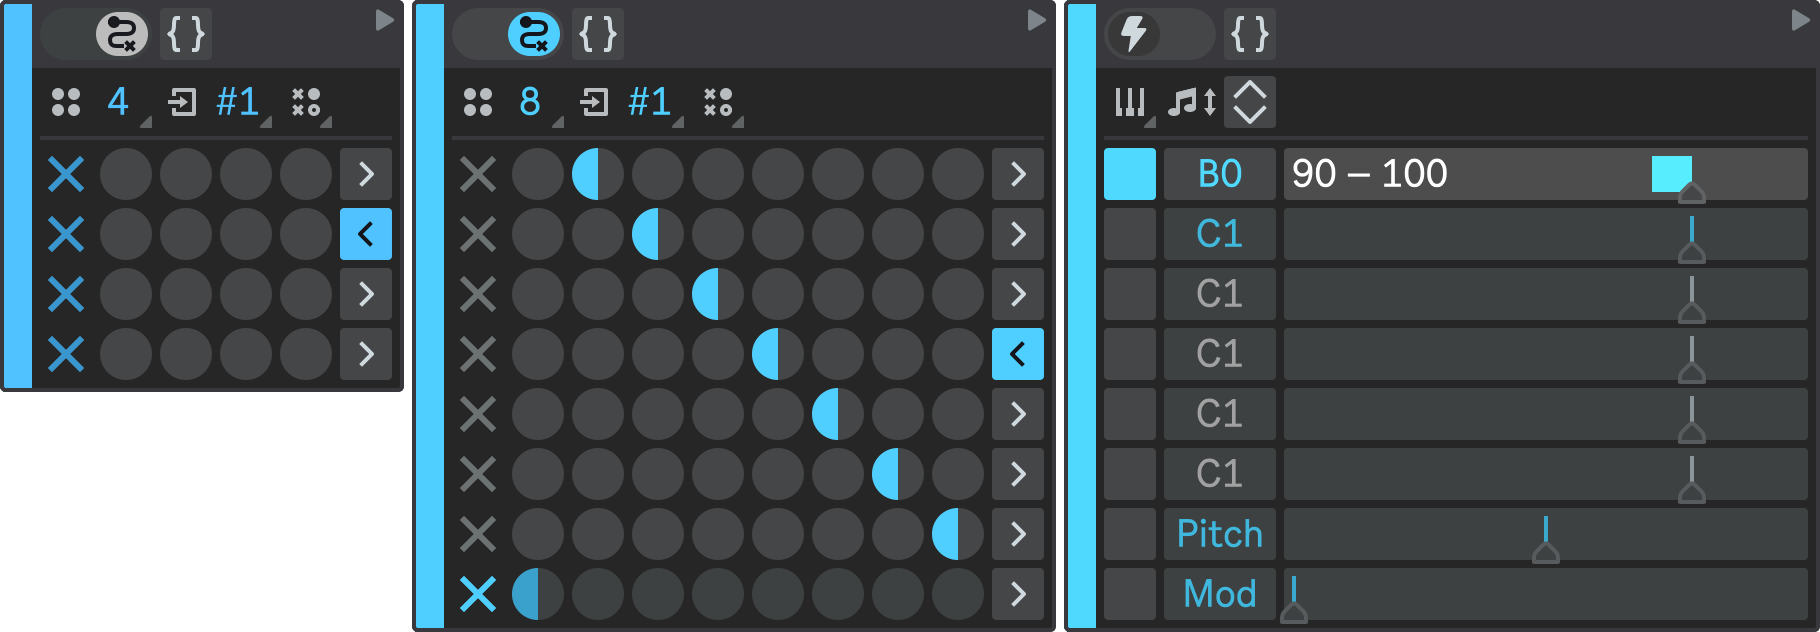
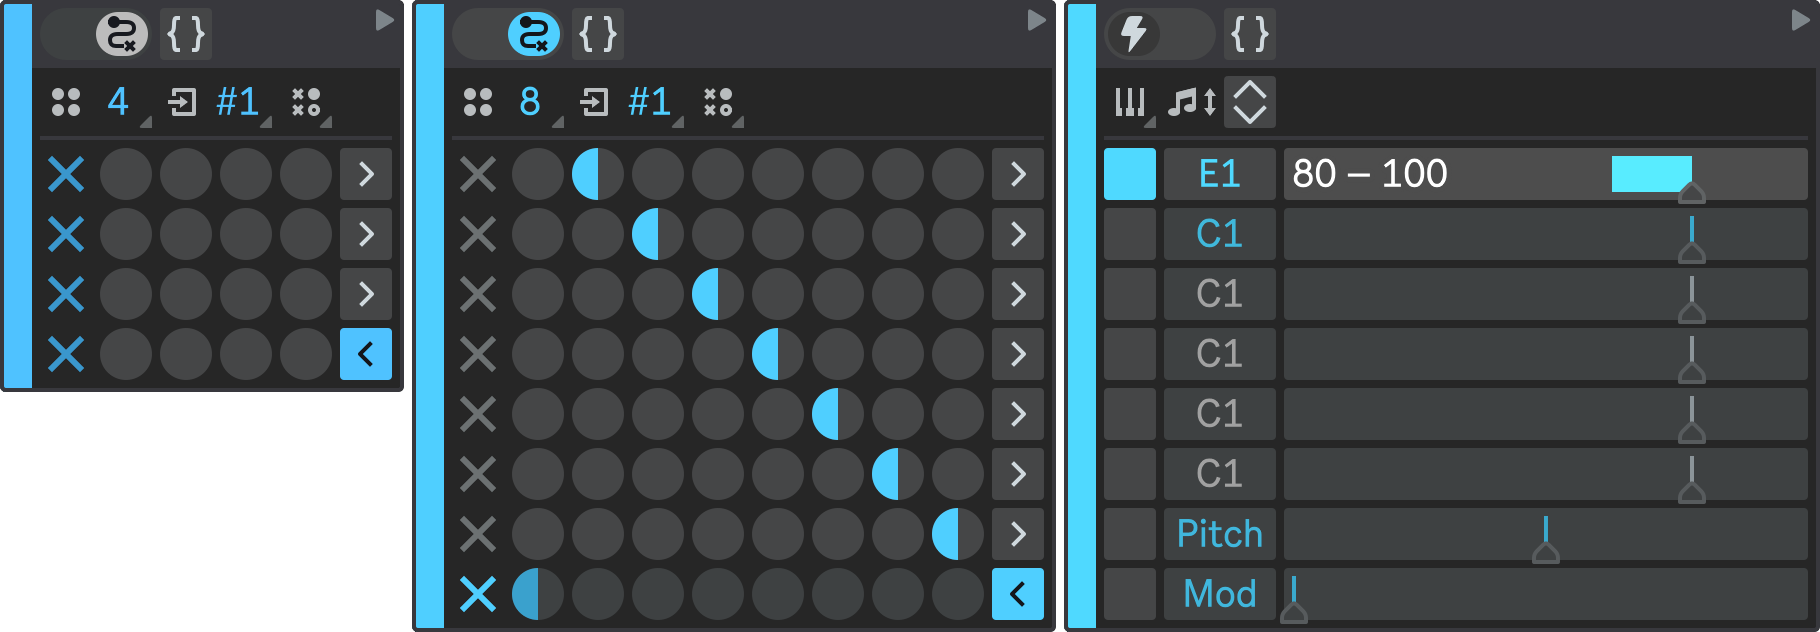
High-Level State 2
Now that we have created a new wrapper state machine on top of the one we configured earlier, we can further expand our pattern to finish the melody.
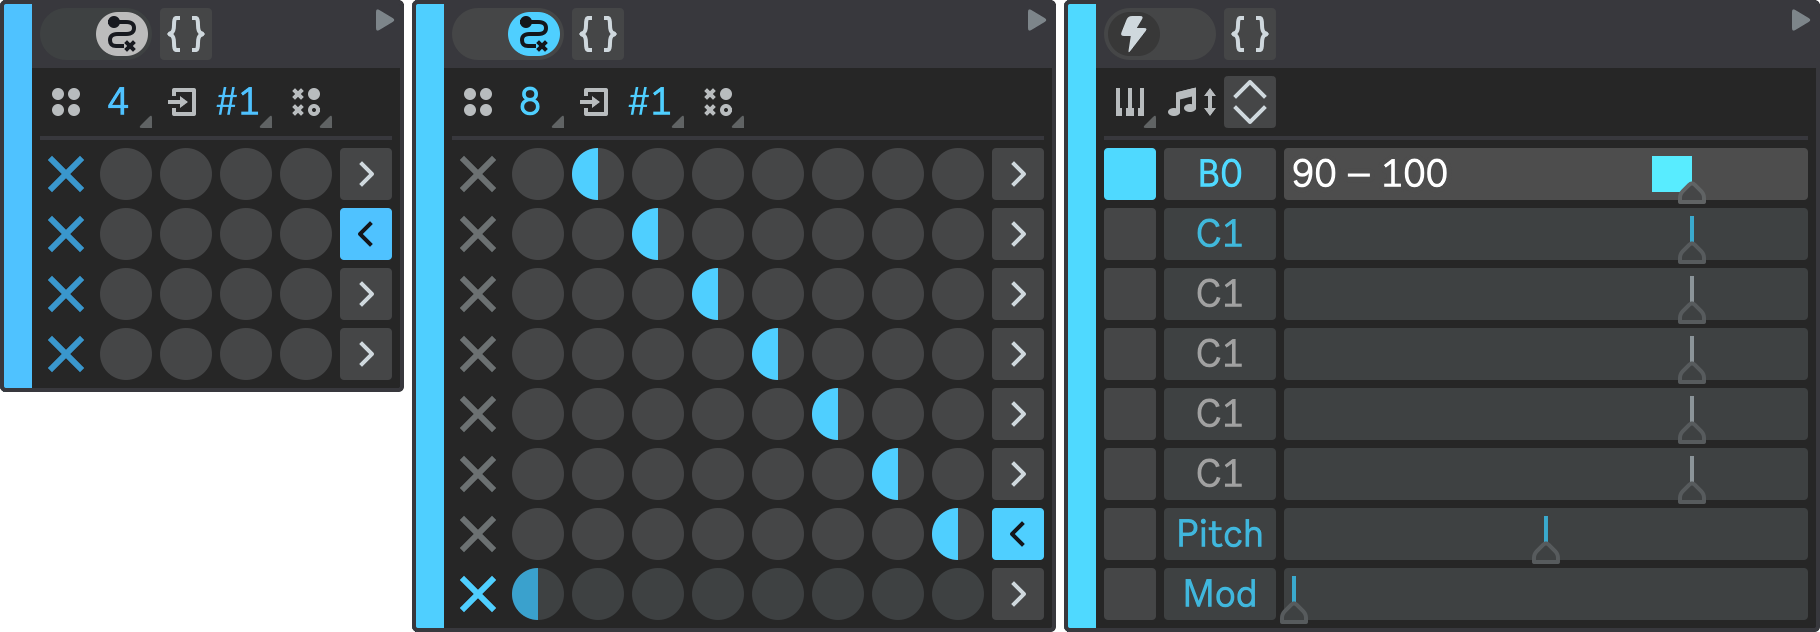
Change States Number of the newly created root state machine to 4 and expand its second state.
Set State 2 type to State Machine to make it a high-level state, and configure it similarly to State 1:
- States Number: 8;
- Sub-State 1: B0;
- Sub-State 2: E1;
- Sub-State 3: empty;
- Sub-State 4: B0;
- Sub-State 5: E1;
- Sub-State 6: empty;
- Sub-State 7: B0;
- Sub-State 8: E1.
Again, you can adjust note velocities to your liking.
Click the Pattern Selector dropdown and select Sequence option to configure the State Transition Matrix to transition in the sequential manner.
Your State 2 should look like this:
- State 2.1
- State 2.2
- State 2.3
- State 2.4
- State 2.5
- State 2.6
- State 2.7
- State 2.8
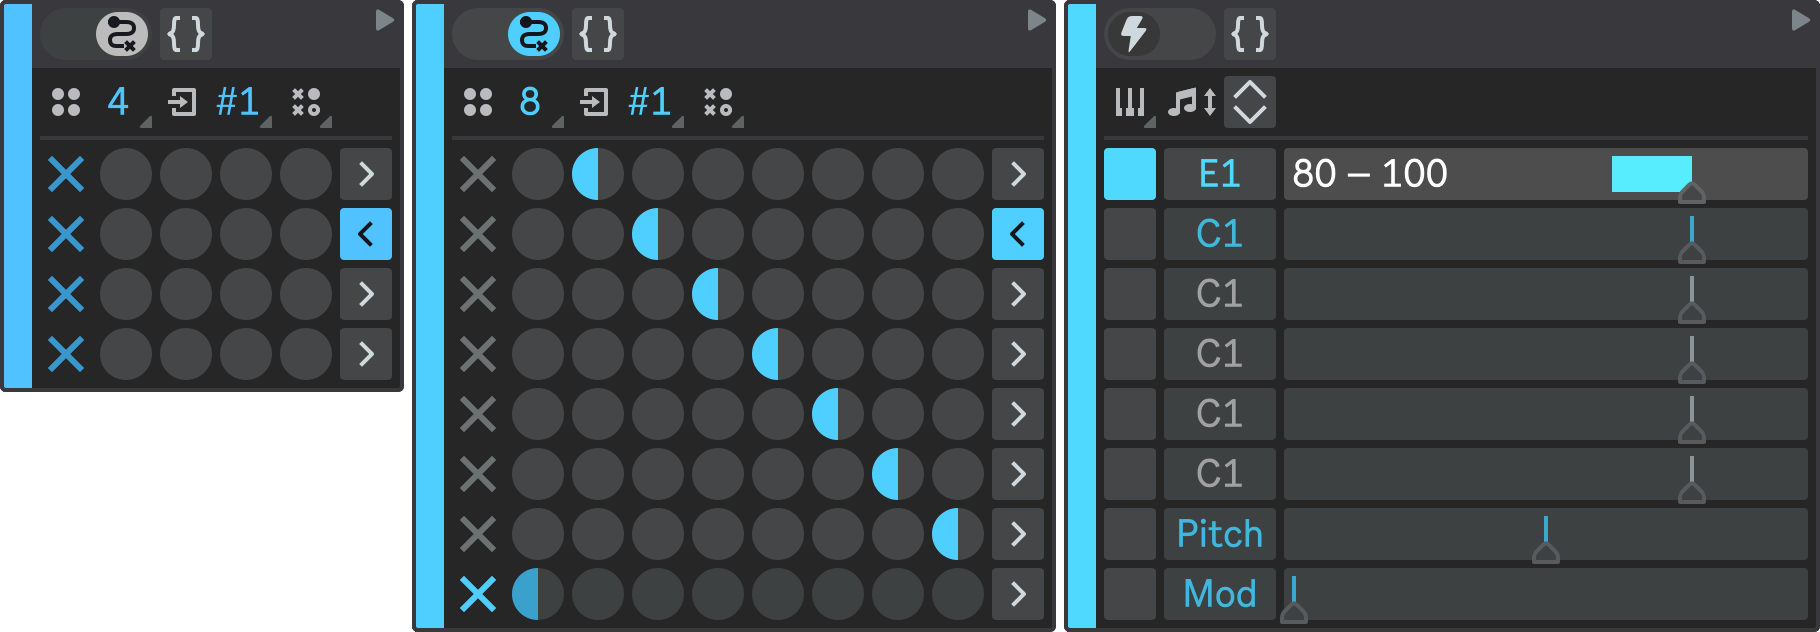

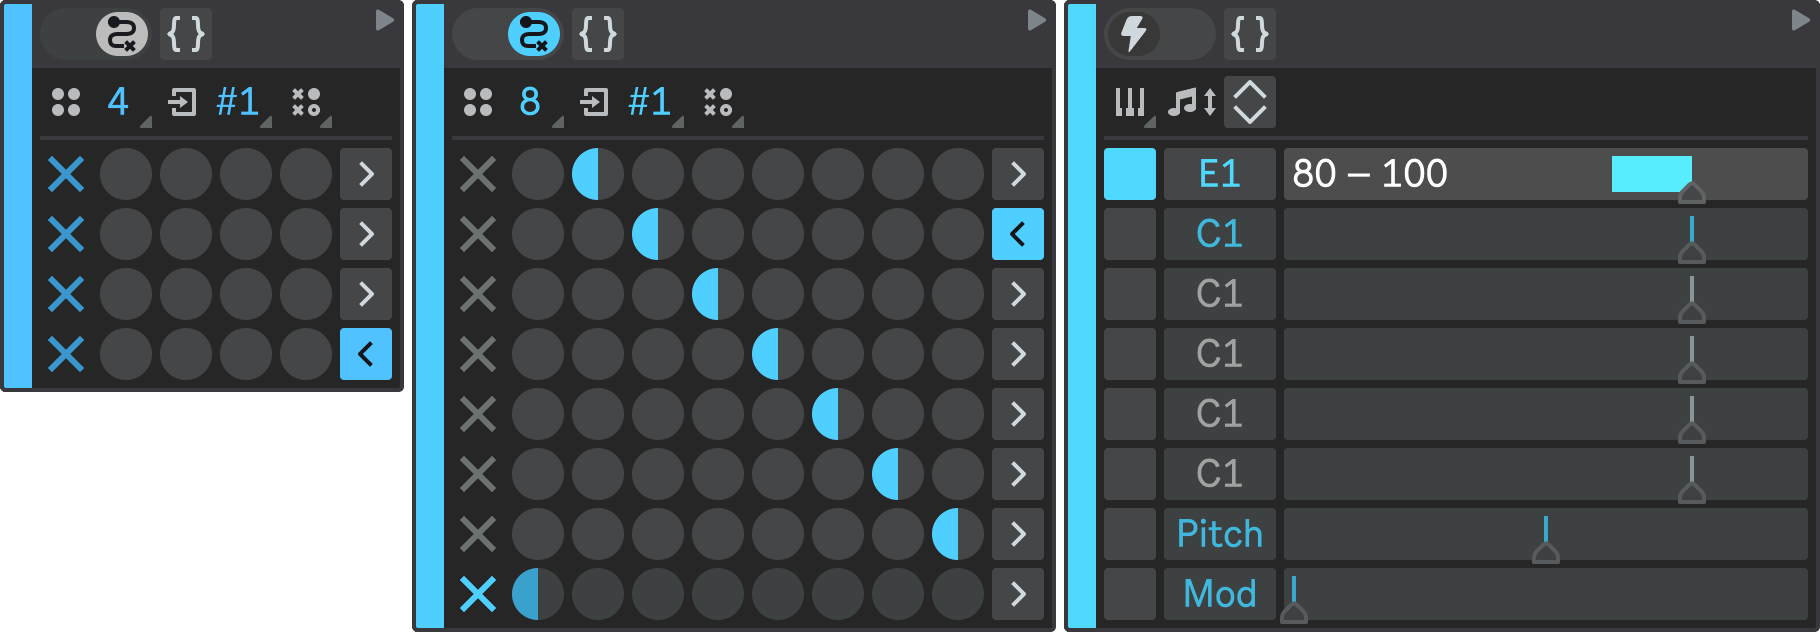
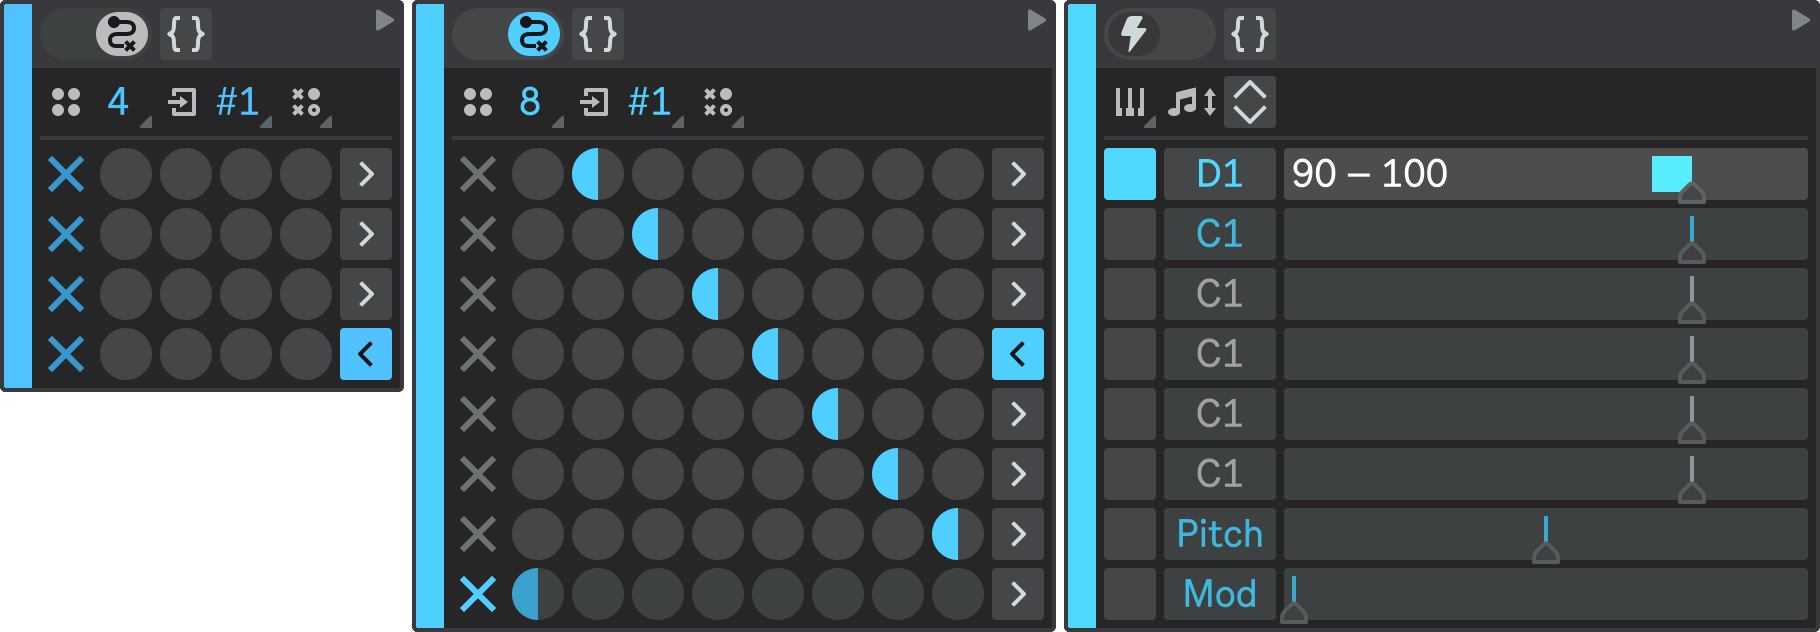
High-Level State 3
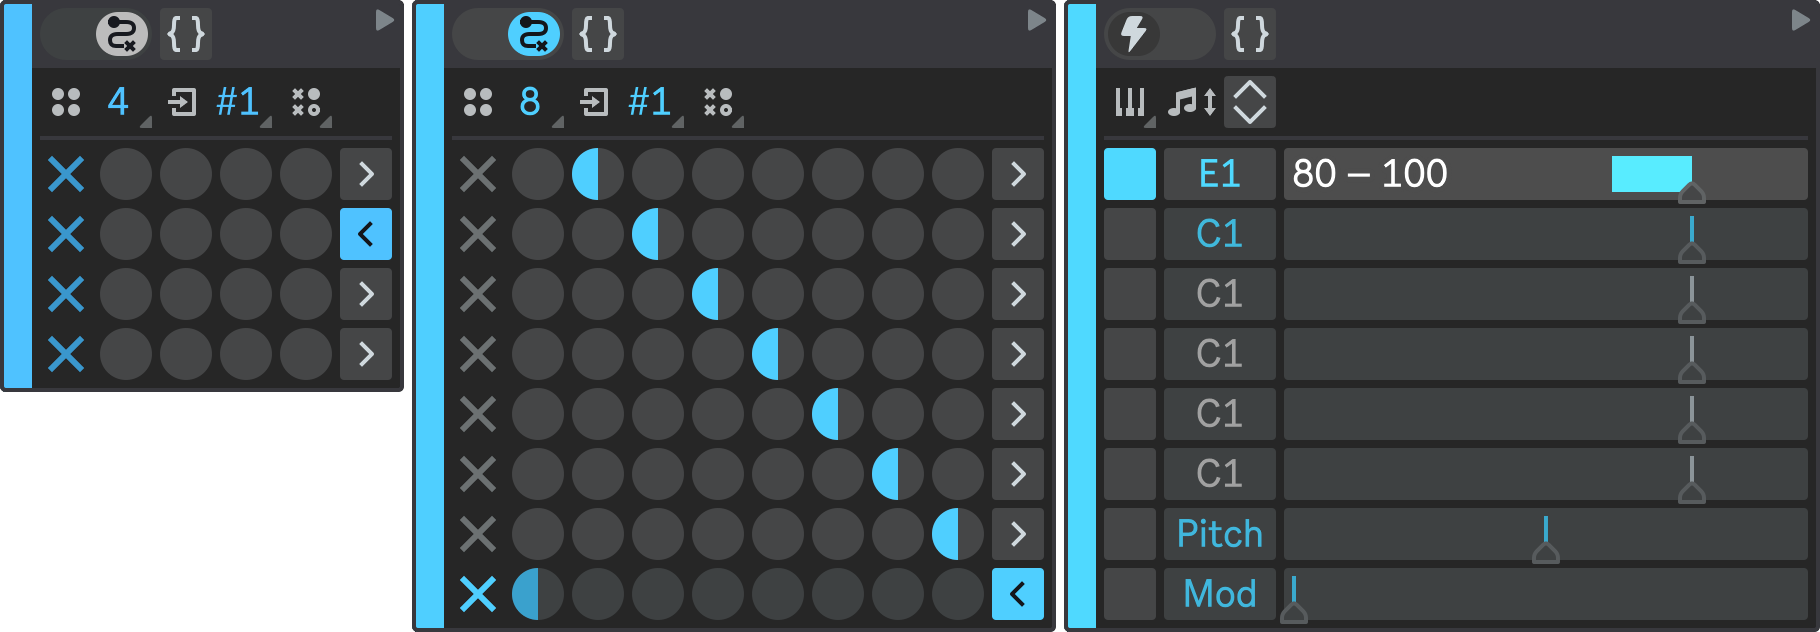
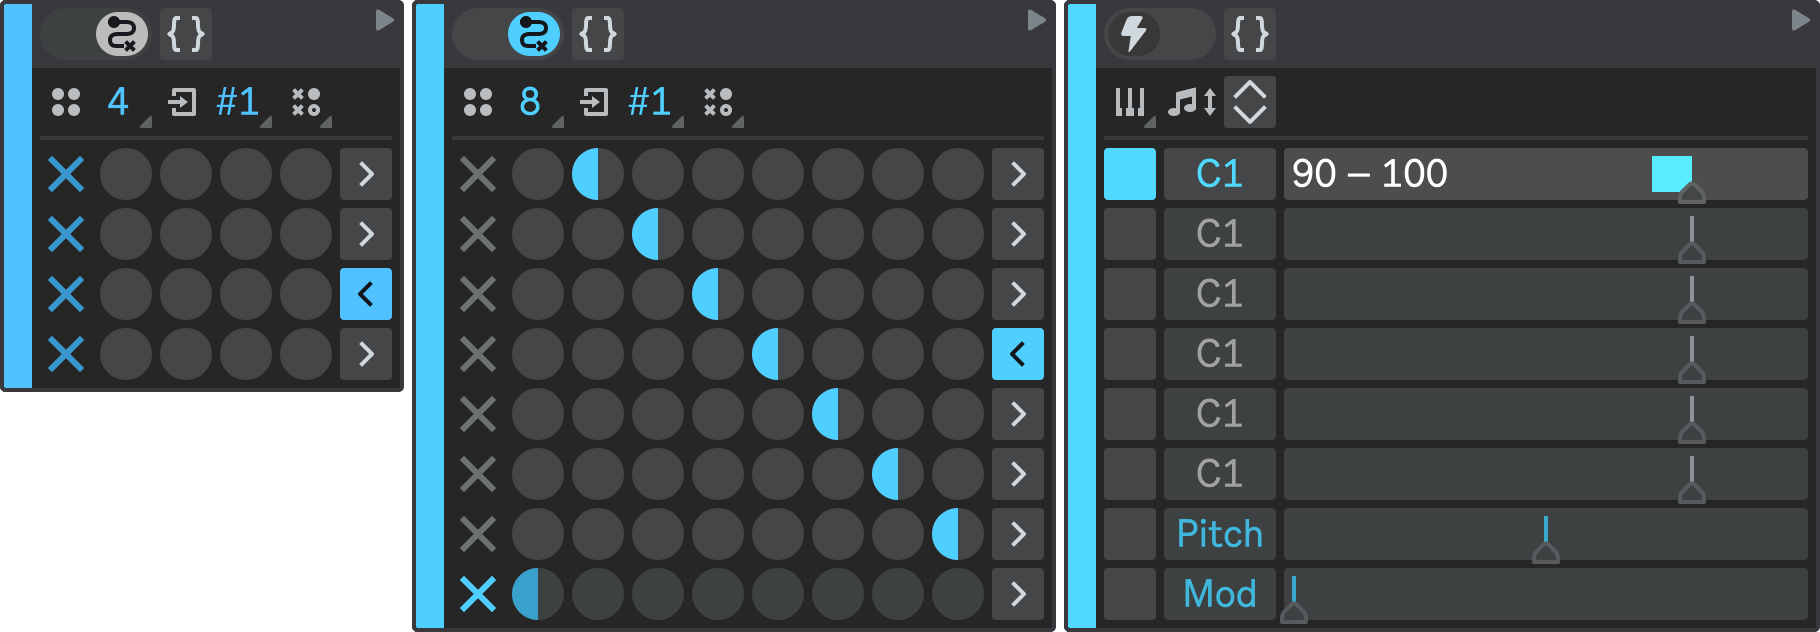
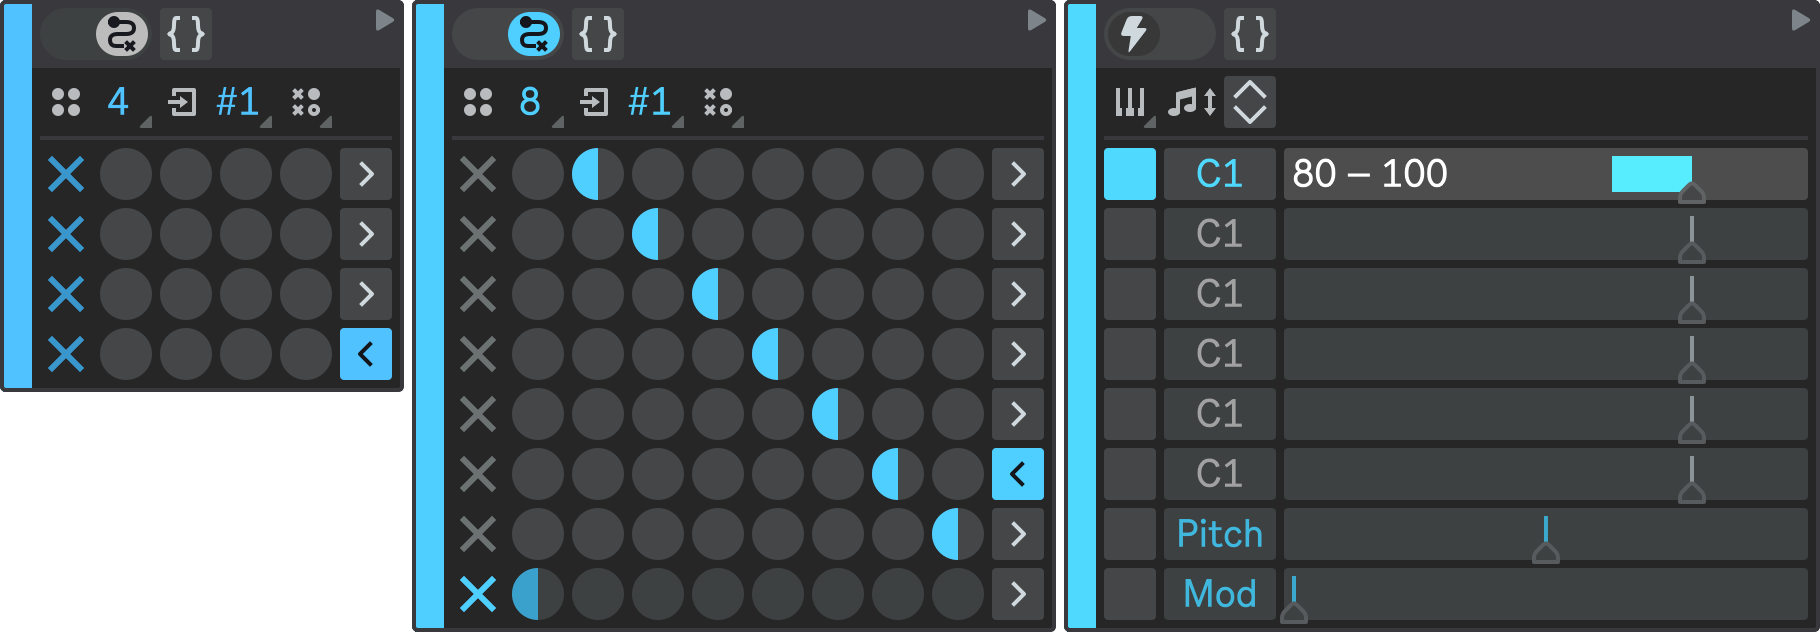
Expand the third state of the root state machine. Again, set its type to State Machine to make it a high-level state, and configure it similarly to State 1 and State 2:
- States Number: 8;
- State 1: C1;
- State 2: E1;
- State 3: empty;
- State 4: C1;
- State 5: E1;
- State 6: empty;
- State 7: C1;
- State 8: E1.
Again, you can adjust note velocities to your liking.
Click the Pattern Selector dropdown and select Sequence option to configure the State Transition Matrix to transition in the sequential manner.
Your State 3 should look like this:
- State 3.1
- State 3.2
- State 3.3
- State 3.4
- State 3.5
- State 3.6
- State 3.7
- State 3.8
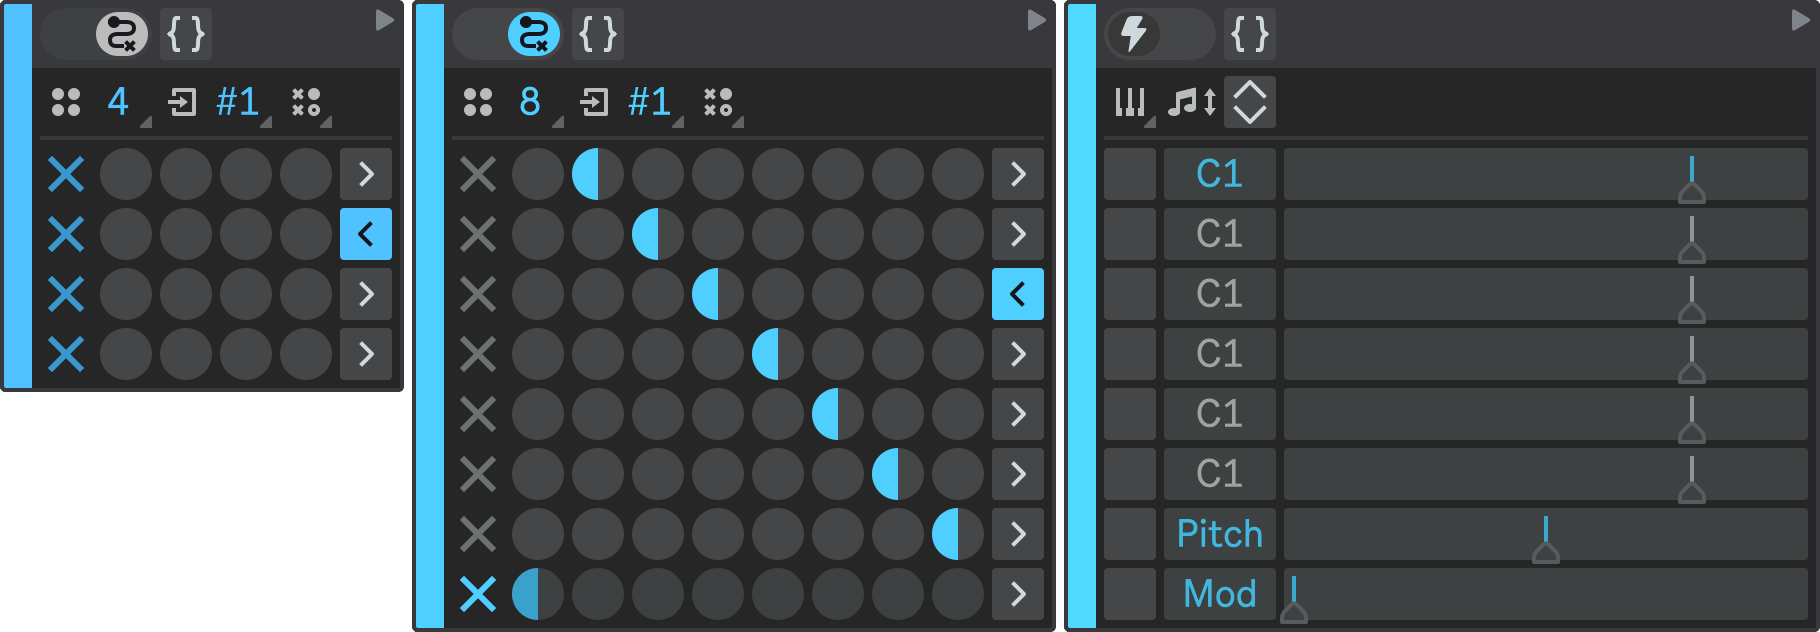
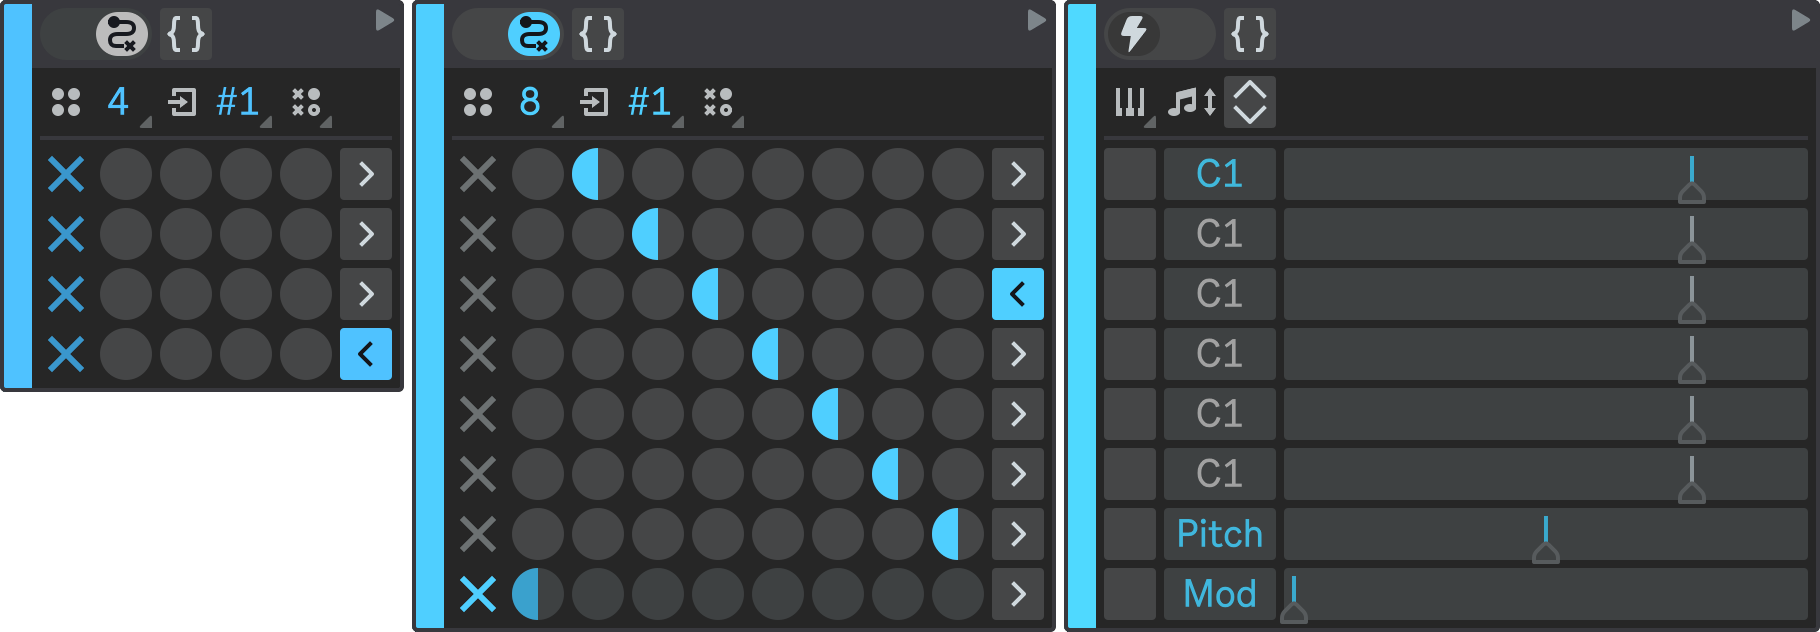
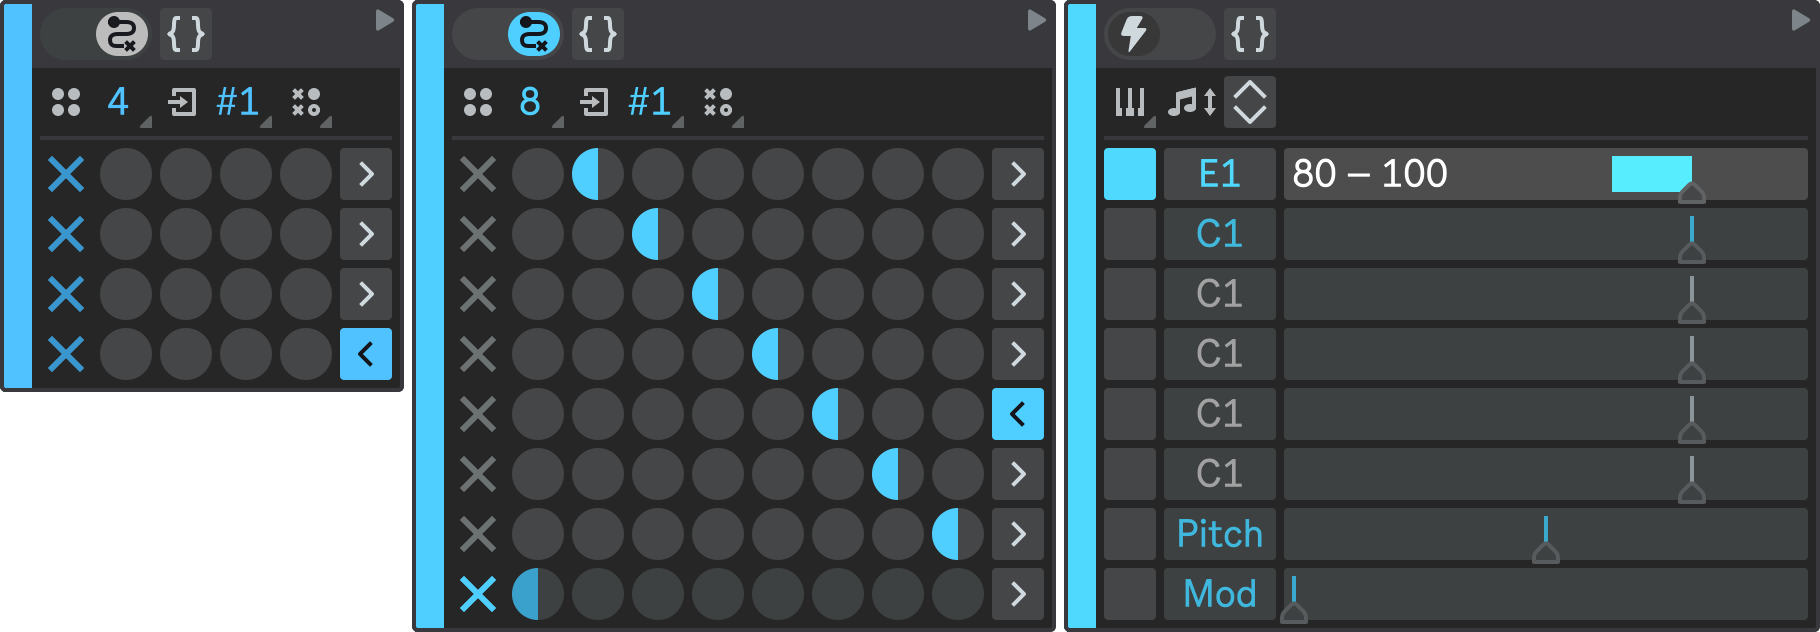
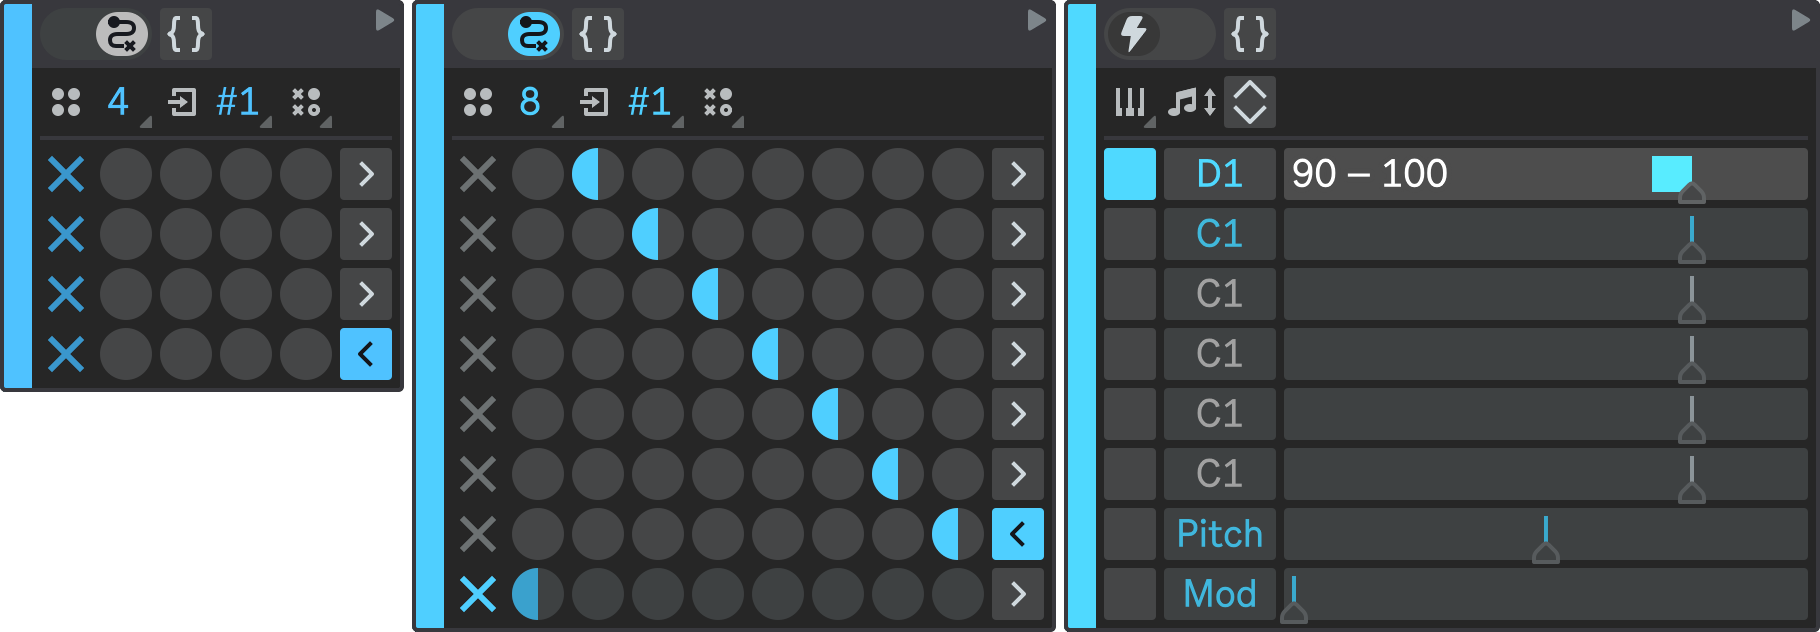
High-Level State 4
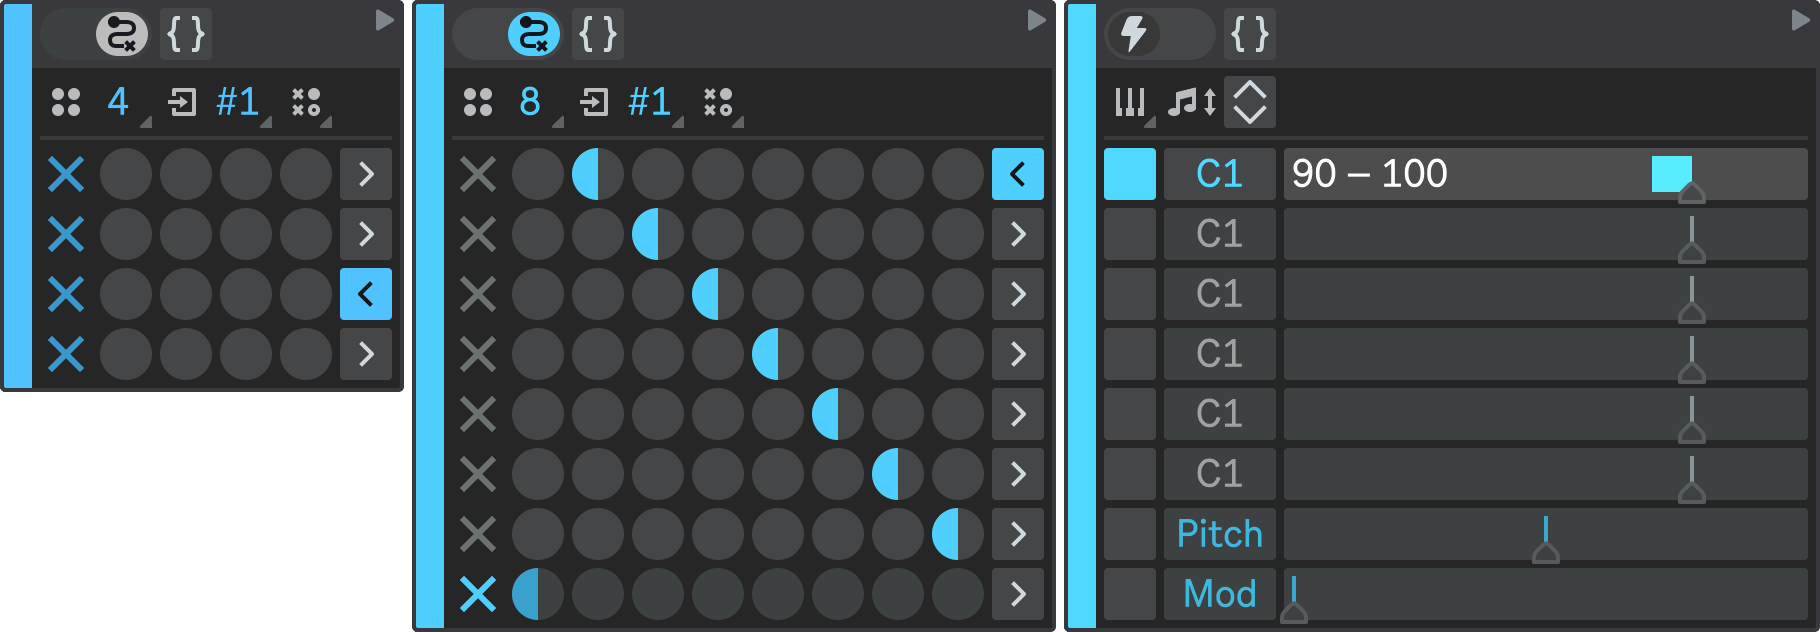
Finally, expand the fourth state of the root state machine. Again, set its type to State Machine to make it a high-level state, and configure it similarly to the previous states:
- States Number: 8;
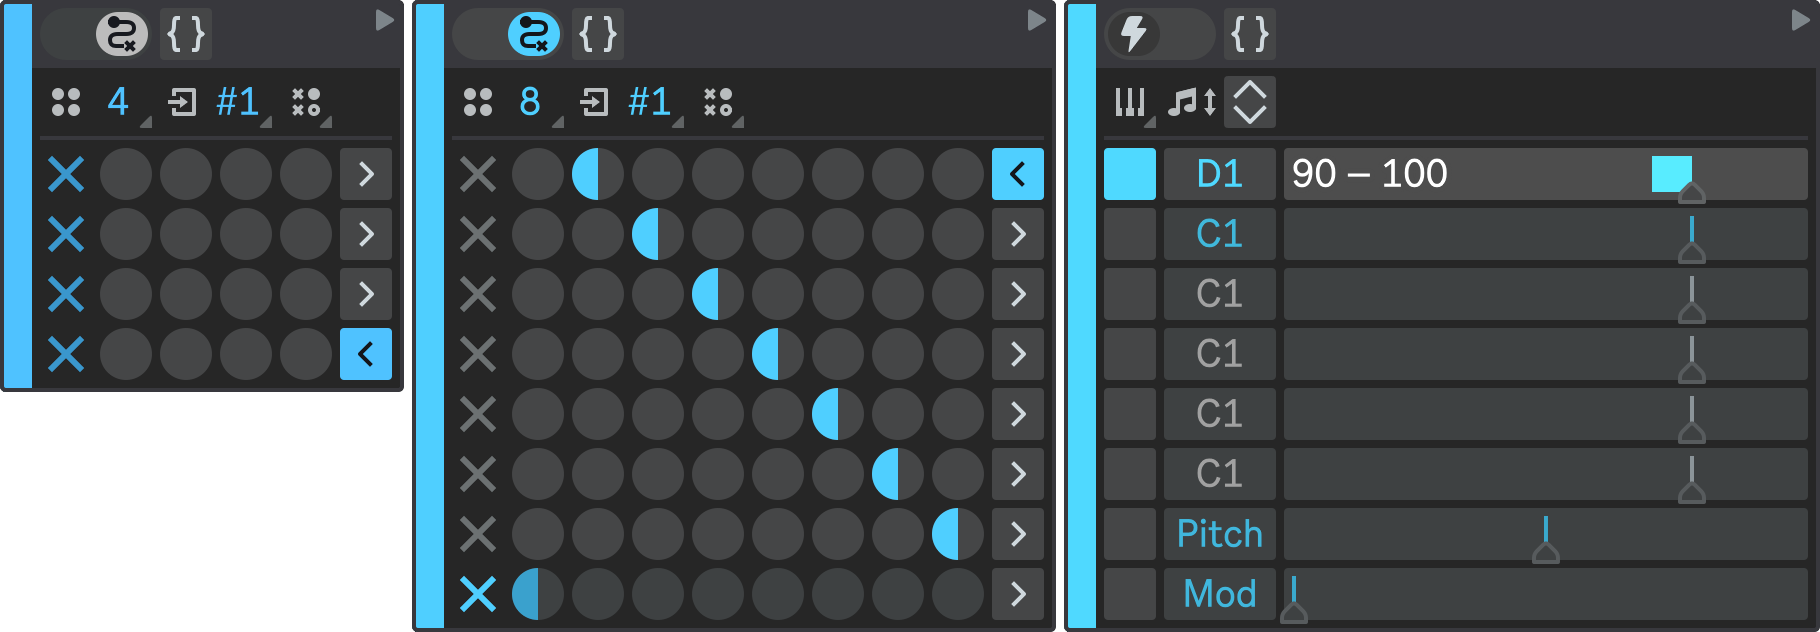
- State 1: D1;
- State 2: E1;
- State 3: empty;
- State 4: D1;
- State 5: E1;
- State 6: C1;
- State 6: D1;
- State 7: E1.
Again, you can adjust note velocities to your liking.
Click the Pattern Selector dropdown and select Sequence option to configure the State Transition Matrix to transition in the sequential manner.
Your State 4 should look like this:
- State 4.1
- State 4.2
- State 4.3
- State 4.4
- State 4.5
- State 4.6
- State 4.7
- State 4.8
Root State Transition Matrix
Next, you just need to configure the State Transition Matrix of the root state machine.
Configure it in the way that each state can be followed either by the next state, or by the previous state:
Result
Hit Play in Ableton Live to hear all three sequencer parts playing together.
Notice that each phrase of the melody is played in a linear way from the first state to the last, but the transitions between phrases are non-linear: each phrase can lead to either the previous or the next phrase. This contrasts with the previous part, where each arpeggio plays its notes in an irregular way, but always moves to another arpeggio when it finishes. This lets you mix different levels of predictability and randomness to achieve interesting musical results.