Installation Guide
This guide will show you how to install Orthogonal devices in Ableton Live.
Download the device
To get started, you will need to download the Orthogonal-Device-v*.zip file from your Orthogonal purchase via Gumroad. You should have also received a link to download the file in your email after completing the purchase.
Prepare User Library Folder
Next, you will need to create a folder for the device in your User Library in Ableton Live. The User Library is where you can store and access your own devices, presets, clips, and more.
To create the folder, follow these steps:
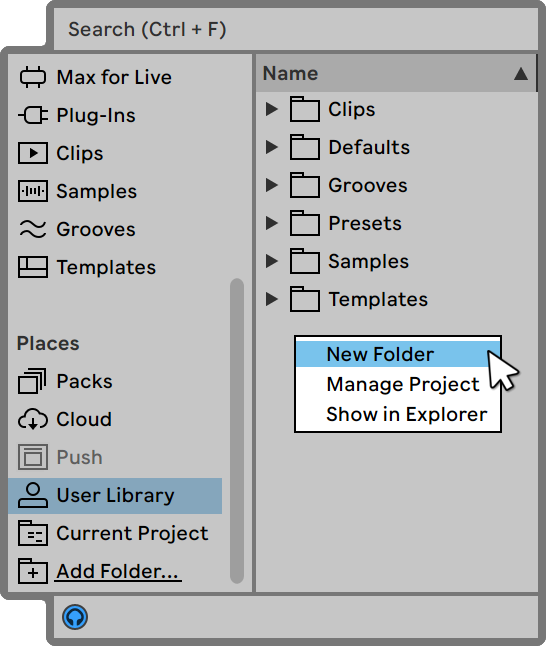
- In Ableton Live's Browser, navigate to the User Library folder. It should be located under Places on the left side of the screen.
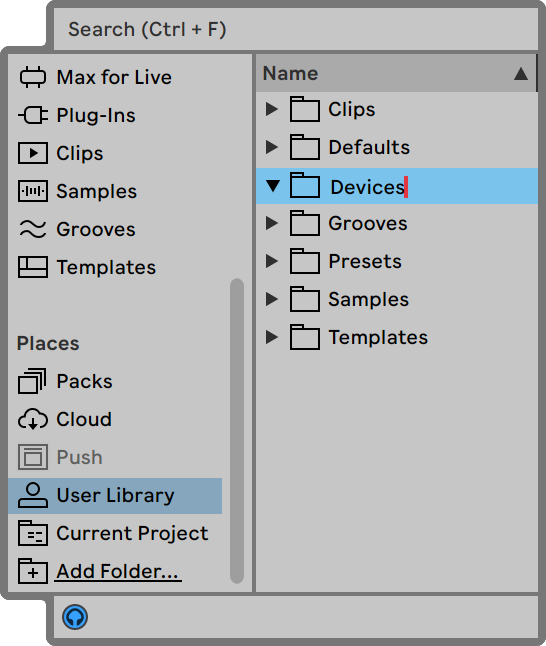
- Right-click inside the User Library folder and select New Folder. Name the folder Devices.
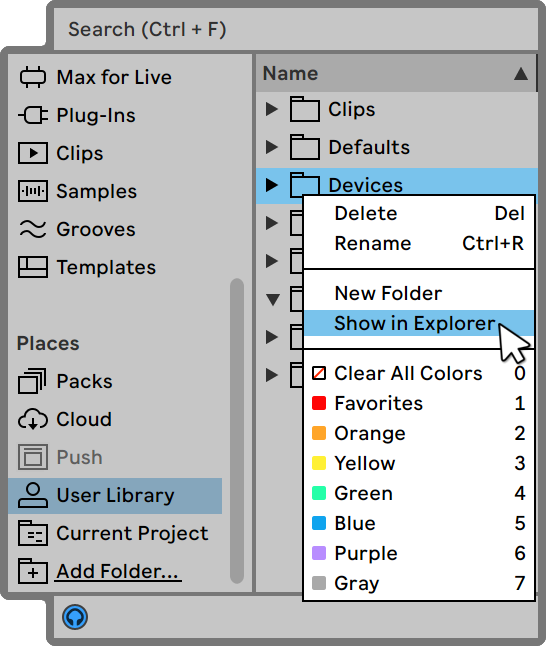
- Right-click the Devices folder and select Show in Explorer (Windows) or Show in Finder (Mac) depending on your operating system. This will open the folder in your file manager.
Copy Contents
Next, open the zipped Orthogonal-Device-v*.zip folder and copy its contents to the Devices folder you just created.
- Locate the zipped Orthogonal-Device-v*.zip folder on your computer;
- Double-click on it to open it and see the contents;
- Inside the zipped folder, you will see a folder named after the device;
- Drag and drop the device folder to the Devices folder in your file manager.

Device will appear in your User Library in Ableton Live.
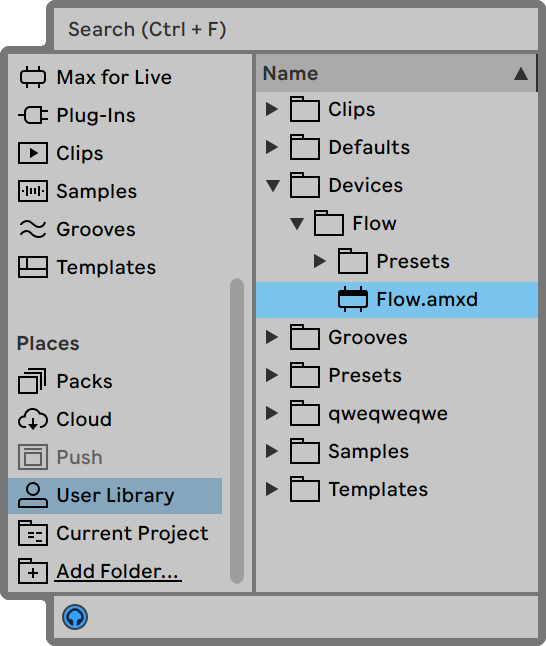
You have successfully installed the device to your User Library in Ableton Live. Now you're ready to use it and explore its features!