Part 1: Chord Progression
Now that you have loaded Flow and configured the key zones and synths, you can start creating your musical piece. In this section, you will use the first sequencer part, P1 to generate a simple chord progression.
Part Overview
For the P1 sequencer part, we are going to configure a state machine according to the following diagram:
- Diagram
- Matrix
| F Major 7 | G Major | A minor | |
|---|---|---|---|
| F Major 7 | 80% | 20% | |
| G Major | 20% | 80% | |
| A minor | 100% |
This state machine will generate chords on every whole note, and alternate between them in in a somewhat random way, creating an effect of tension and resolution.
Mixer
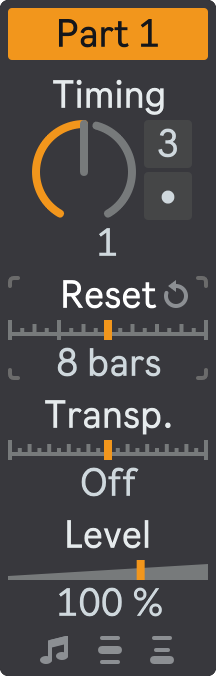
Configure P1 mixer like following:
- Timing: 1 — this will make the state machine transition on every whole note.
Reset Interval
The Reset parameter allows you to force the corresponding state machine to reset at regular intervals. When the state machine resets, it begins playing from its Initial State. This can create more structure and coherence in your generative music: for example, you can configure your chord progression to start from the same chord, then transition freely according to the state transition rules, and reset every few bars to create a sense of repetition or resolution.
Set the Reset parameter to 8 bars.
Your P1 mixer section should look like this:
Sequencer
Next, go to the sequencer configuration section. Open the floating plug-in window and make sure that P1 is selected in the Part Selector.
Configuration
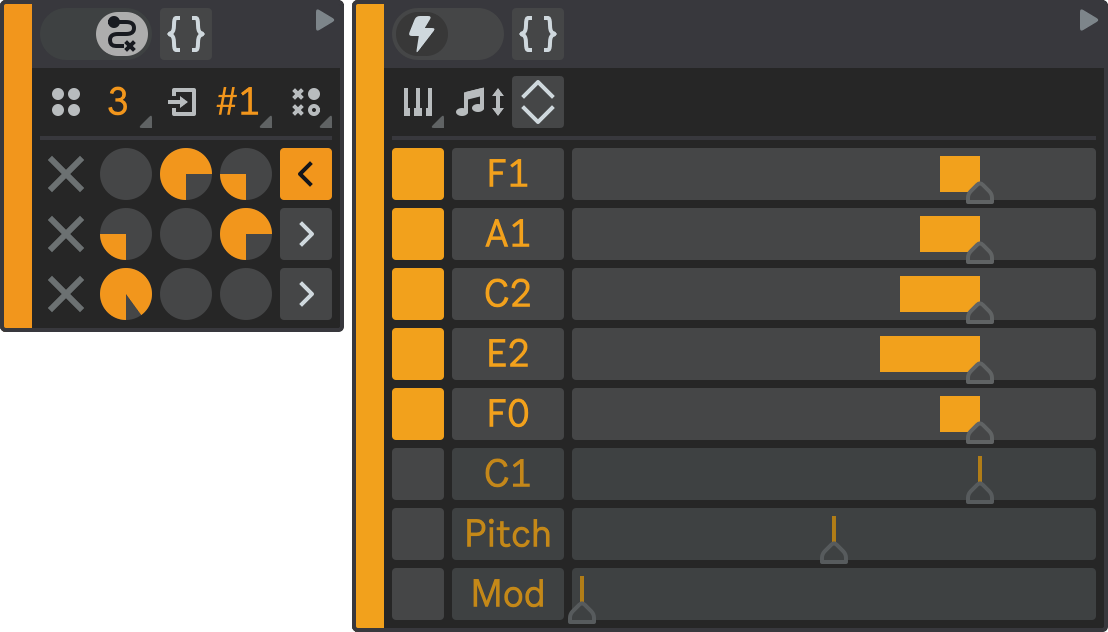
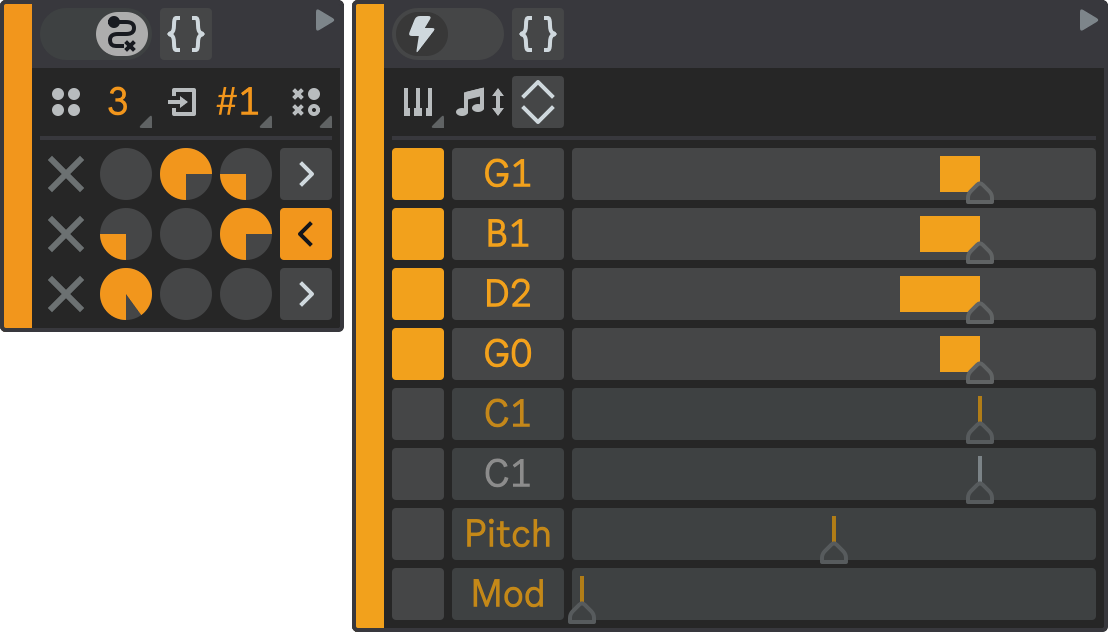
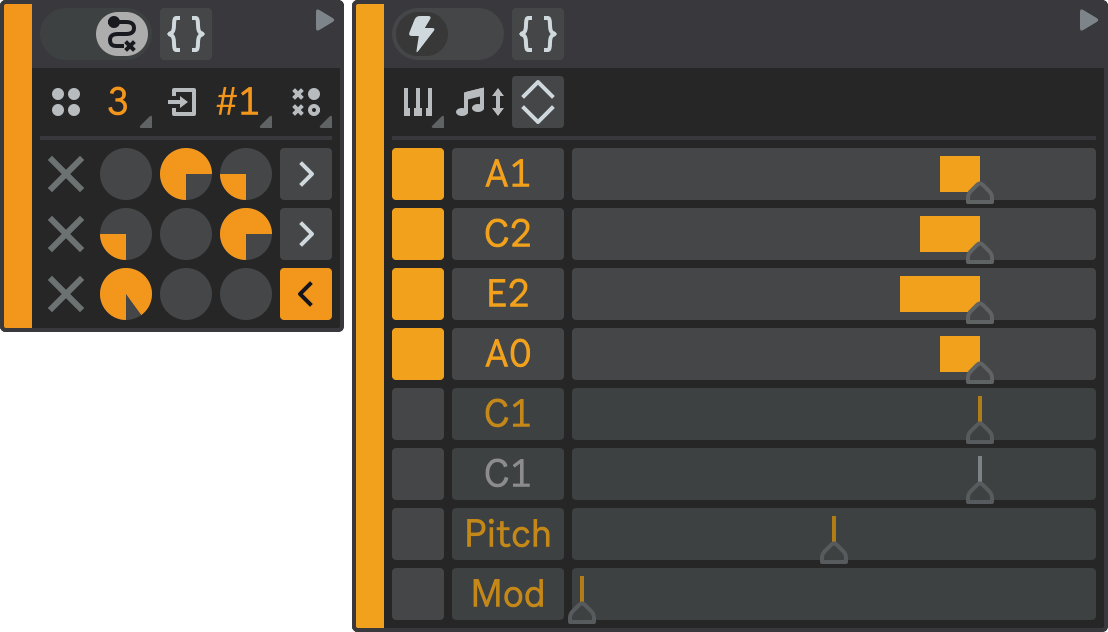
For this sequencer part, we need three states, one for each of three chords. Configure P1 state machine as follows:
- States Number: 3;
- State 1: F Major 7 chord (F1, A1, C2, E2);
- State 2: G Major chord (G1, B1, D2);
- State 3: A minor chord (A1, C2, E2).
Also, for each state add an additional bass note one octave below the chords root note: F0, G0 and A0 correspondingly.
This configuration will result in Synth 1 playing the lower bass notes, and Synth 2 playing the higher chord notes.
For all the chords, you can adjust note velocities to your liking.
To configure the State Transition Matrix, refer to the diagram above. It defines a slightly varied transition rules: the State 1 is followed by State 2 with higher probability, and by the State 3 with lower probability. Similarly, the State 2 followed by State 3 with higher probability, or transitions back to State 1 with lower probability. State 3 always transitions to State 1.
Your state machine configuration should look like this:
- State 1
- State 2
- State 3
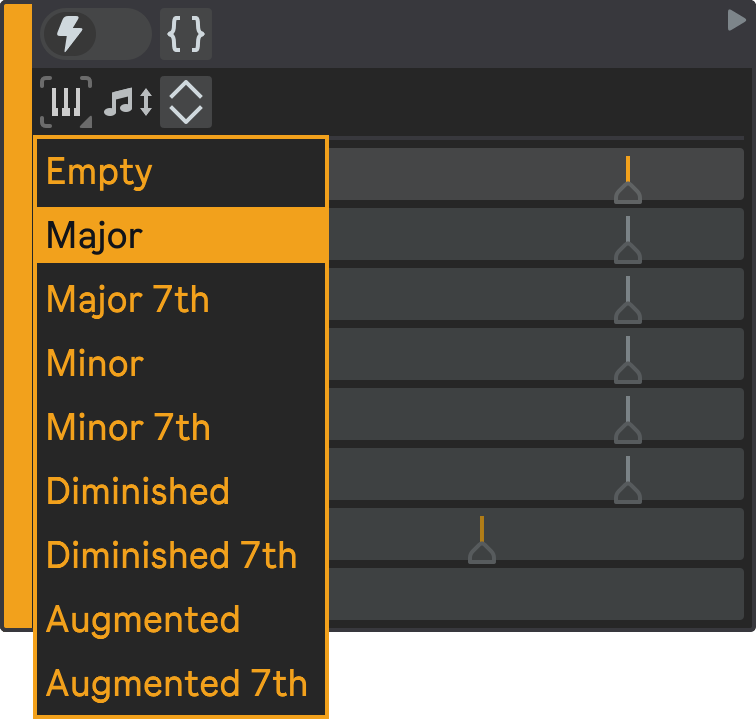
Chord Selector
Instead of manually entering all the chord notes, you can use the Chord Selector dropdown to quickly populate the state with the selected chord. Set the first note to the chord's root note pitch and choose the desired chord. The state will be filled with notes, using the first note as the root note of the chord you selected.
Result
Now, hit Play in Ableton Live. Flow will start generating MIDI notes based on P1 state machine configuration. You will hear chords changing every whole note.
Notice how Ableton Live routes Flow's output to two synth based on key zones configuration you set up earlier.